
FrSky Xact servos are one of the recent additions to the FrSky product lineup.
Coreless.
Programmable.
Full CNC aluminum body.
With a Hall Sensor for maximum precision.
What else would you ask for a servo?
We had our hands on the 5700 & 5800 series units and have to assume that these are some of the greatest servos we tested so far.
Check the tests of the FrSky Xact D5701 & FrSky Xact LD5801 to learn more
They are lightning-fast at the top of the allowed voltage preserving precision at the lowest available volts.
So in this guide, we’ll focus on the FrSky Xact Servo Programming process.
3 Ways To FrSky Servo Programming
Generally speaking, you can do it with:
- Ethos FrSky Radio
- OpenTx ACCESS FrSky Radio
- FrSky Freelink App
The first two methods will have different interfaces, since using different OS, but the logic of programming with Ethos is very similar.
In this guide, we’ll focus on the process of programming with an OpenTX Radio exclusively.
Xact Servo Programming With OpenTx
First of all, you will need your Tx to support the ACCESS radio protocol.
Certain radios do.

Second, you will need a compatible Rx that also supports ACCESS firmware and FBUS connection.
Make sure that your radio, Internal RF module, and Rx are running the latest available stable software by FrSky.
Next, get a FrSky Servo LUA script and load it to the SD card of your OpenTx radio.
Note, that you can program only one servo at a time.
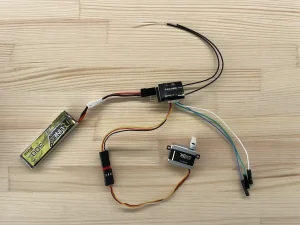
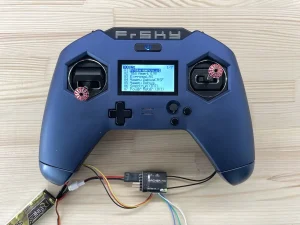
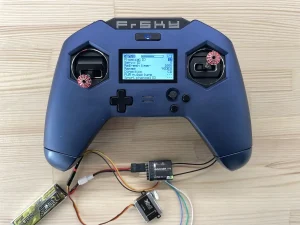
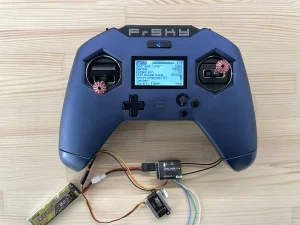
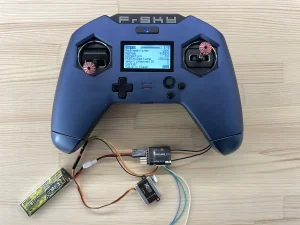
So, to finalize the setup, connect your servo to the Smart Port pin on your Rx and make sure that the servo Ground and Power lines are also connected.

I.e., check how to connect an Xact Servo to the Archer R4 receiver for programming:
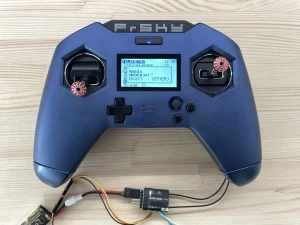
Now, power up your radio and receiver.
Make sure the receiver is registered and bound to the current model and the link is established.

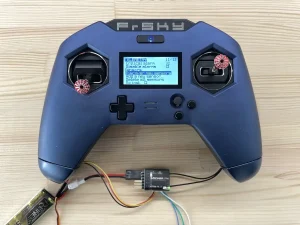
Next, scroll down the model setting menu to where you see the name of your Rx and press on it.
Choose the Options from the menu to access the receiver settings screen.

Set the FBUS(FPORT) protocol for the receiver Smart Port.

If you don’t see this option, you will need to update your receiver firmware.
Exit the receiver options screen and move to the Telemetry screen in the OpenTx menu on your radio.
Delete all the existing sensors, if there are some.
Skip this step if you are configuring a blank model.
Before the next step, make sure that:
- Your receiver is powered up
- The Xact servo is connected to the receiver Smart Port
- The current model of the radio speaks to the receiver
When all the above are true, hit the Discover New Sensors.
You should get the list that will include the sensors of your Rx, plus the new sensors related to the Xact servo.
In particular:
- SrvA – servo current
- SrvV – voltage on the servo
- SrvT – temperature of the servo
- SrvS – Status
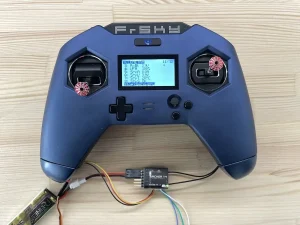
Hit Stop Discovery once all these appear.
This is a critical step, as these sensors are the main indicators that the servo is connected properly, so you will be able to program it via the LUA script next.
Finally, head to the Tools menu of your radio, and launch the FrSky Servo LUA script.
Give it time for the progress bar on top to complete and load the values.
Configurable FrSky Servo Settings
Now, it’s time to play around with the settings for your connected servo.
Most of the time, you will get the following list of parameters:
- Physical ID – differentiates between different FrSky Products in model setup. It should be unique for each device in a particular Smart Bus chain
- Servo ID differentiates between the products of the same type, such as locating telemetry sensors of multiple servos simultaneously. It should be unique for each device in a particular Smart Bus chain
- Refresh Timer
- Range – servo arm rotation angle
- Direction – rotation direction of the servo arm CW/CCW
- PWM Pulse Type – choose between 1500us and 760us depending on your system requirements. Leave 1500us for regular application with a PWM receiver
- Smart Port Channel ID – indicates the channel this servo is going to be assigned when connected via Smart Port / FBUS(FPORT)
- Center – sort of a programmatic servo trim setting
Quick Tip: Set the S.Port Channel ID value between 1-4 to verify the changes you are performing in the LUA script. It will react to the channel 1-4 inputs, respectively. Say, if your stick inputs are assigned to the 1st- 4th channels, the servo will react to a corresponding stick deflection
Once done configuring your parameters, scroll down and hit Yes to save and flash settings to the servo.
When you disconnect the servo from the Smart Port and connect it to a regular PWM output of your receiver, most of the settings will be preserved.
Esp. the rotation angle, rotation direction, PWM range, central position, etc.
Also, if you connect a few servos to the Smart Port instead, the programmed IDs will be intact as well.
Summary
Hope this guide will help you get your FrSky Servos to do what you need them to do in the best way.
If you think we missed something above, please mention that in the comments section below.
Also, if you have some experience with FrSky Xact Coreless servos, share it as well.
We would like to hear from you!


I found this programming guide to be very helpful but I’m still having problems. With either an R10Pro or SR10Pro receiver the Servo amps/volts/temp/status sensors do not show up when discovering new sensors. However, when using an SR6Mini receiver these sensors are discovered but the Lua script never shows any information related to these sensors. My equipment is:
Tx – Taranis X9D+SE 2019 ISRM-S-X9 1.1.0/2.1.10FCC
OTX 2.3.15
Rx – R10Pro and SR10Pro FW v 2.1.14
Rx – SR6Mini FW v 1.0.10
Servo MD5301H FW v2.01
FrSky Lua Servo FW v1.01 and 1.02
Can you advise further about programming the servo with this set up?
Thank You
With FrSky it can get tricky if some of the RF modules in your system run outdated firmware.
So, check the FrSky official website for the latest FW for your ISRM and Receiver.
Then, make sure to switch the smart port on the receiver to FBUS through the options in the menu.
Hope this helps)