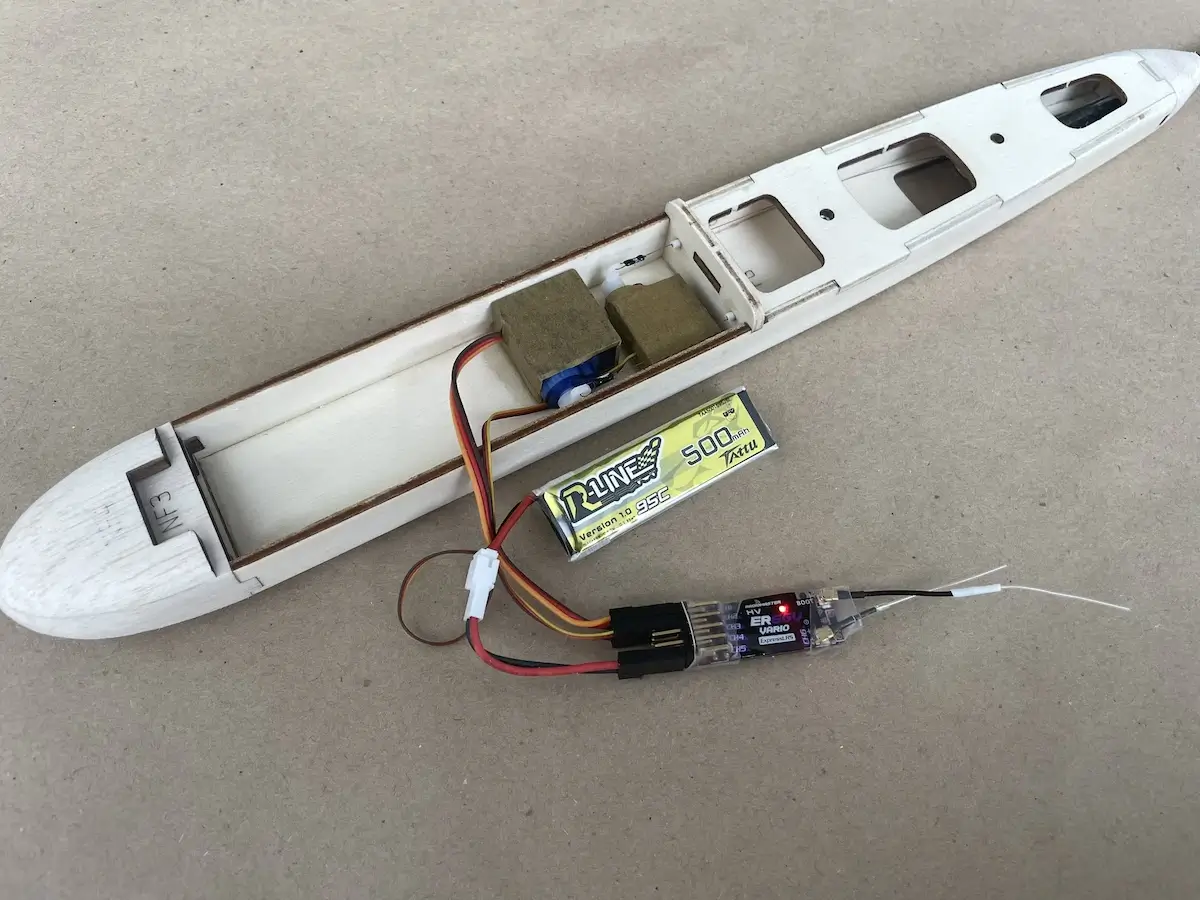
Rx Battery. We recommend a ~500mAh 1S LiPo, similar to what is used with indoor whoop drones, that has a great capacity for the weight and packs inside nicely.
A micro PWM radio receiver that has pins for direct servo connection, and will work with your Radio Transmitter.
A pigtail for connecting the battery to a receiver. It can act as your power switch as well, eliminating the need to install another component in the powertrain.
Prepare Your Tools And Supplies
To help you with the build, please prepare the following essentials:
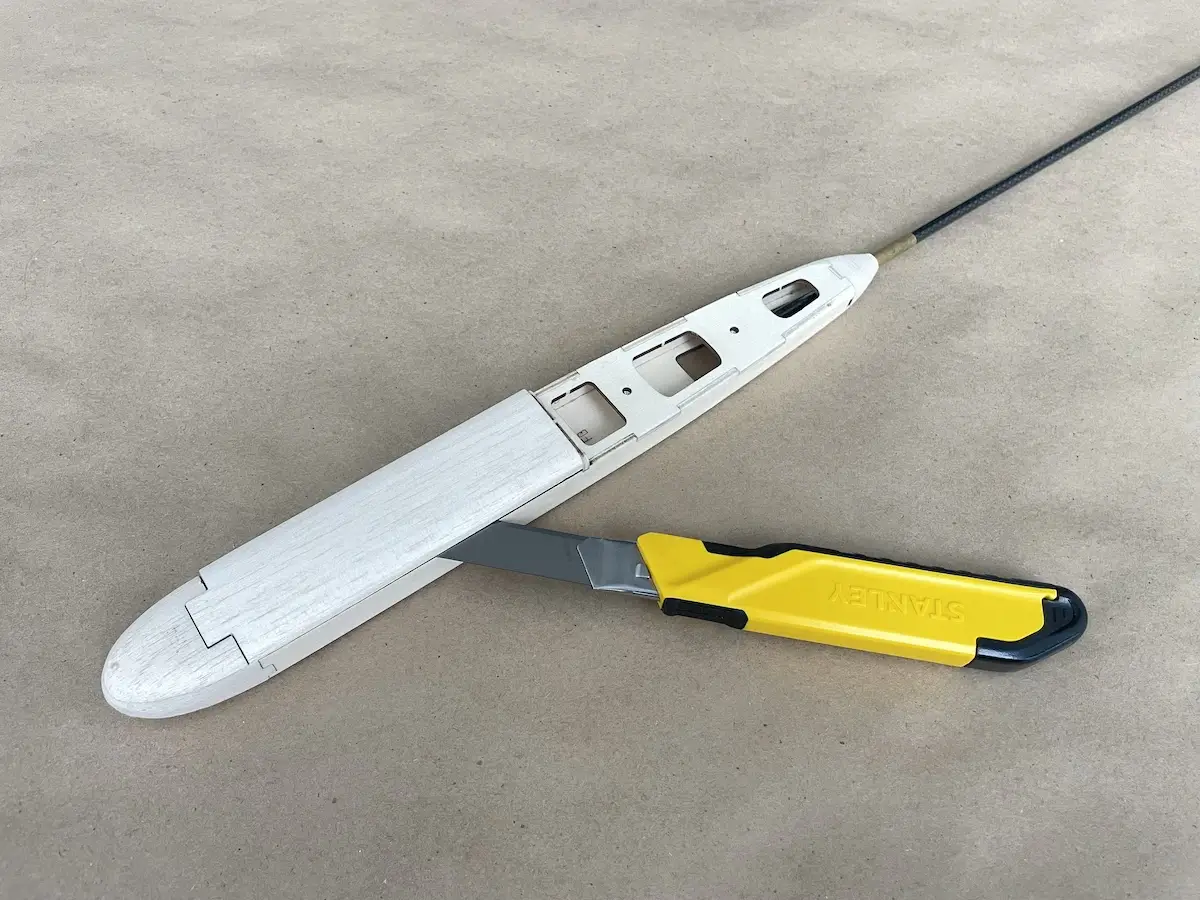
A sharp model (or paper) knife
Medium and thin CA with kicker
D2 or D3 PVA glue
Masking tape
Diamond files
Tweezers
Pliers
Flathead and Phillips-head screwdrivers
Sandpaper
Kapton tape, or the other sticky tape that you prefer.
You will also need a model covering film and the tools to work with it.
Scissors, covering iron, etc.
If everything is ready, let’s proceed directly to the build.
Bonus Part: Video Assembly Guide
Robert (aka BavarianRC) has already completed the Lull DLG build and recorded the full process on video.
Check it out!
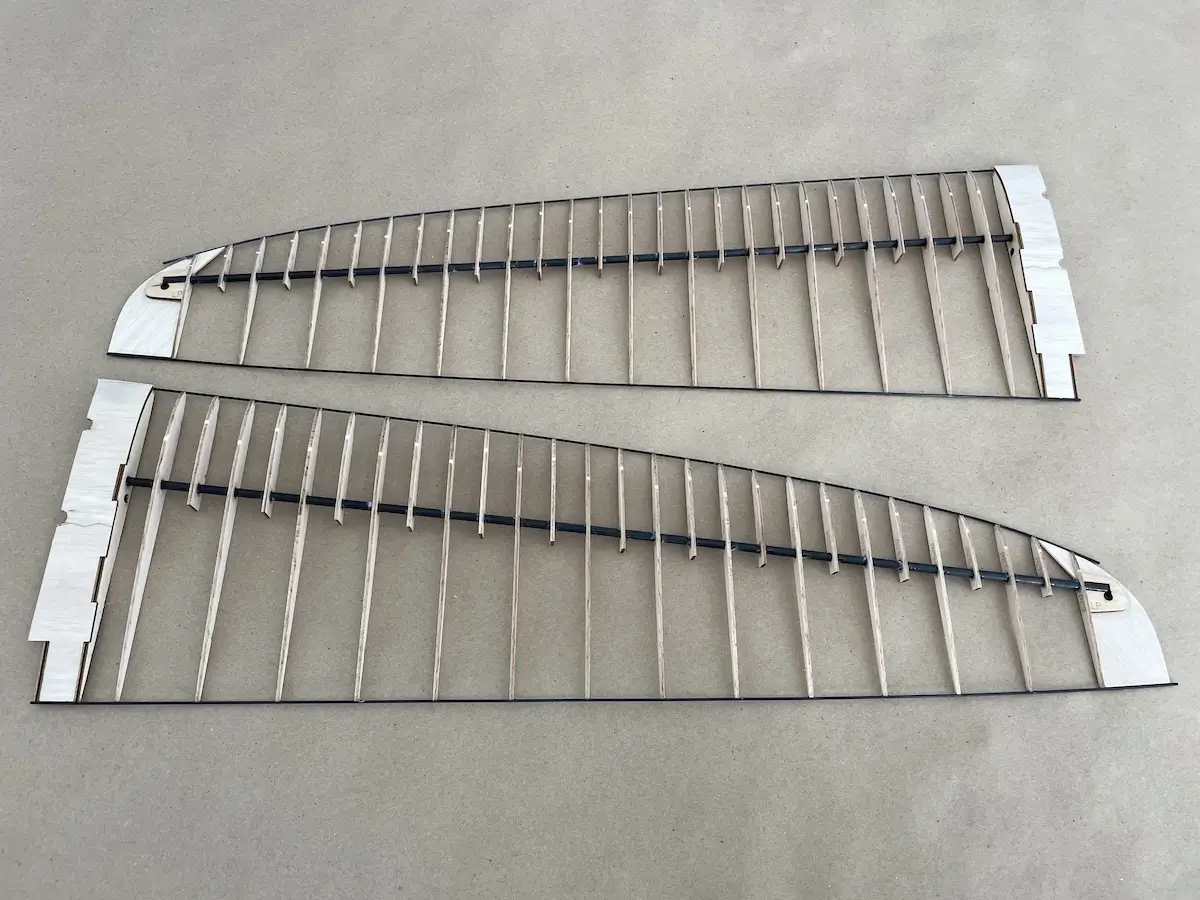
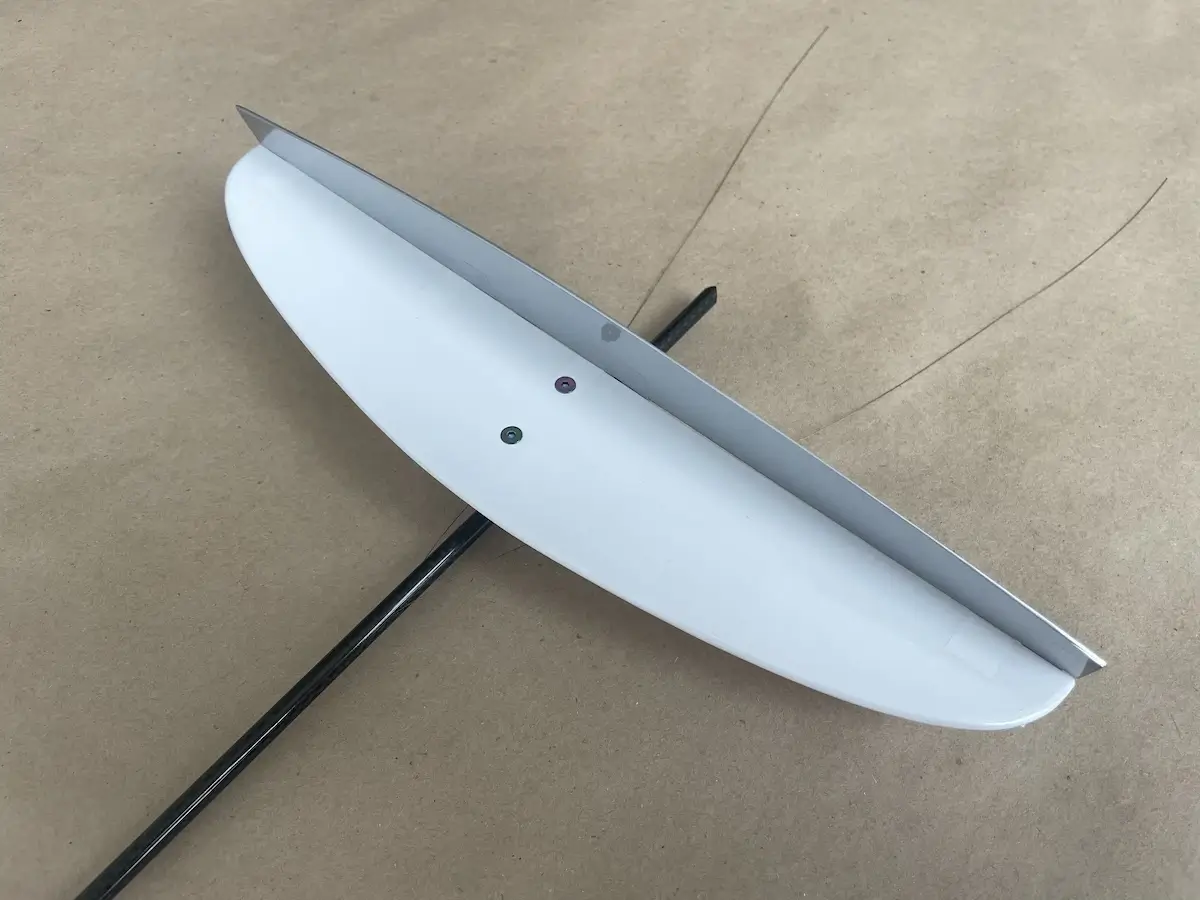
Part 1. A Wing
We recommend starting the assembly with the wing, as it will be used for the tail alignment later in the build.
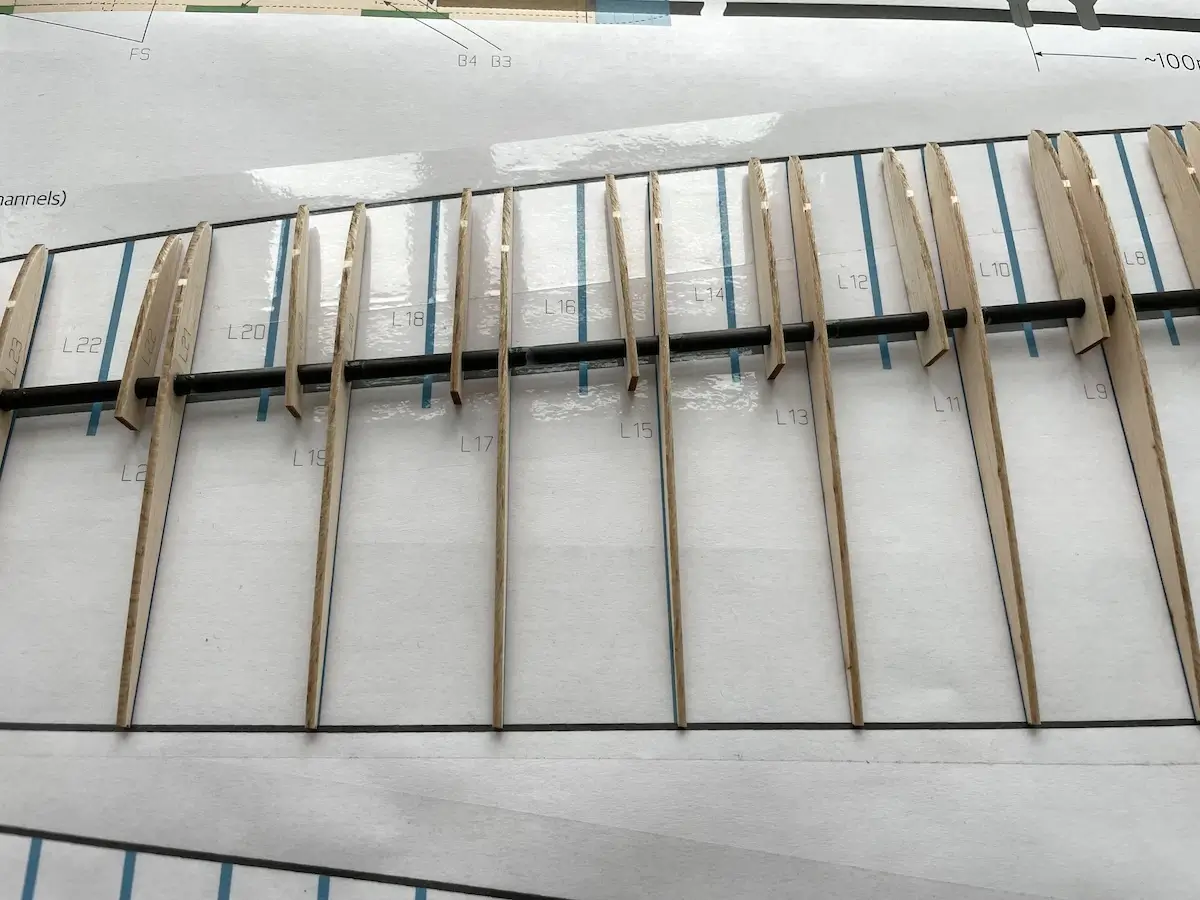
Pro Tip: Use a clean flat surface for assembly. The wing ribs have a flat bottom tail shape, so you can position them flat on the plan and apply CA to fix them permanently.
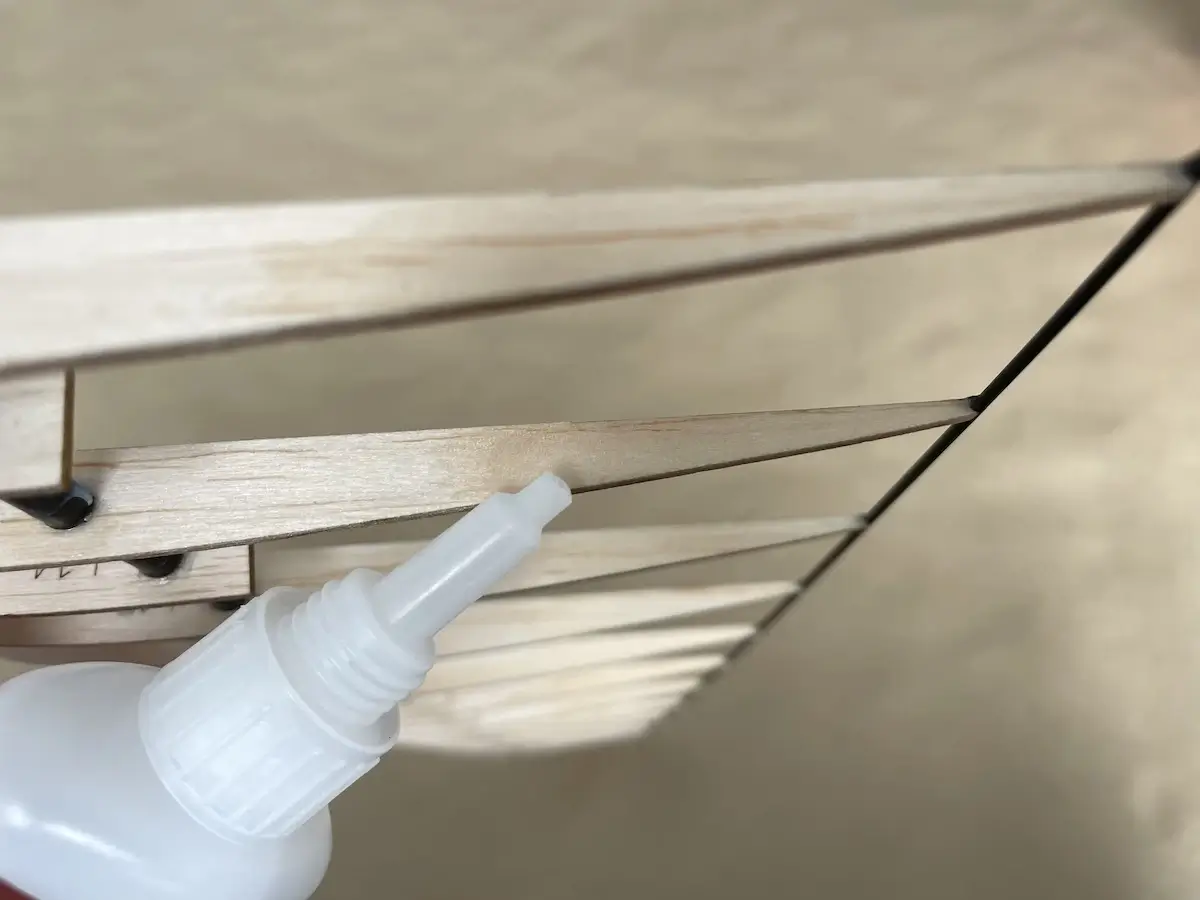
Also, thin, medium CA, and PVA D2/D3 glue are handy for this stage. Use PVA for wood-wood connections and CA for wood-carbon connections.
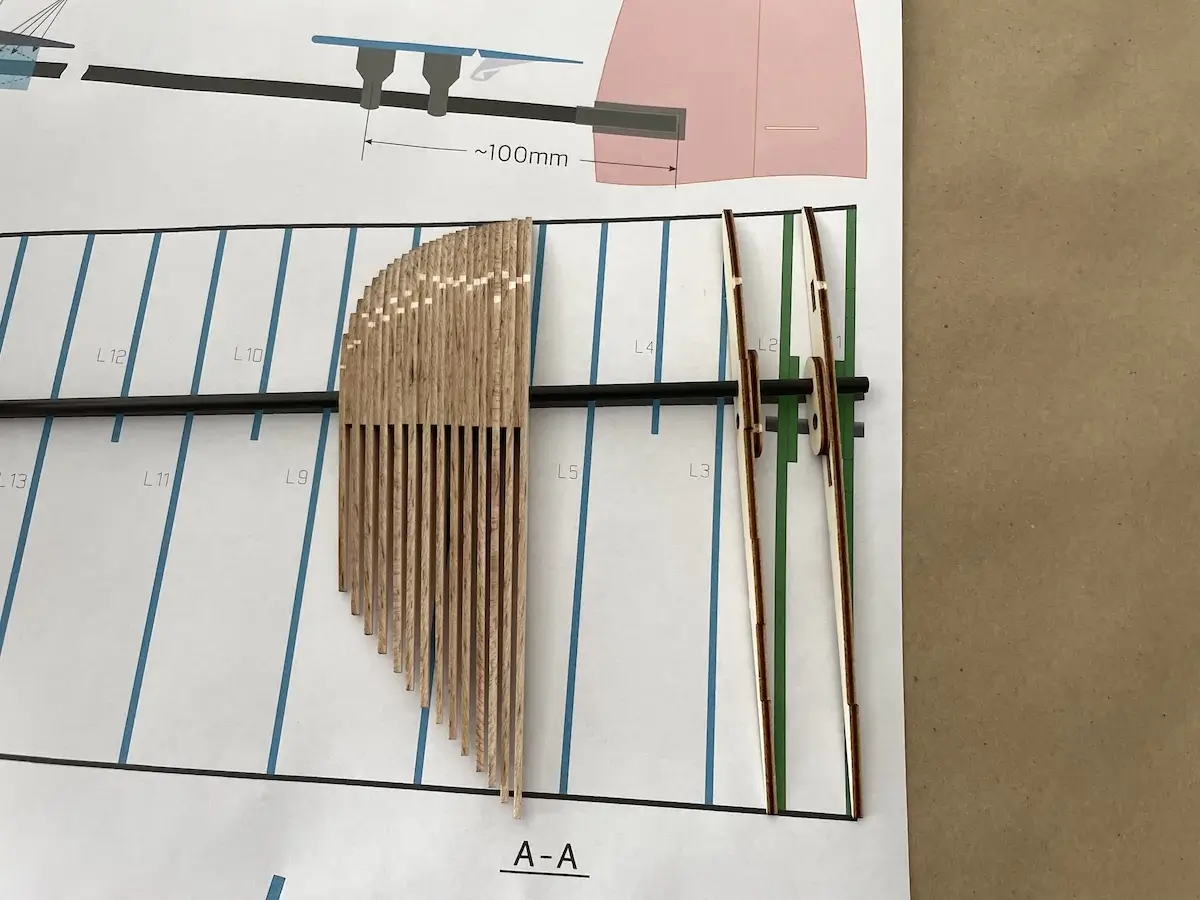
Also, installing the main spar first, the trailing edge next, and the leading edge last in the exact order is important.
This will help you prevent bending the main spar during assembly.
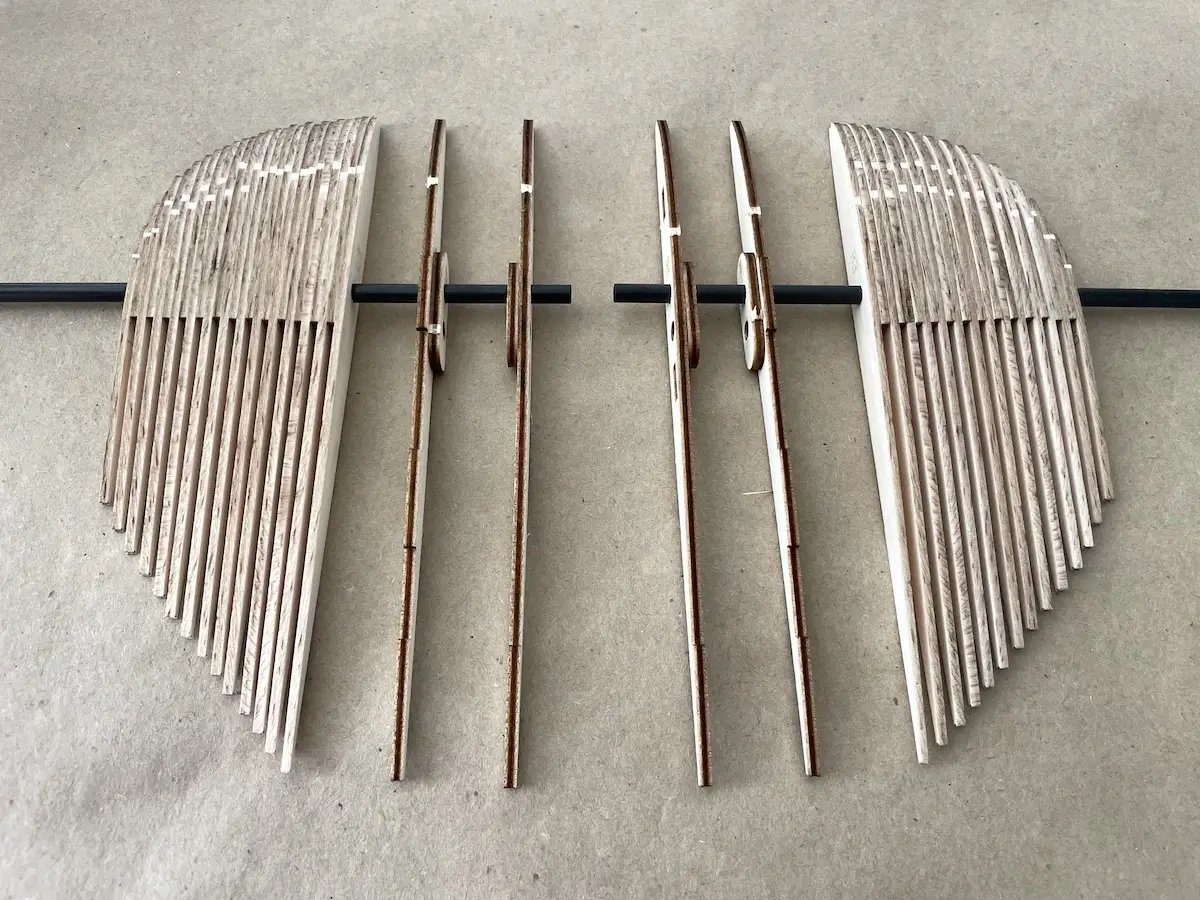
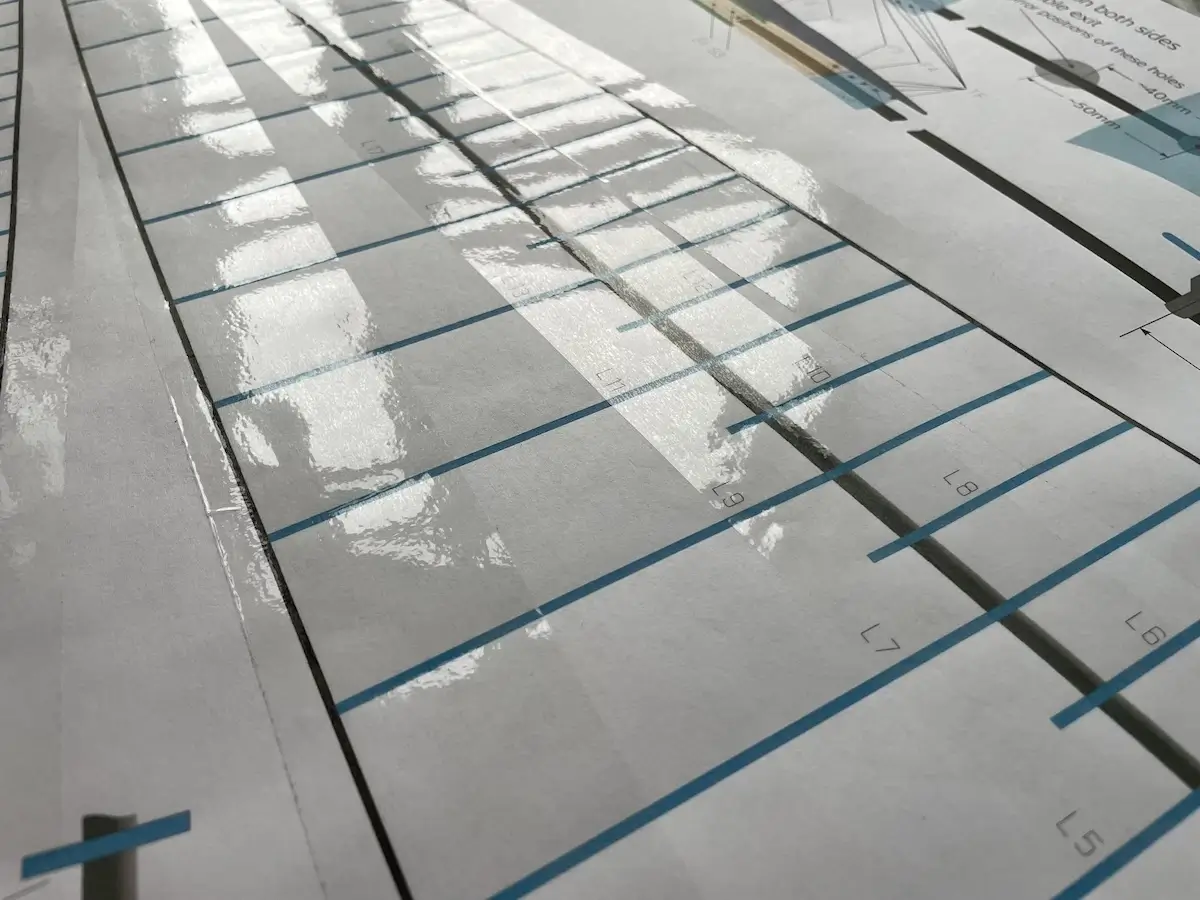
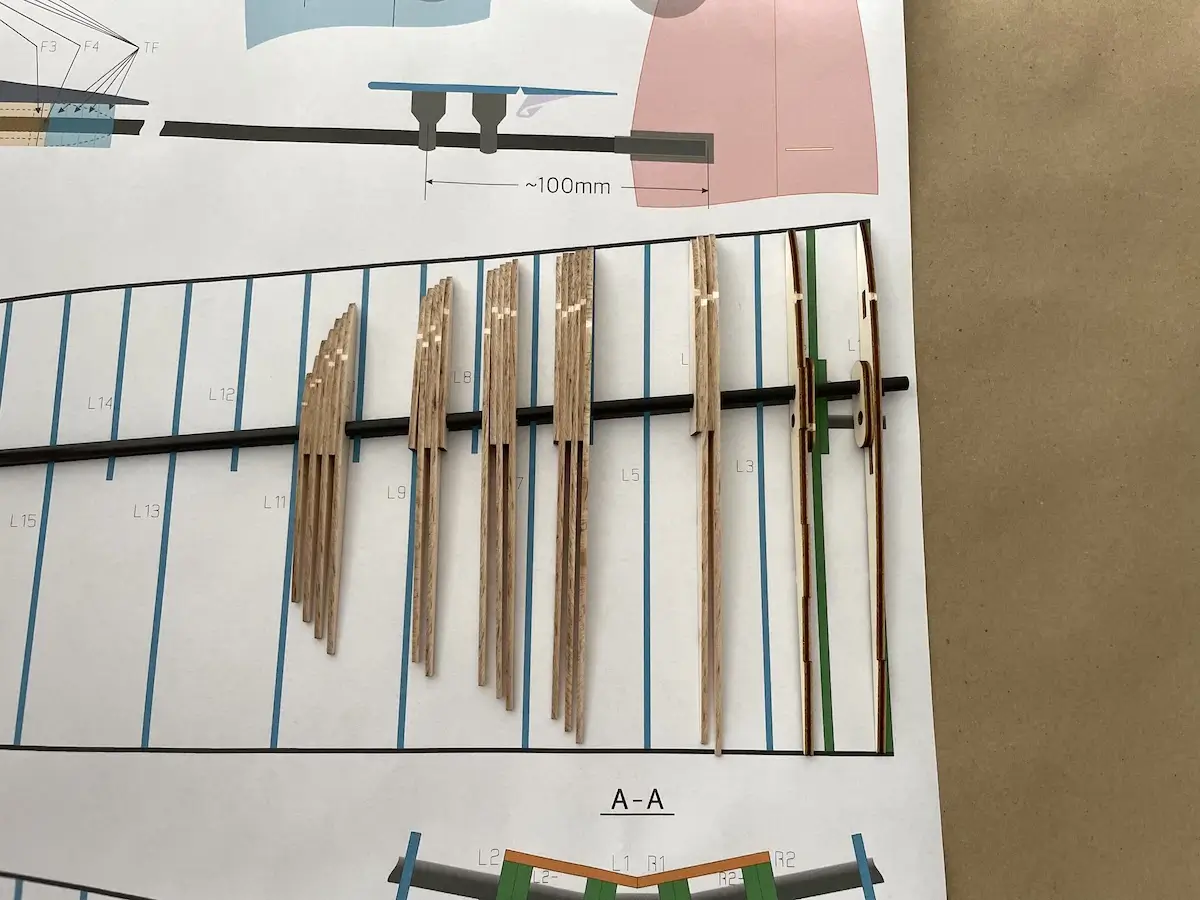
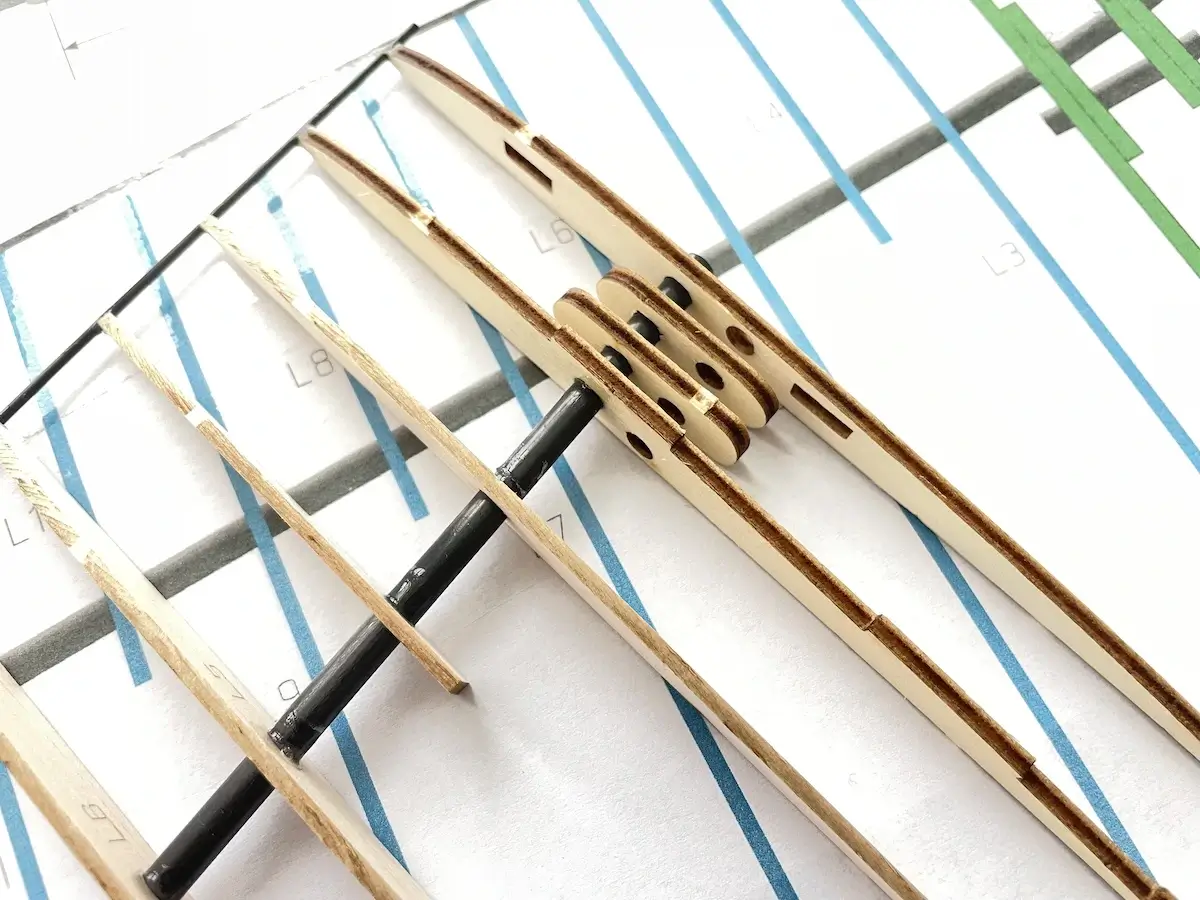
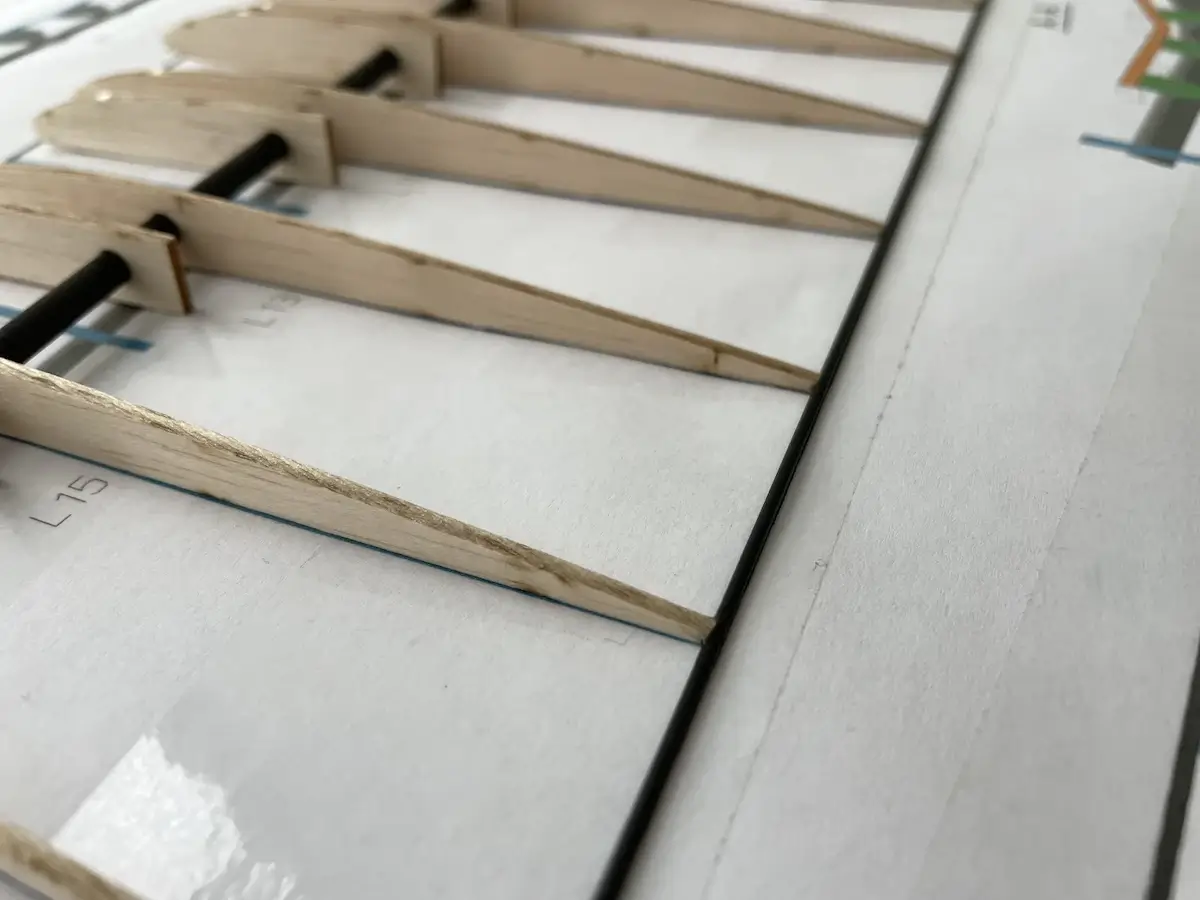
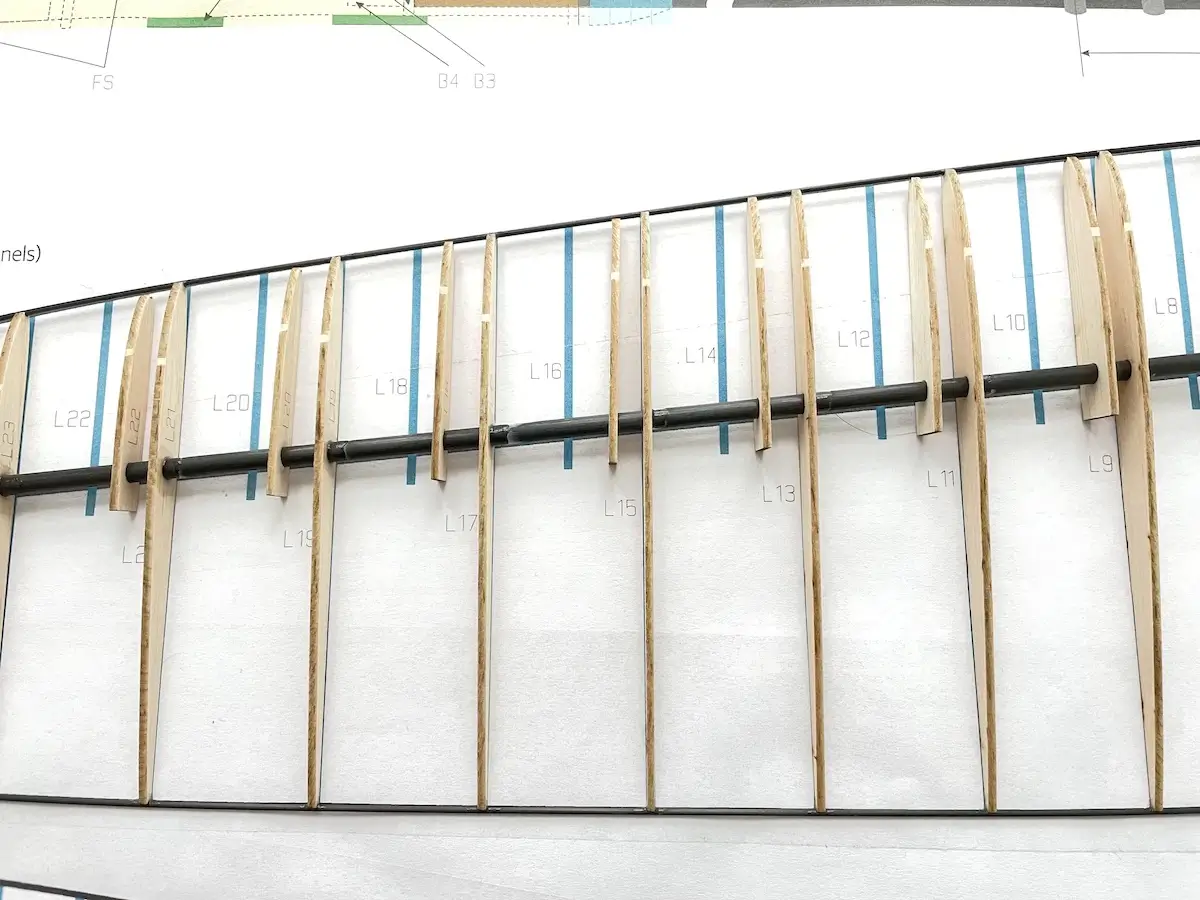
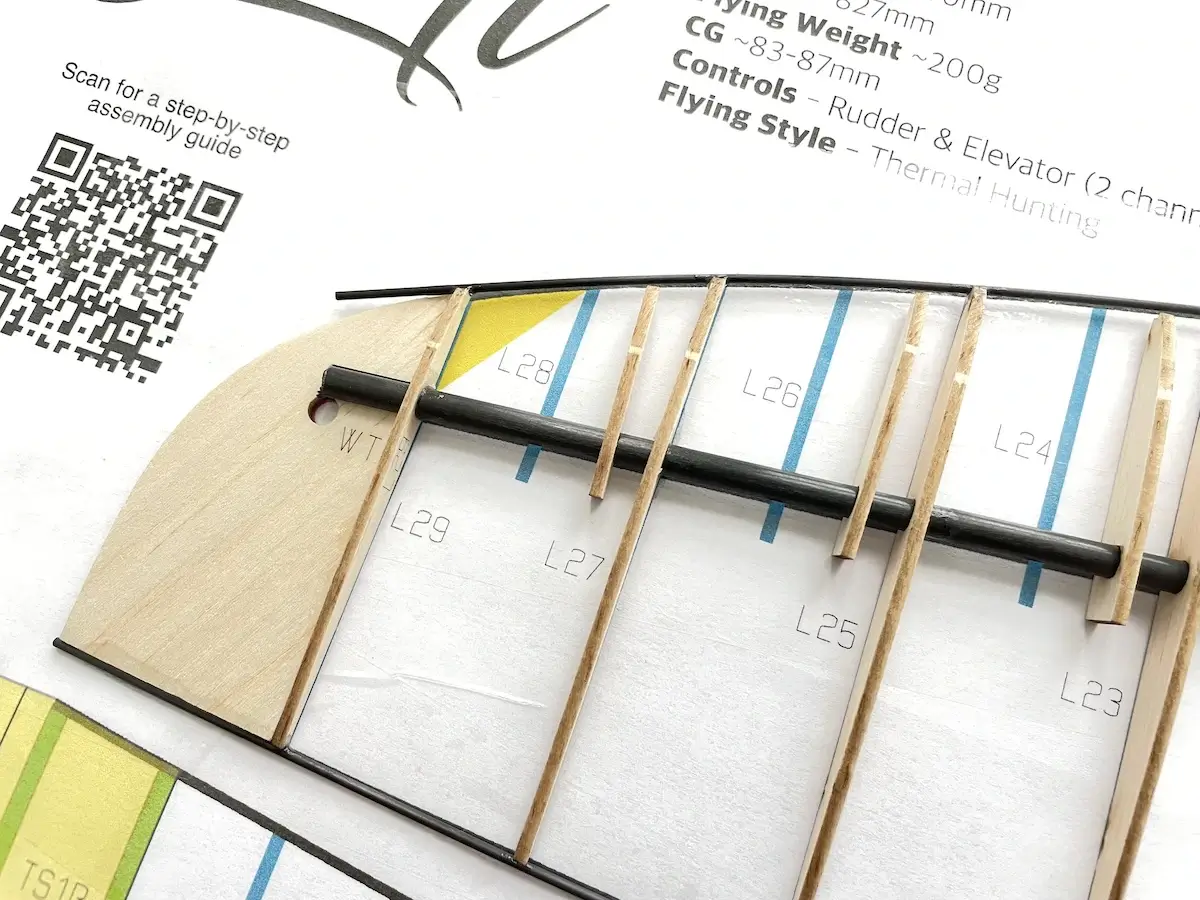
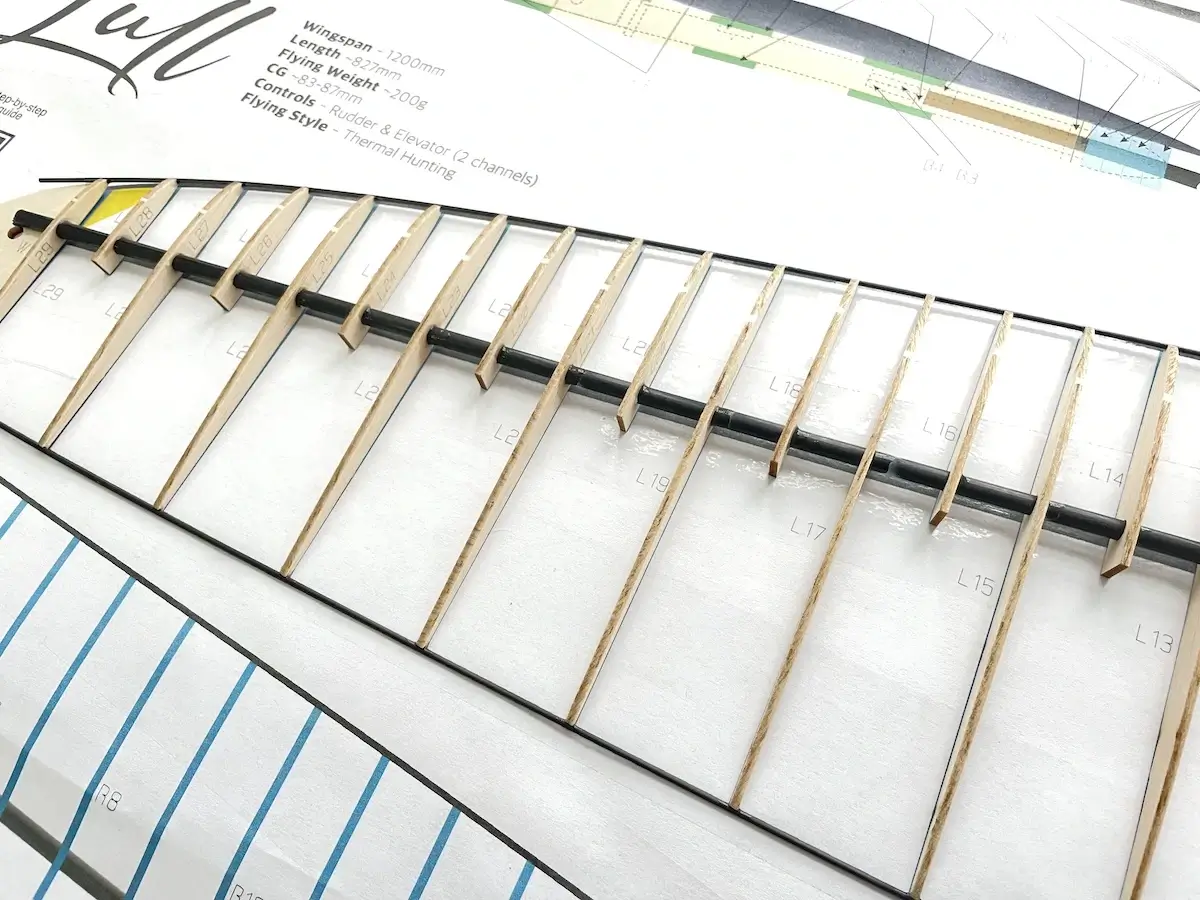
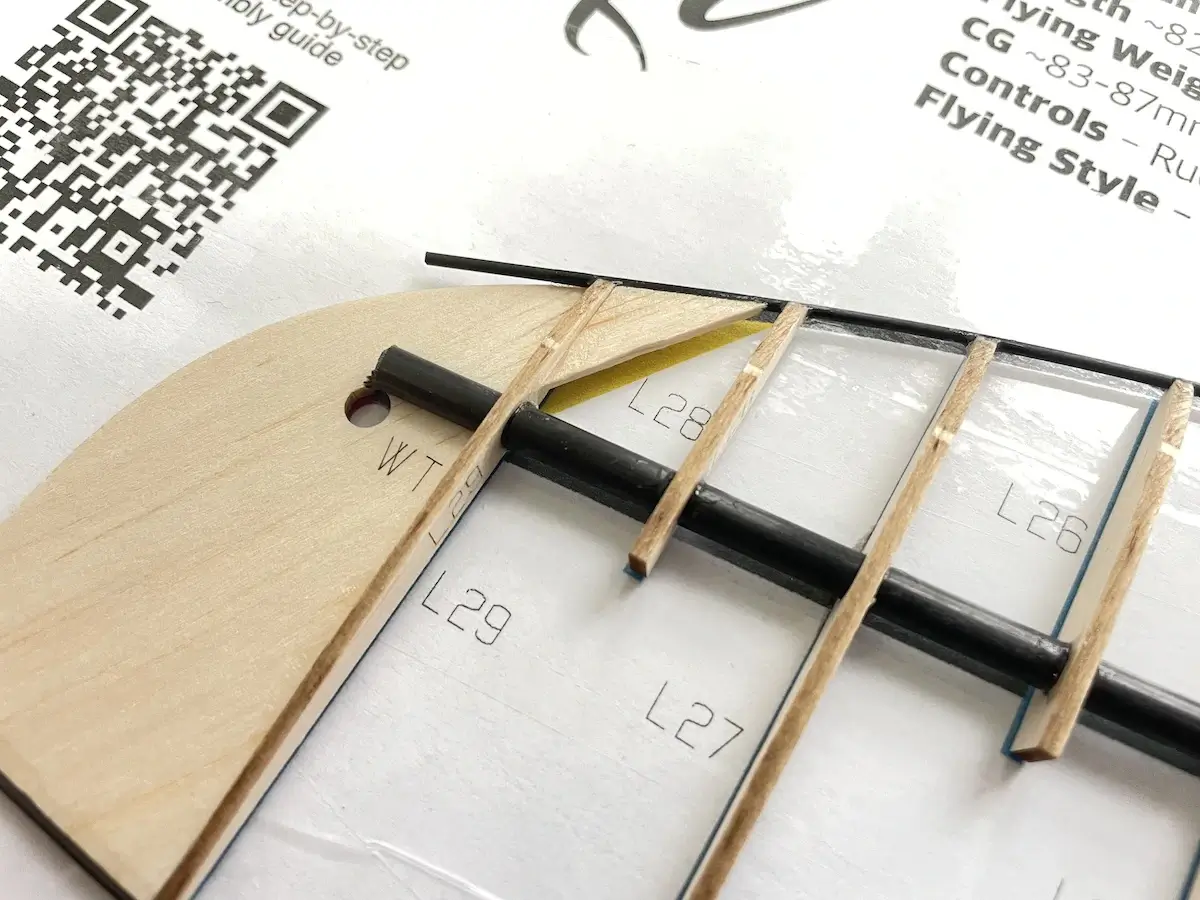
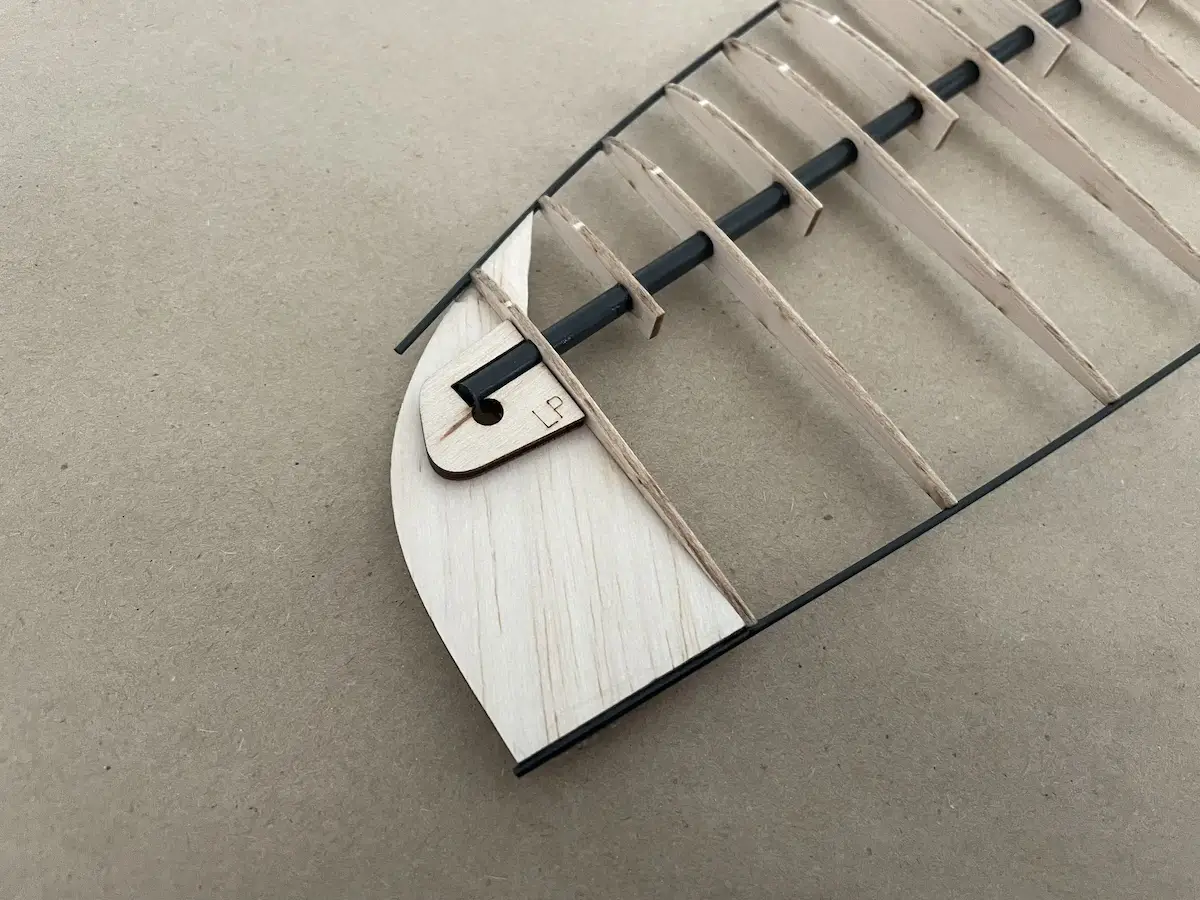
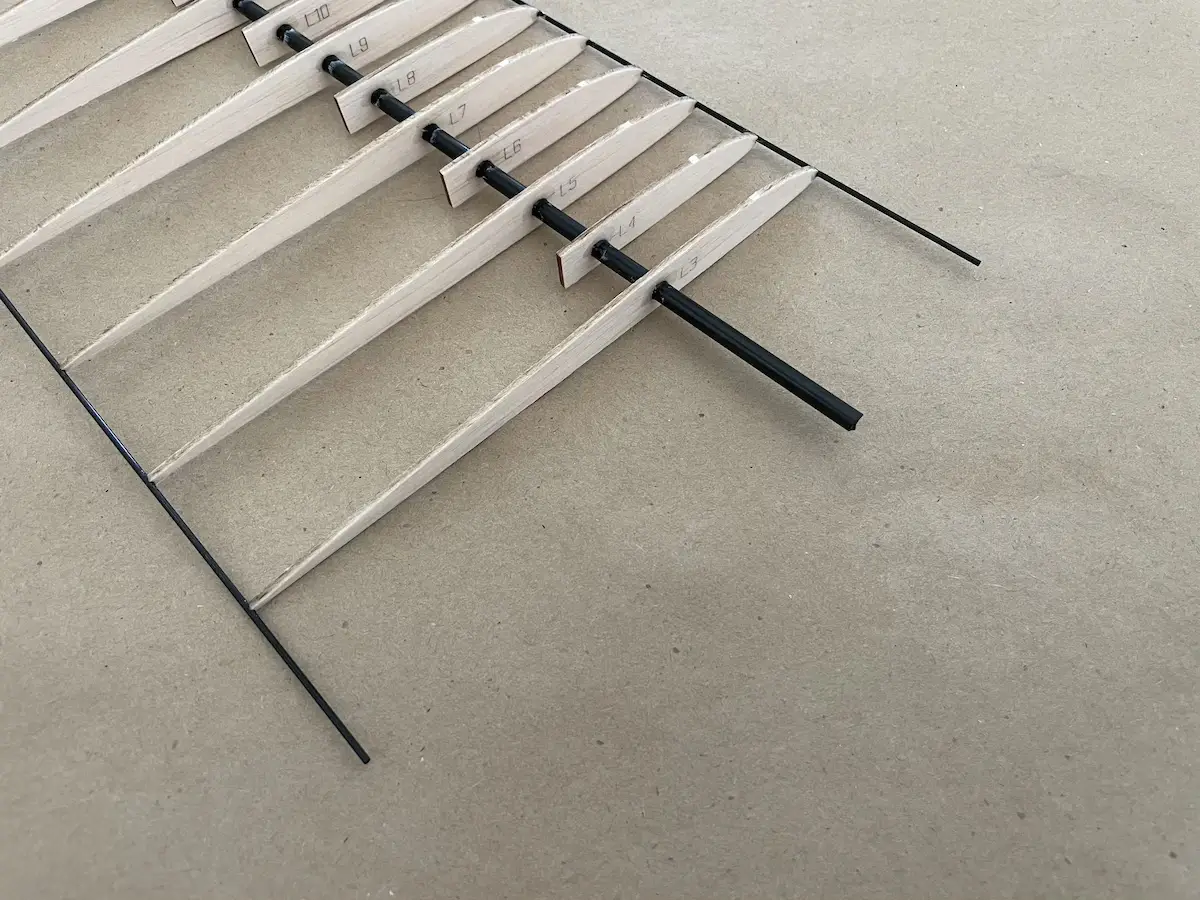
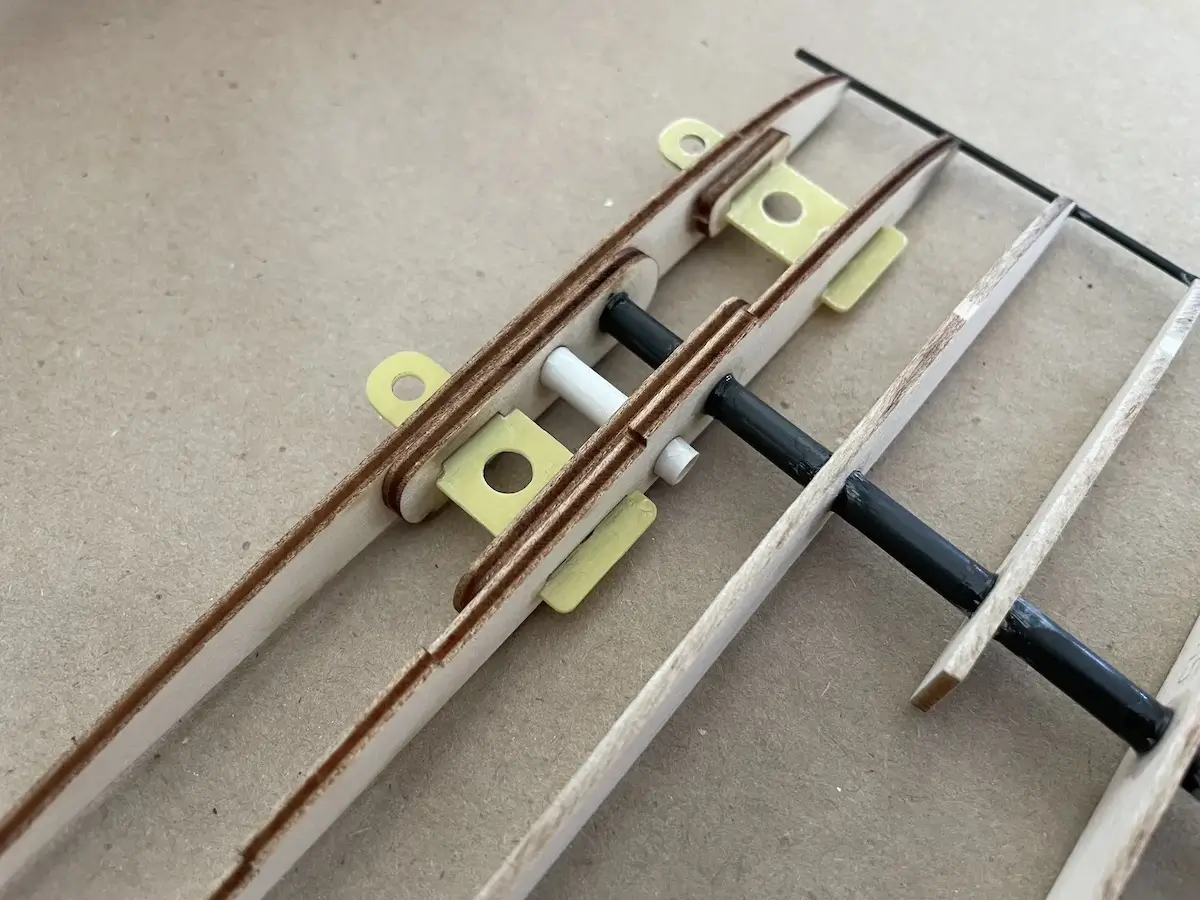
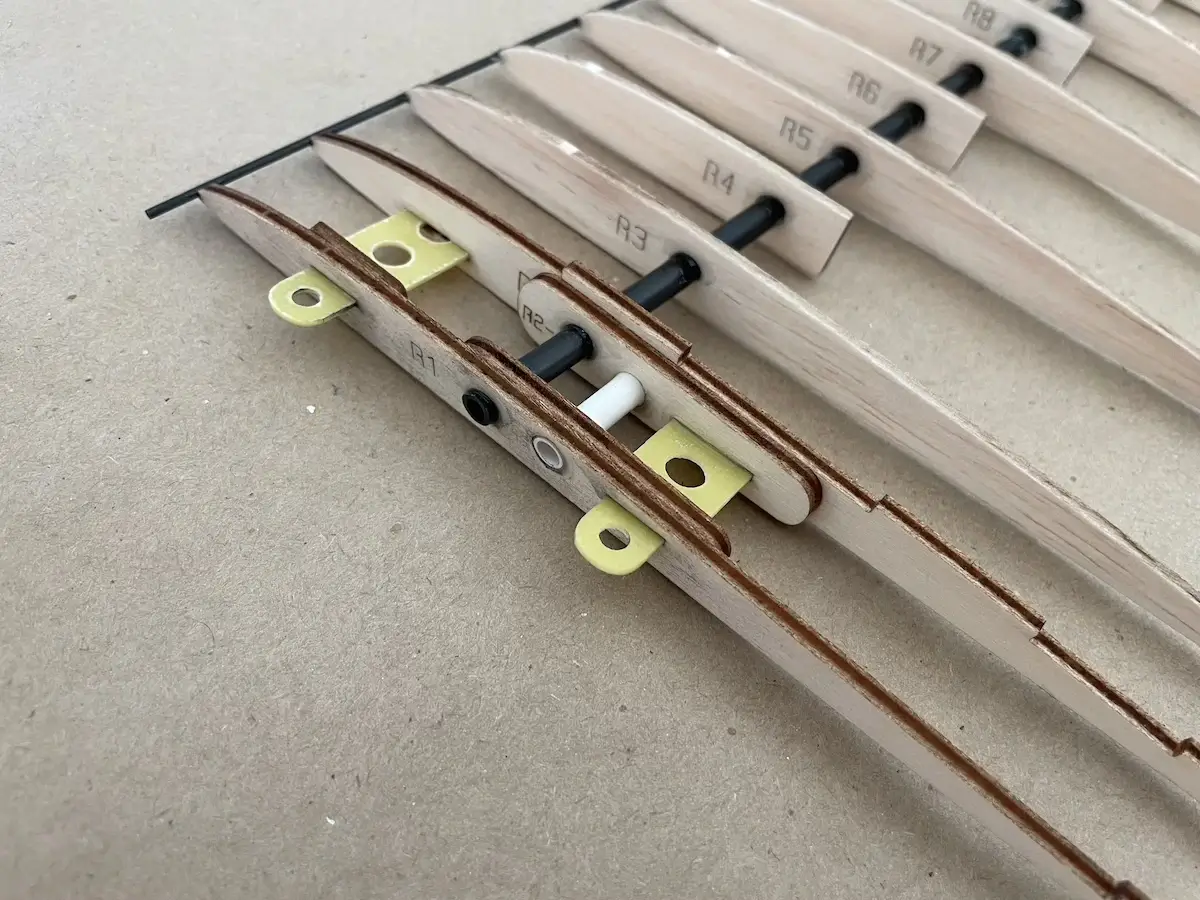
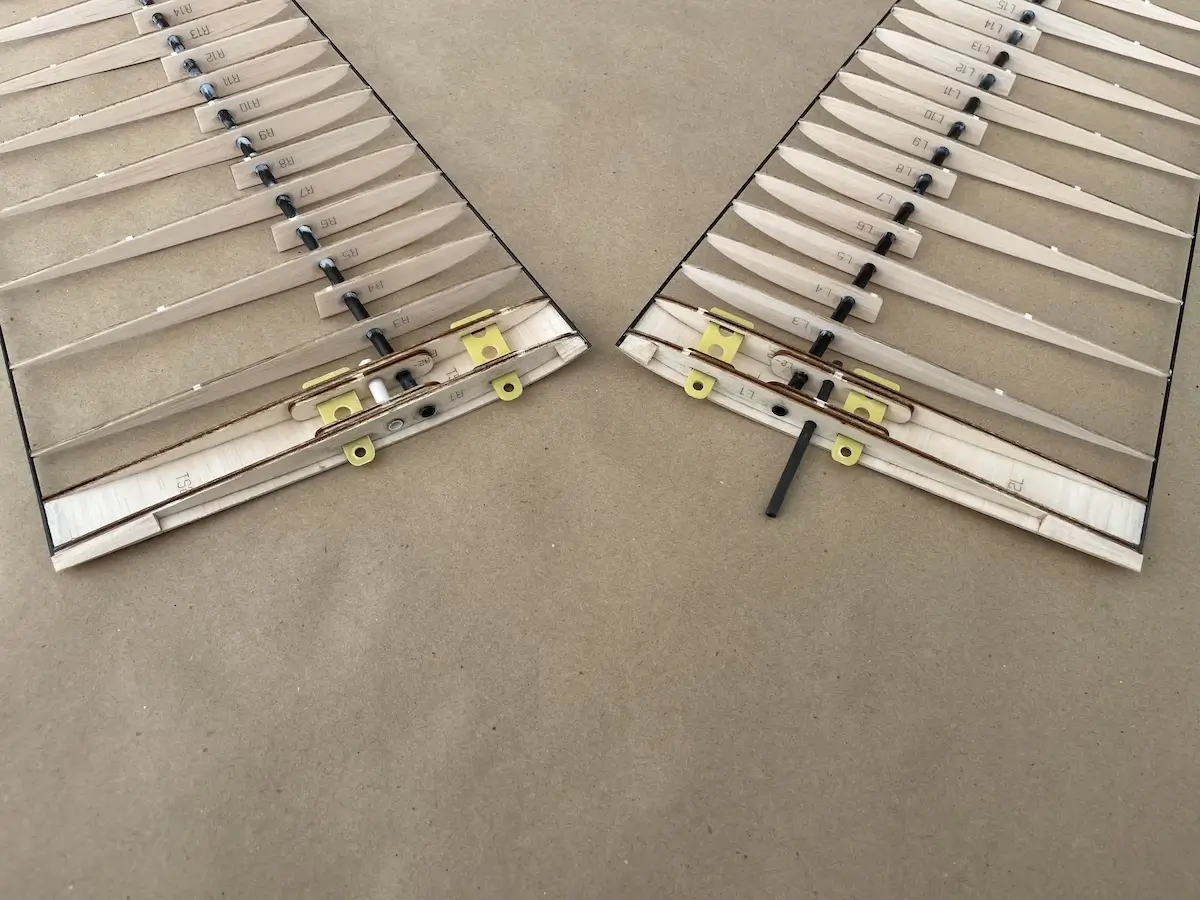
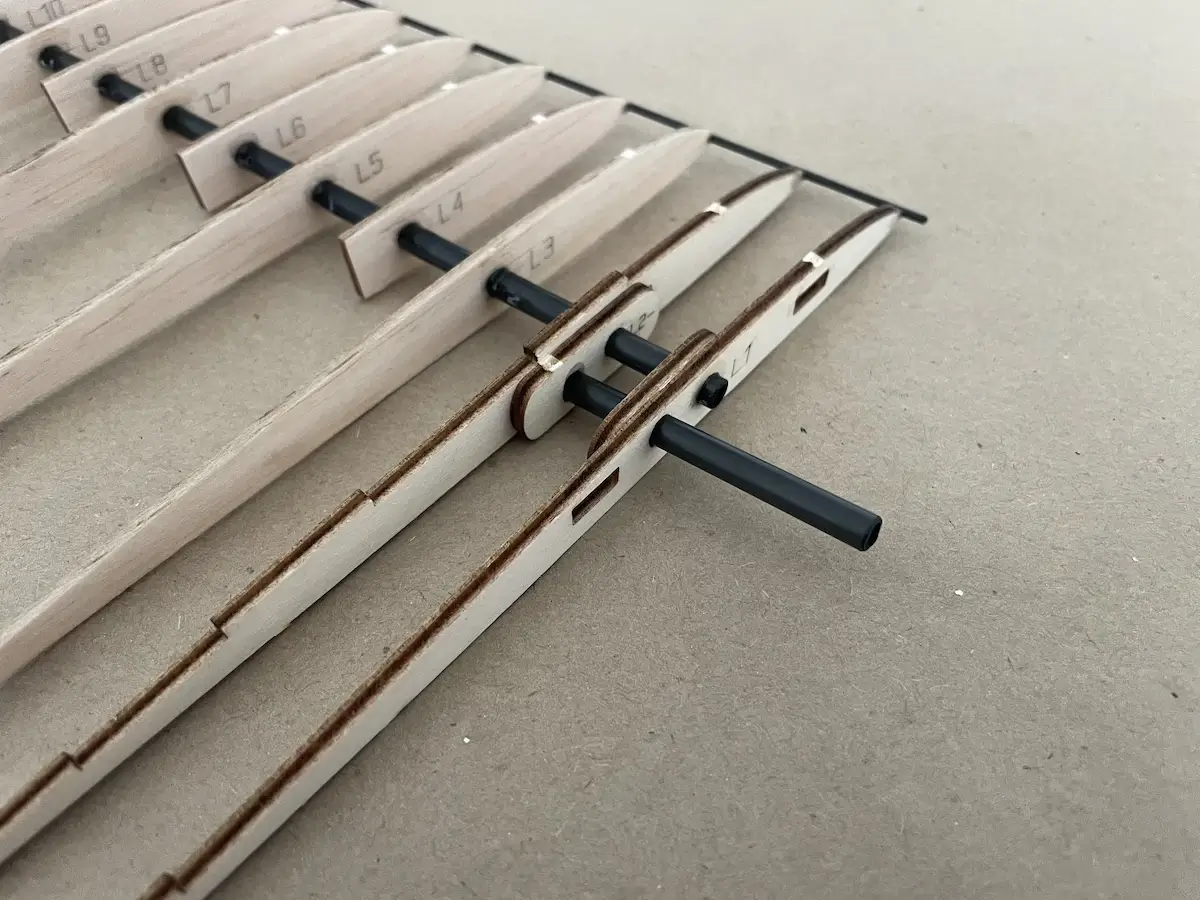
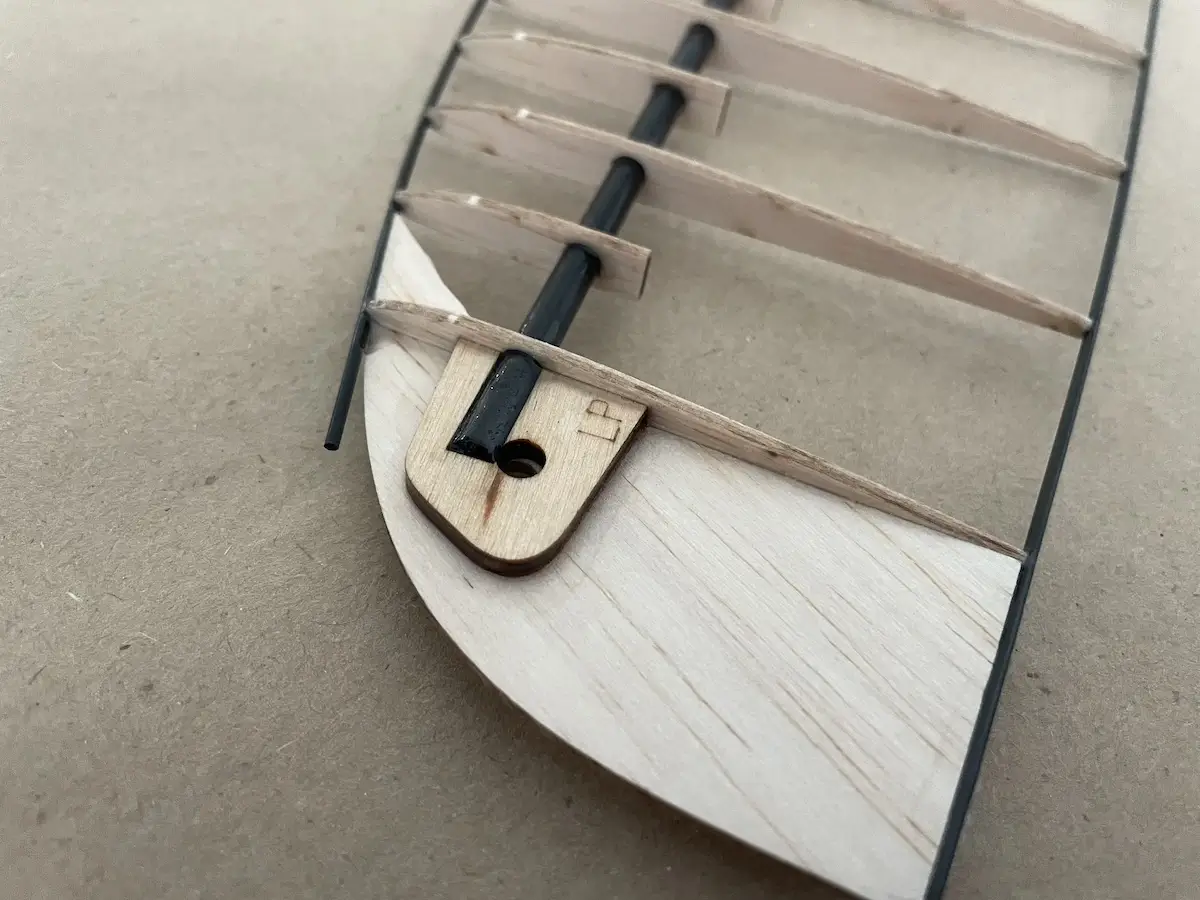
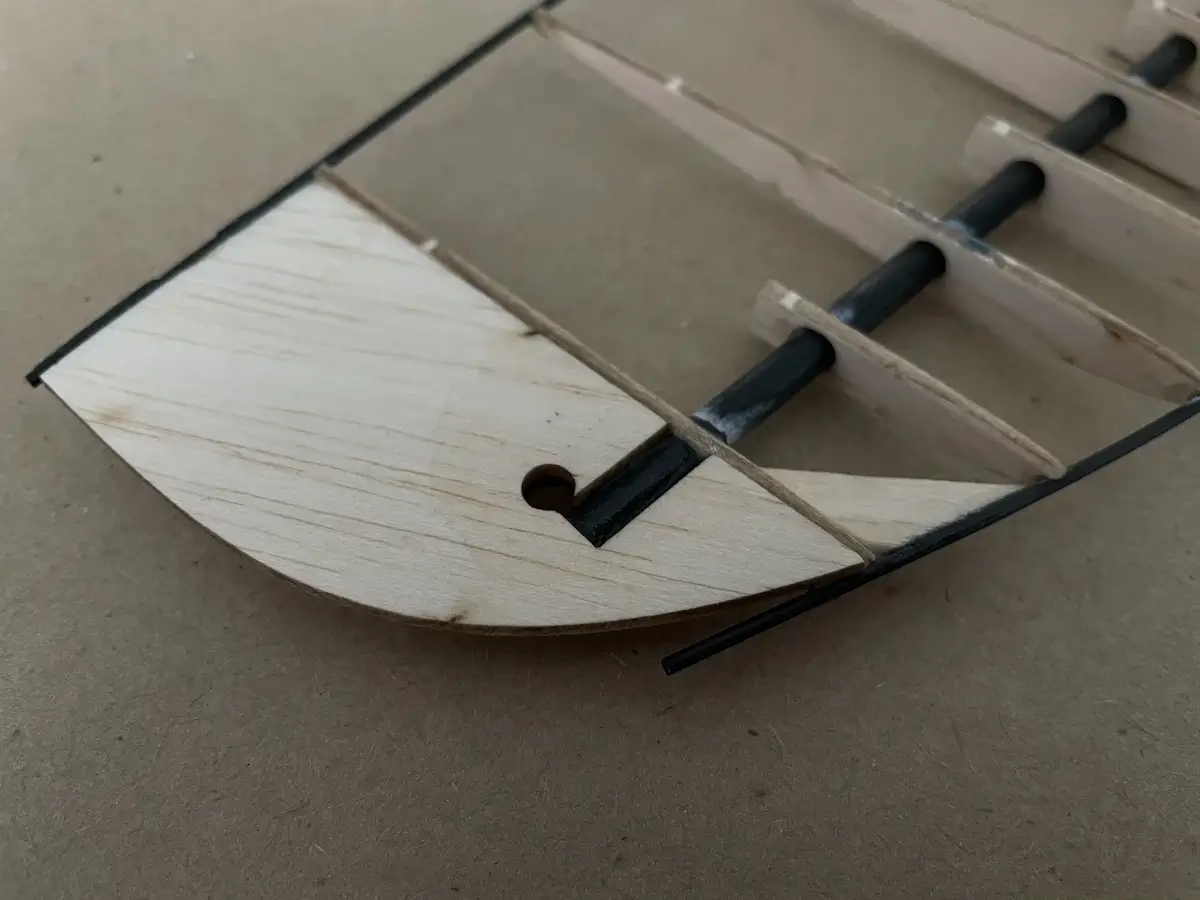
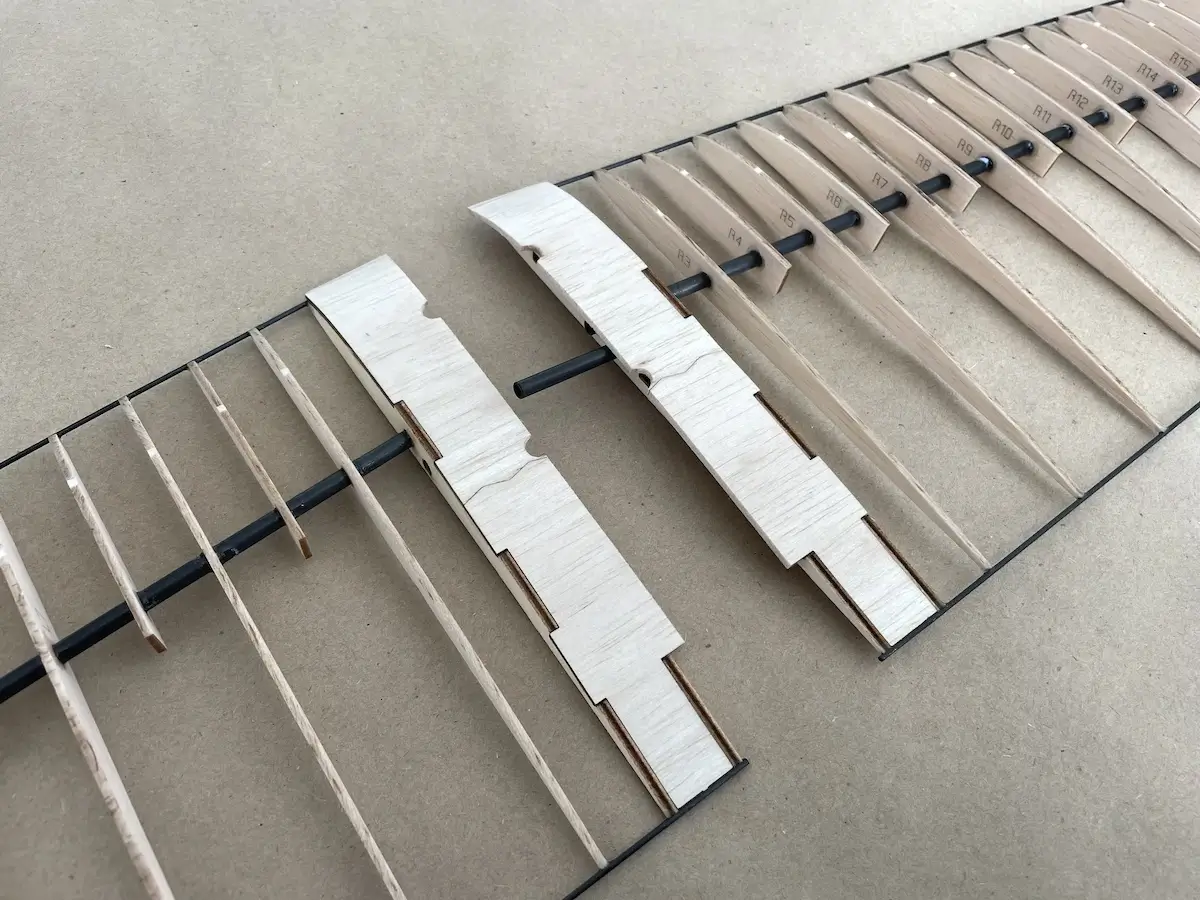
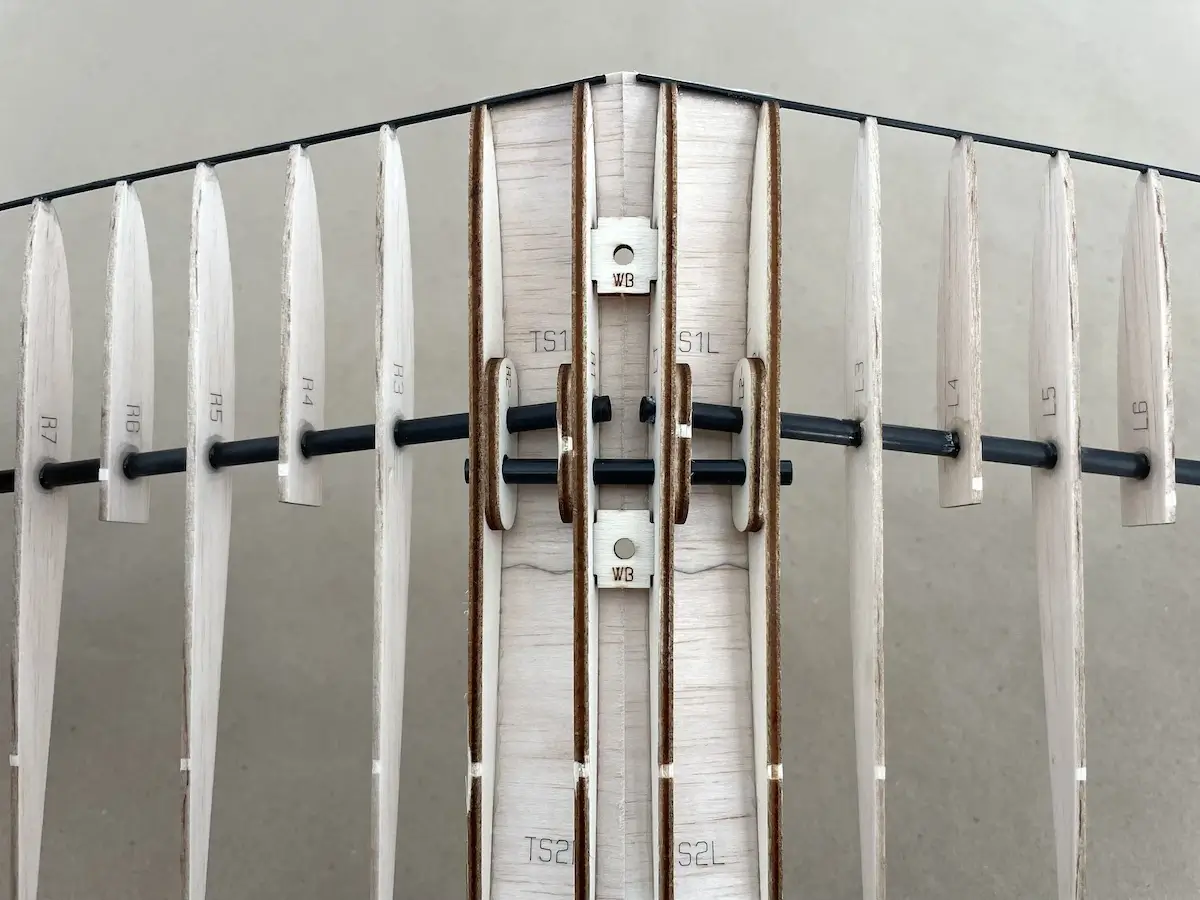
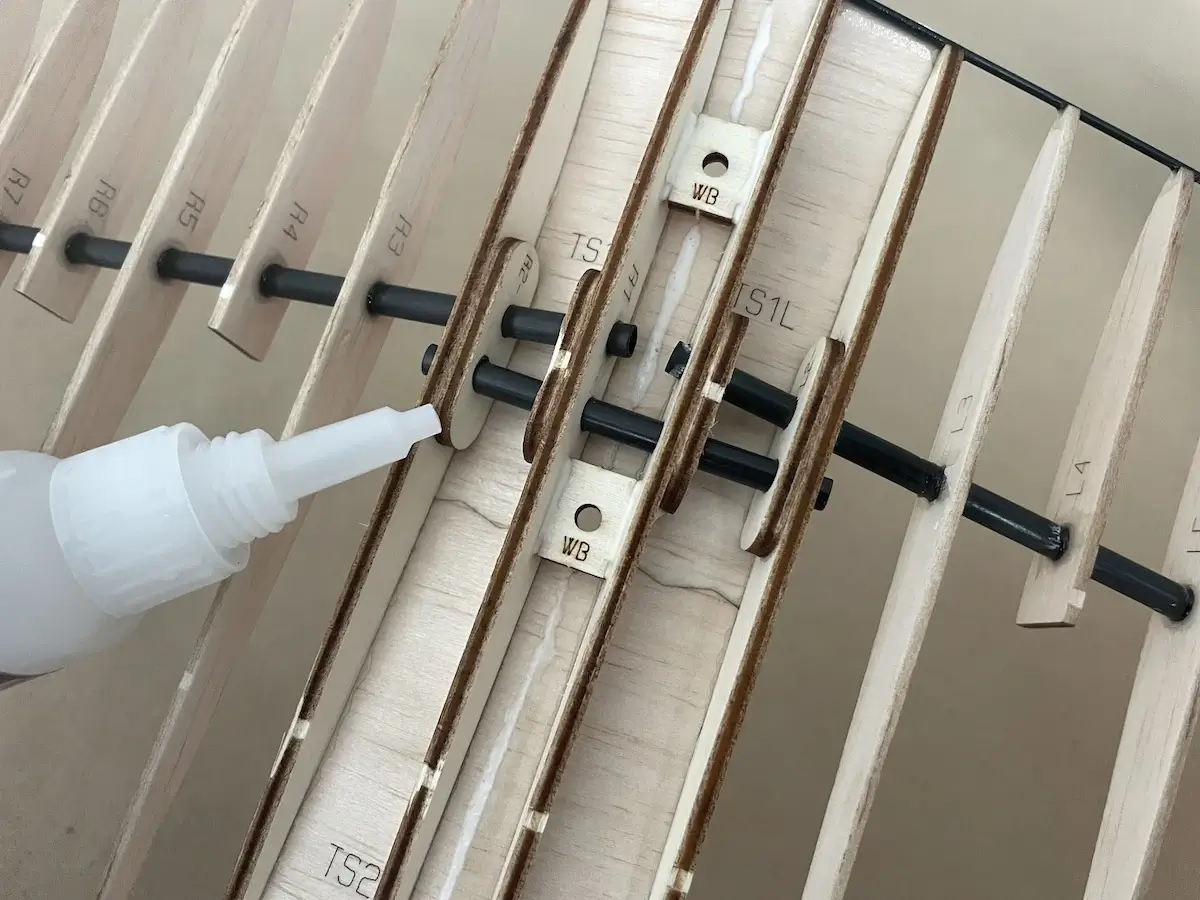
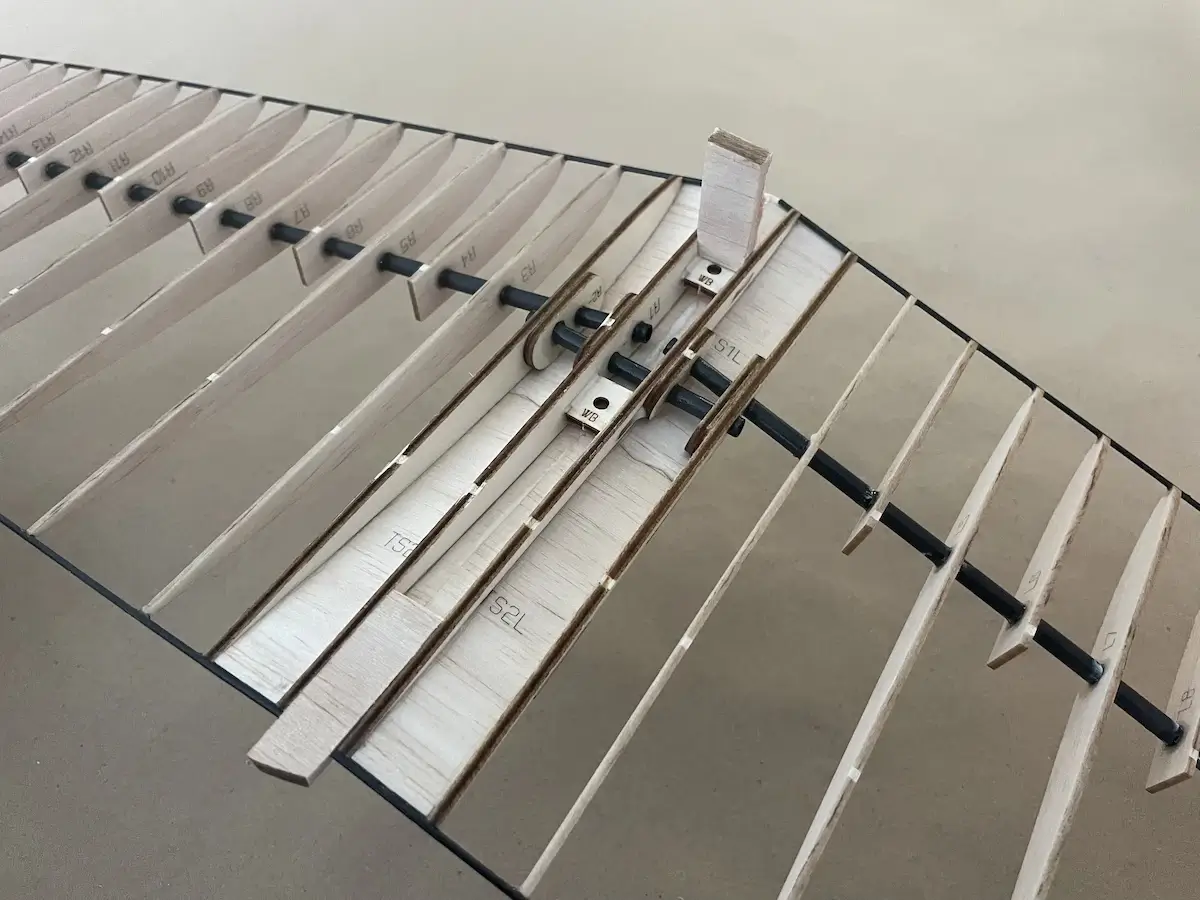
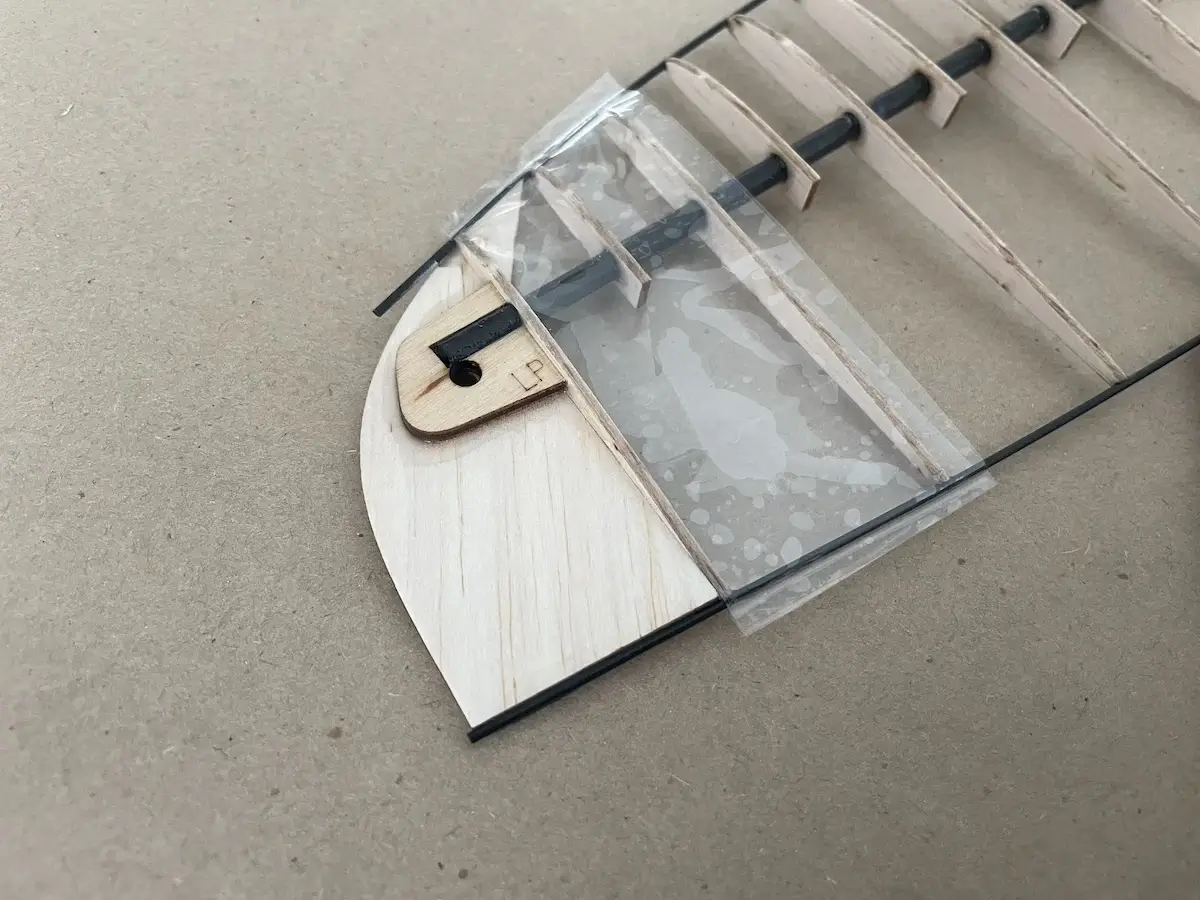
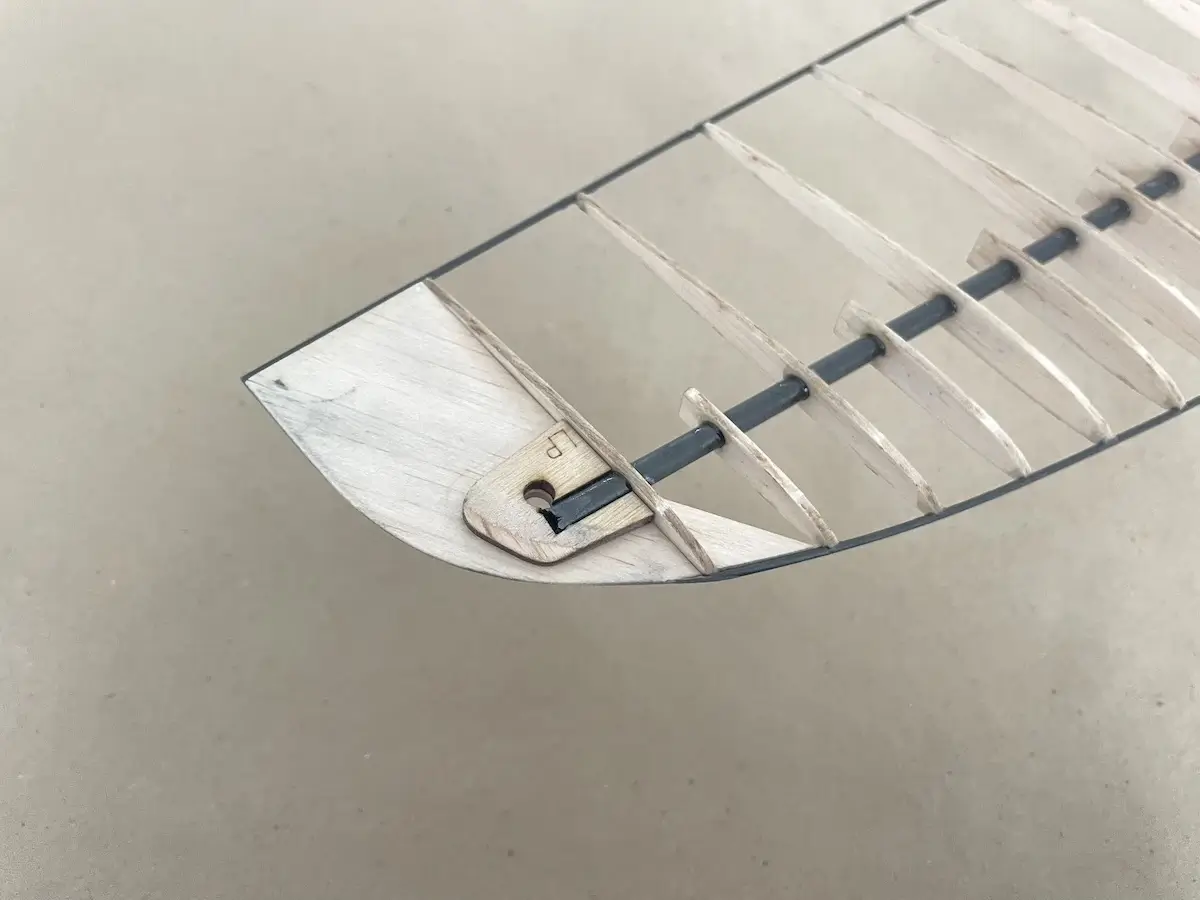
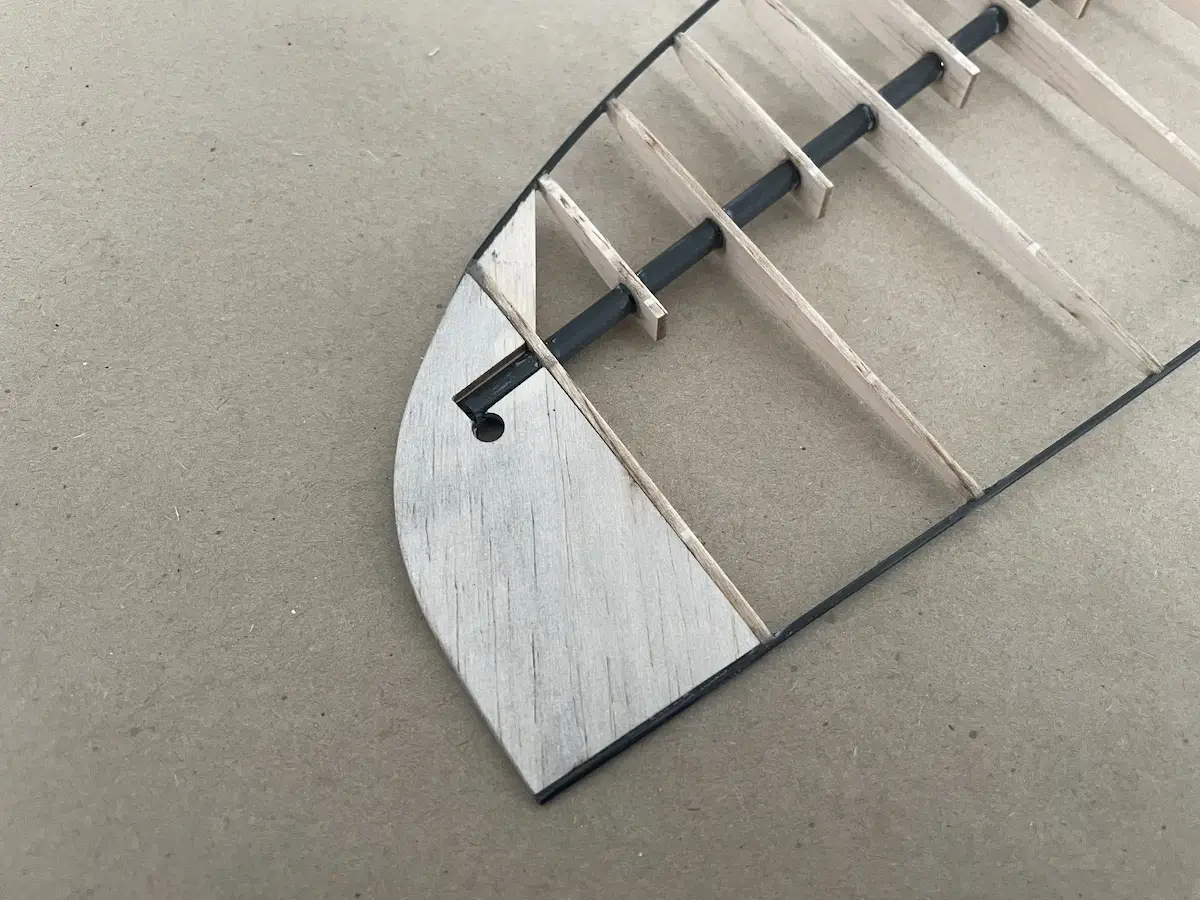
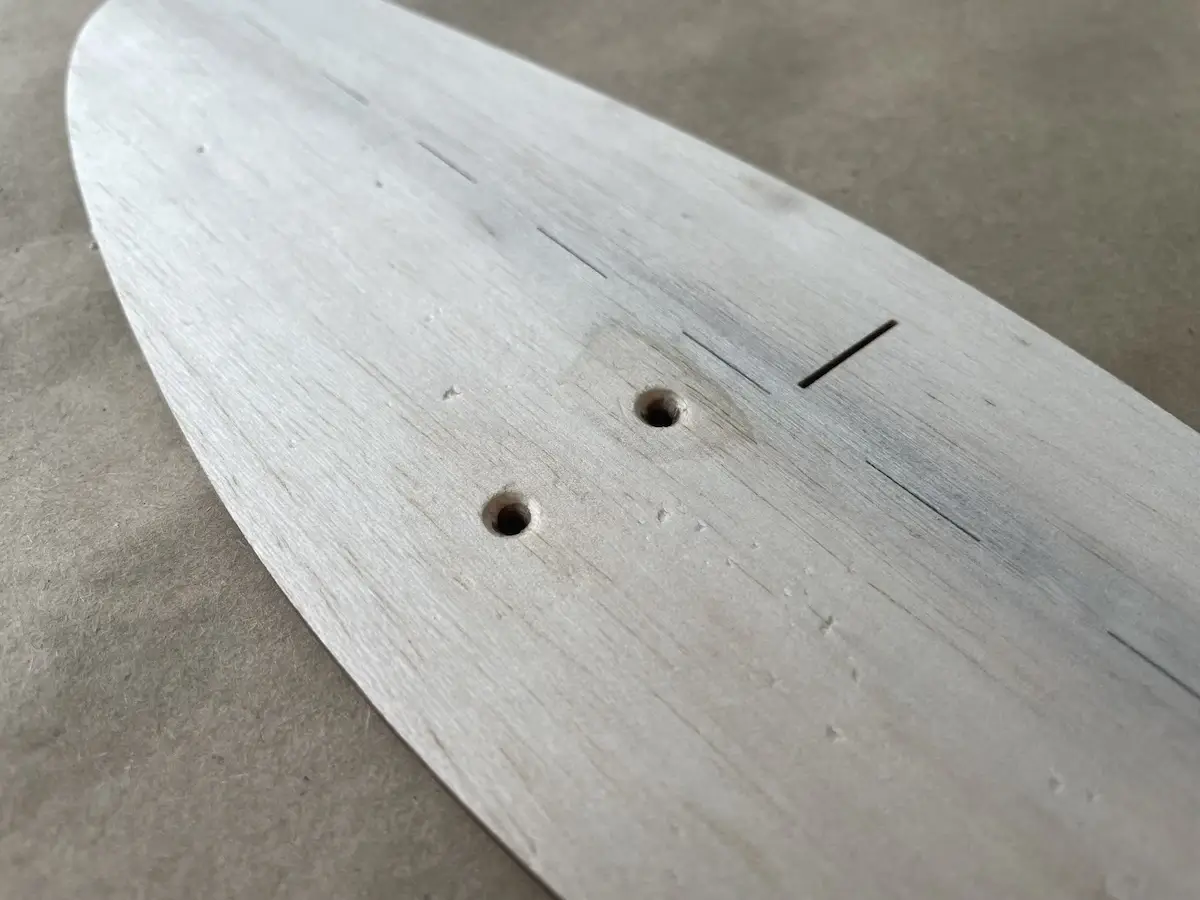
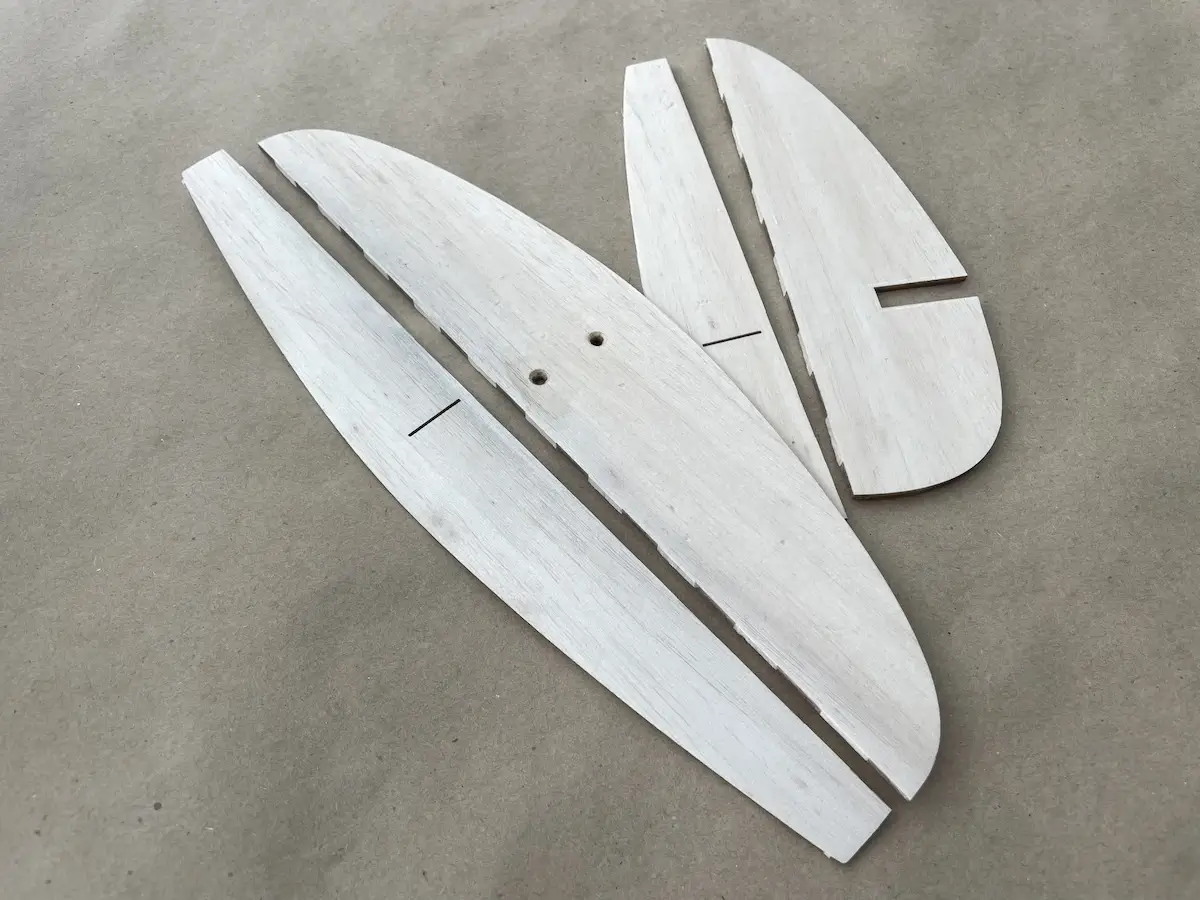
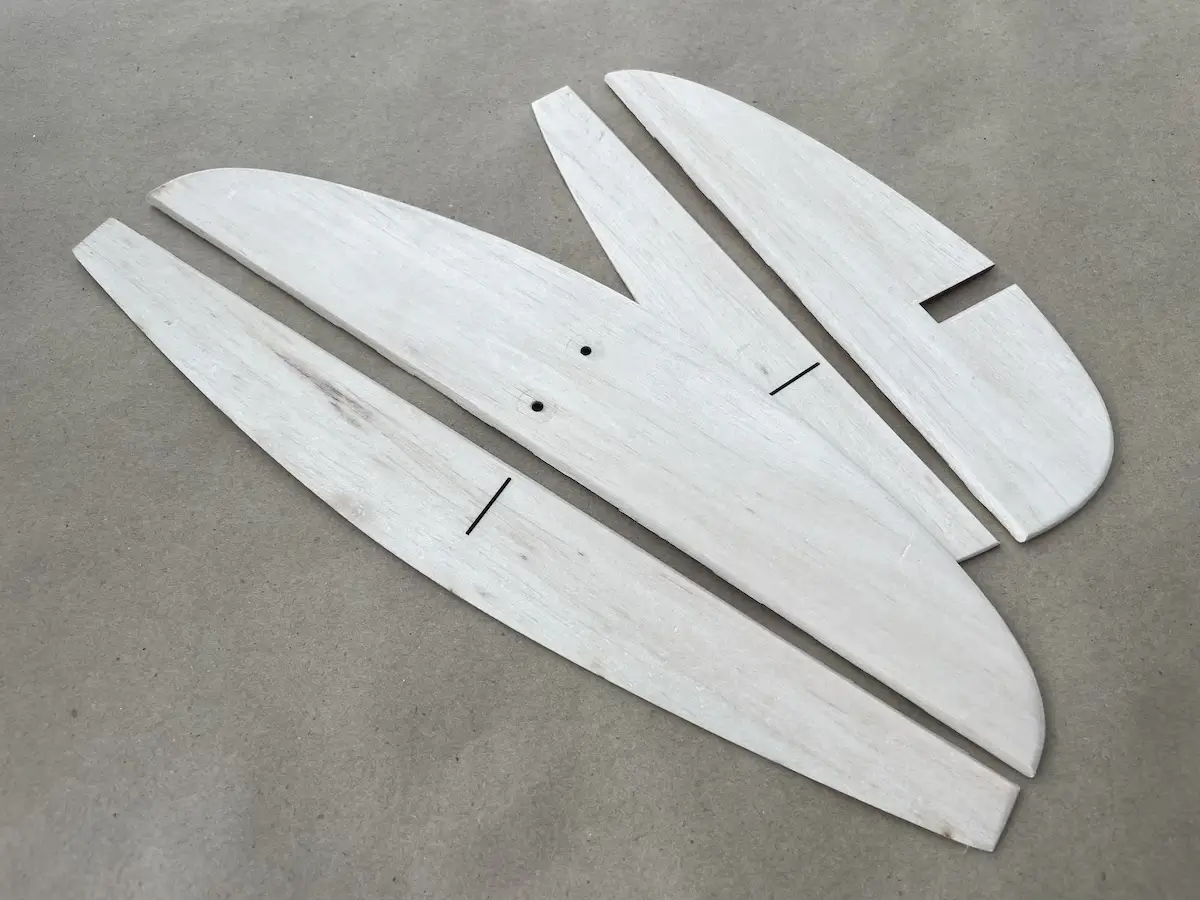
Find all the wing ribs and half ribs and put these onto the 5x4mm tube from the kit in the correct order. Each rib has a number that will help you with this taslkThen, prepare your plan by applying a clear sticky tape over the areas where you will apply glue. This will prevent the wing from sticking to the paperYou may notice that the ribs on the plan are not perpendicular to the main sparSo either one by one or in small groups by 5-6 pcs, gently squese the ribs to set a required angleStart with gluing the “full ribs” in leaving the “half ribs” unglued Also, make sure to keep L1+ and L2- unglued as wellNext fix the trailing edge in placeInstall the wing tipNow, install the leading edge glueing it to the “full ribs” only at firstFix the leading edge on top surface of the wing tip, apply CA and kick it with kicker to cure fastNow, you can finally position the “half ribs”and fix them in place with CAUse a piece of scrap 2mm balsa and create a stiffener on the last rib to reinforce the leading edge connection. Pay attention to the grains alignment for the best resultInstall a plywood launch peg reinforcement
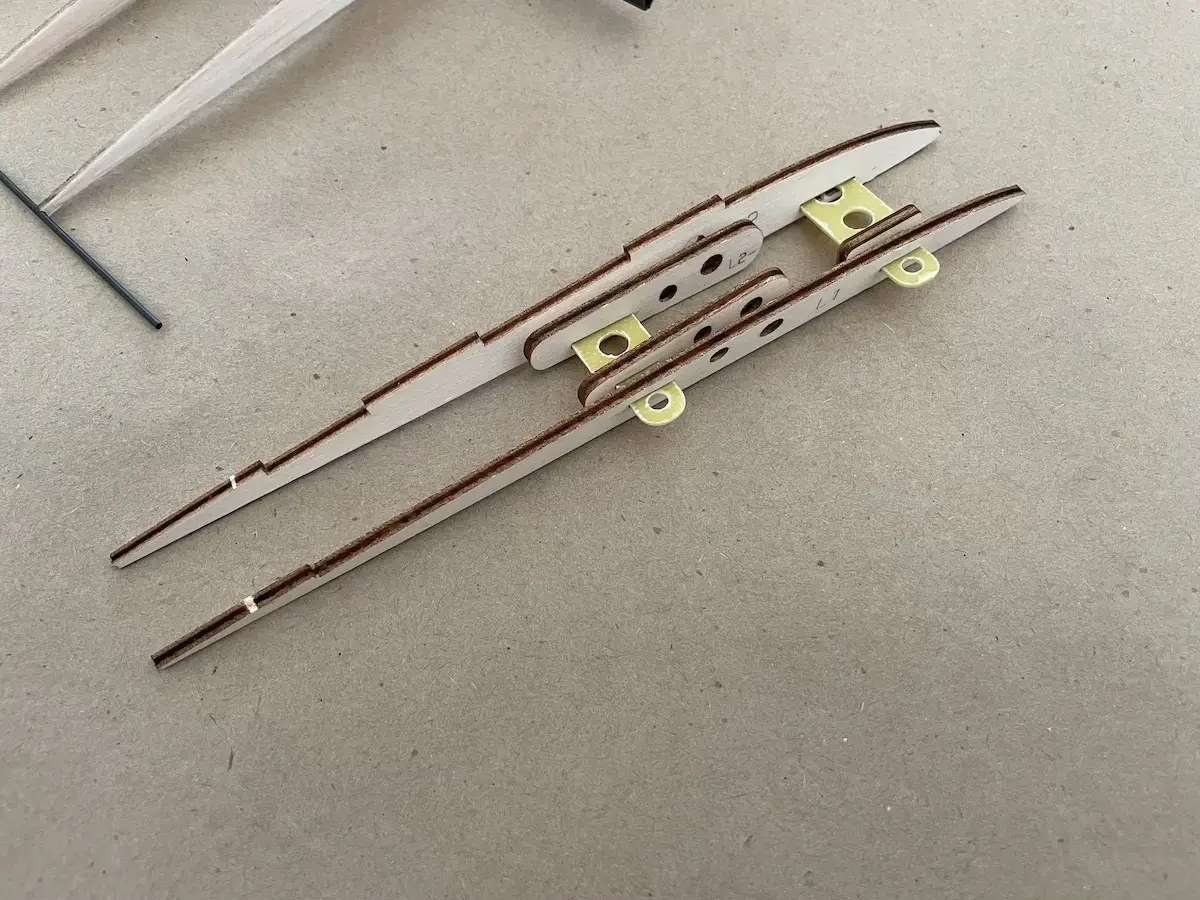
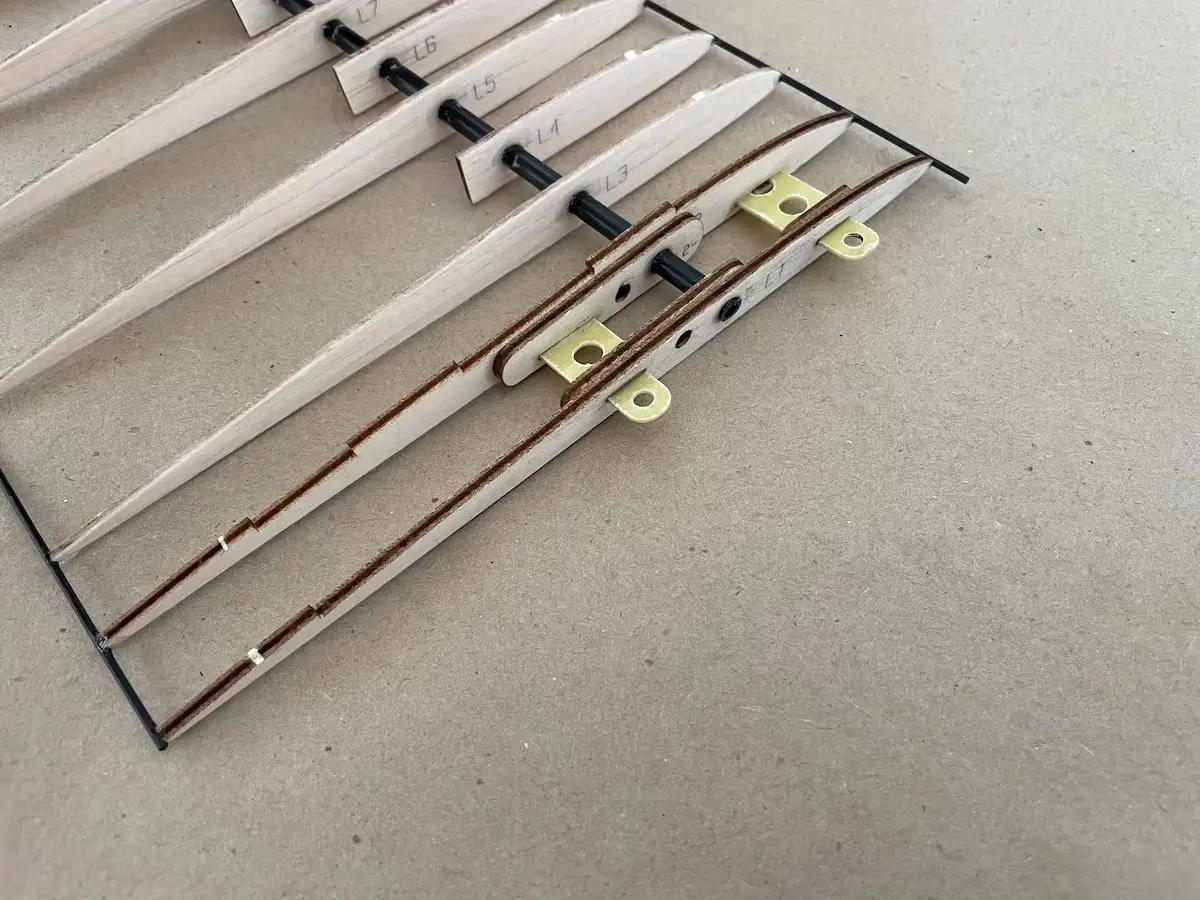
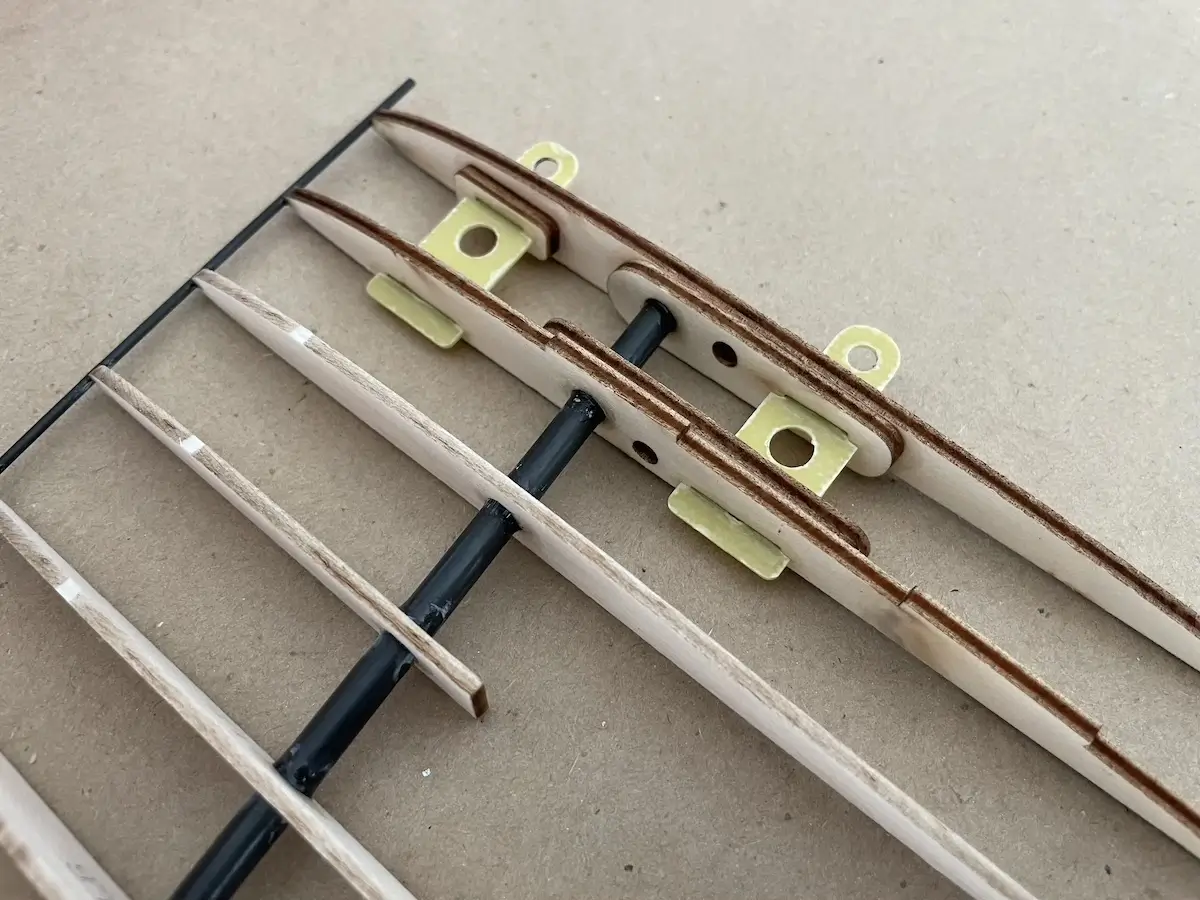
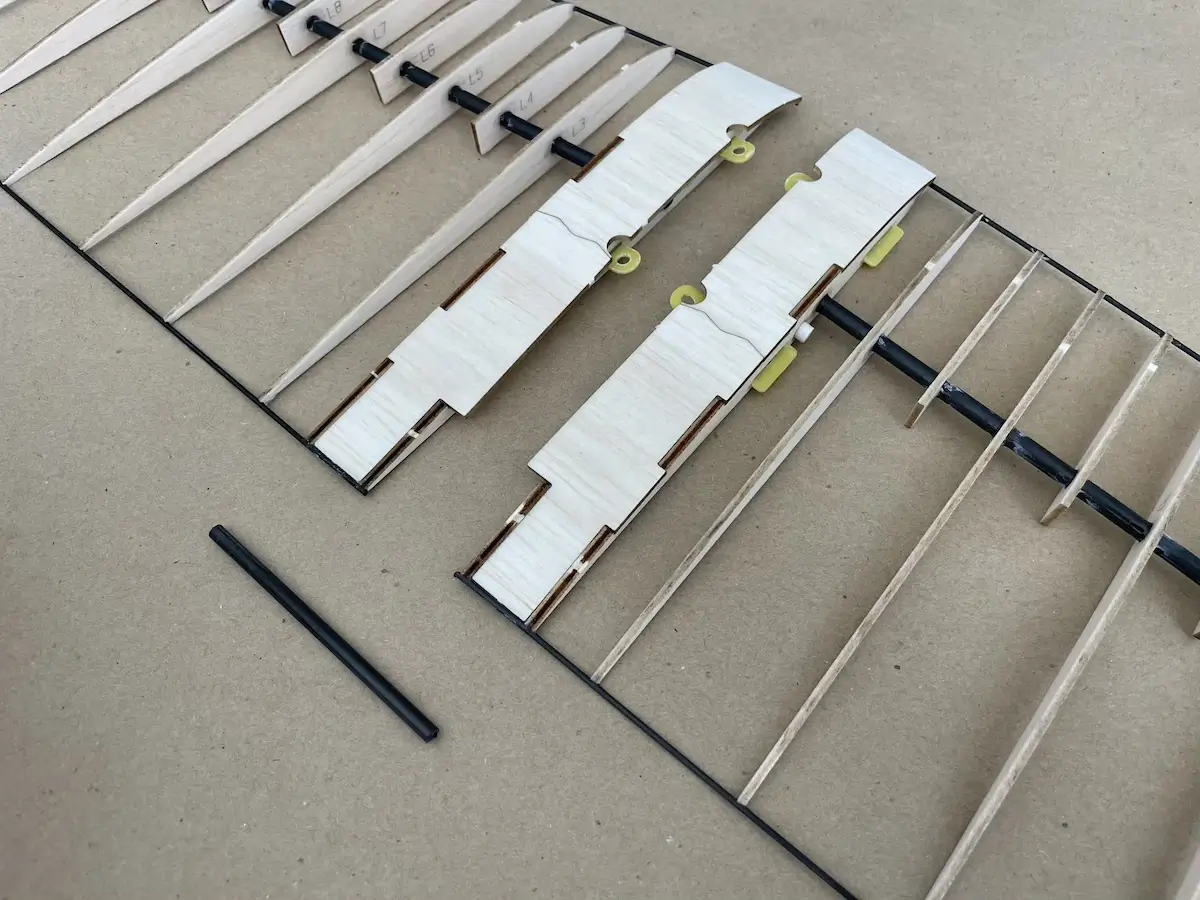
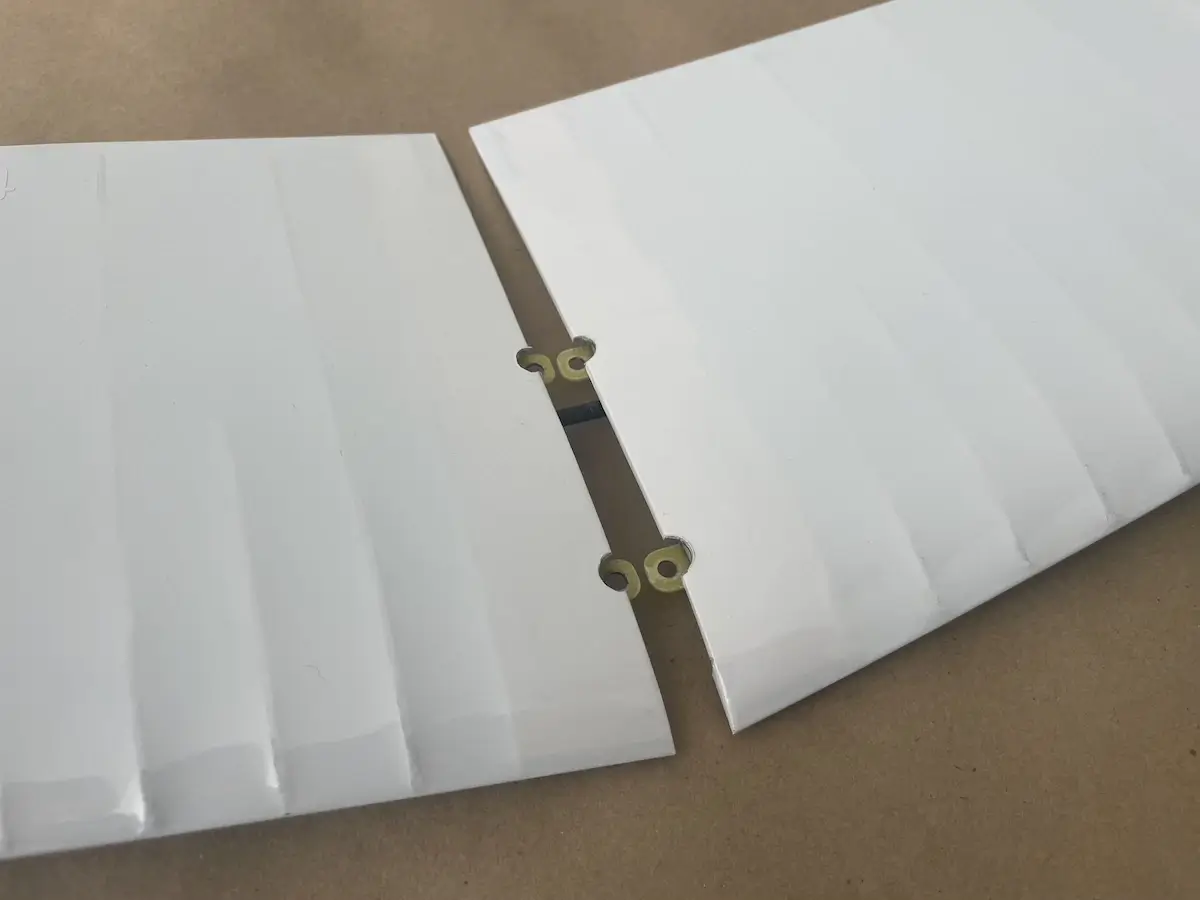
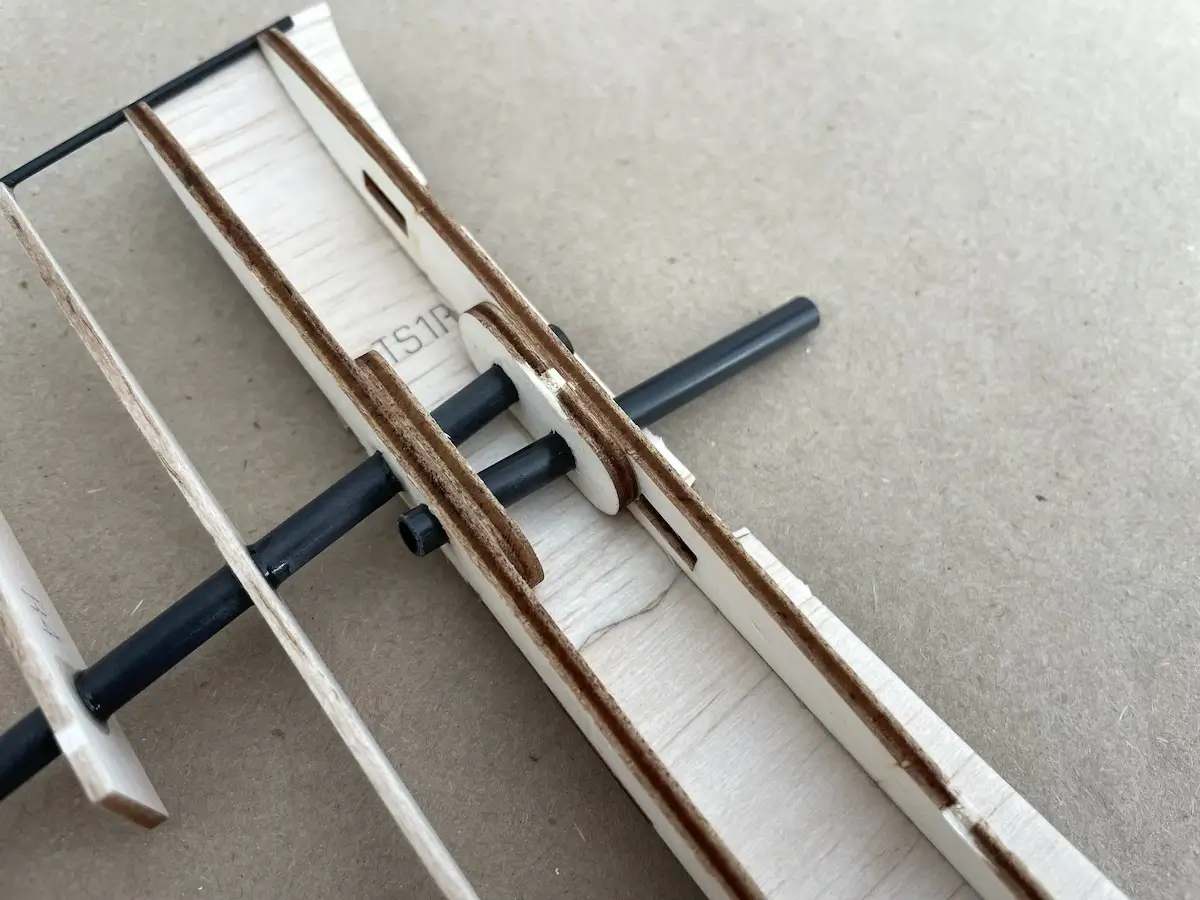
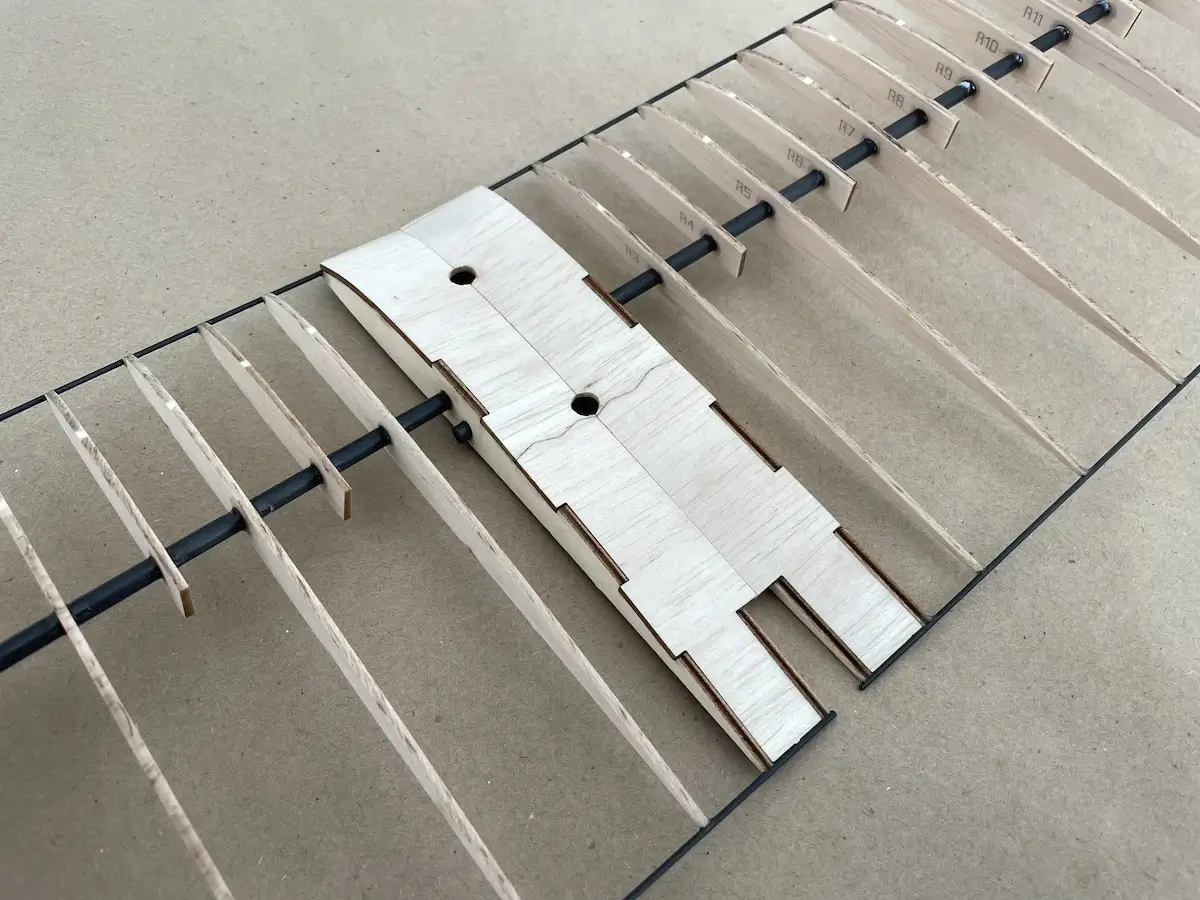
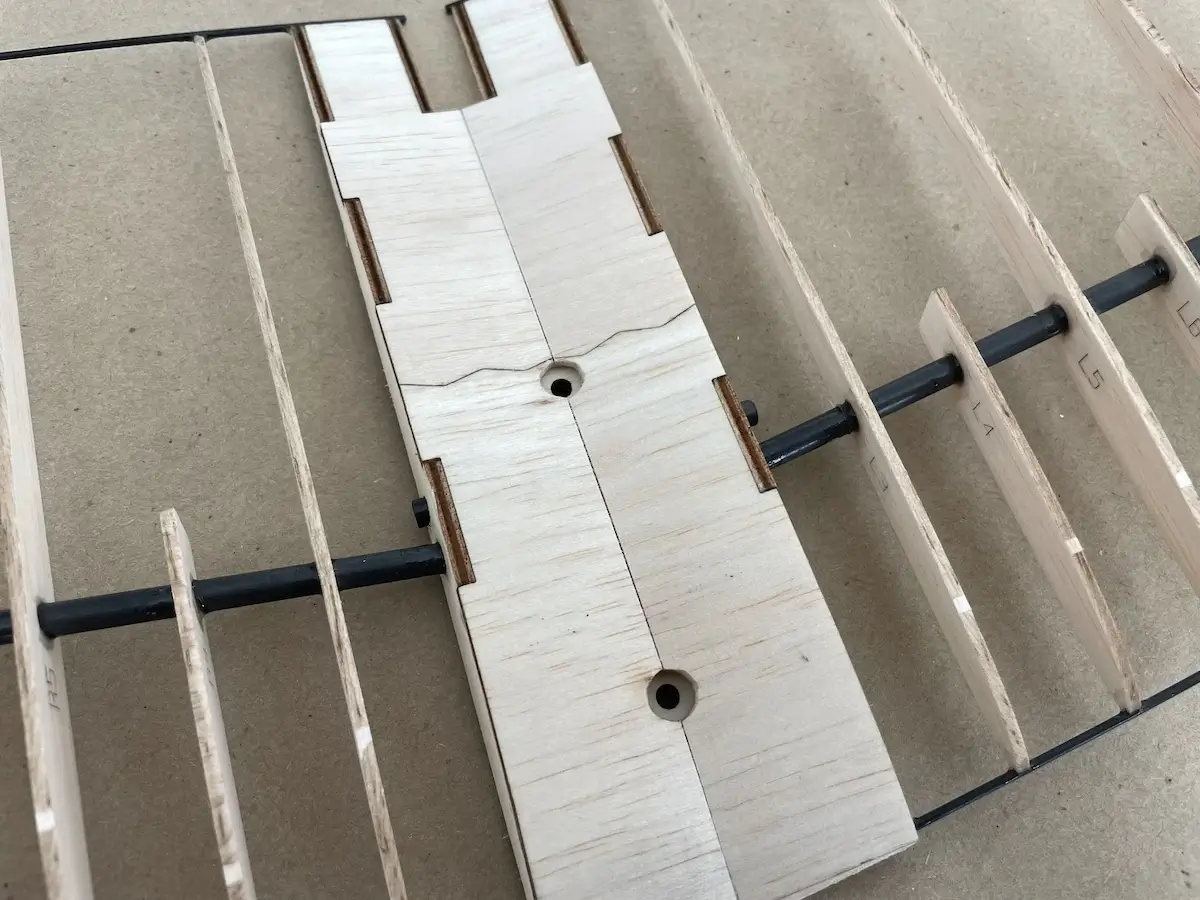
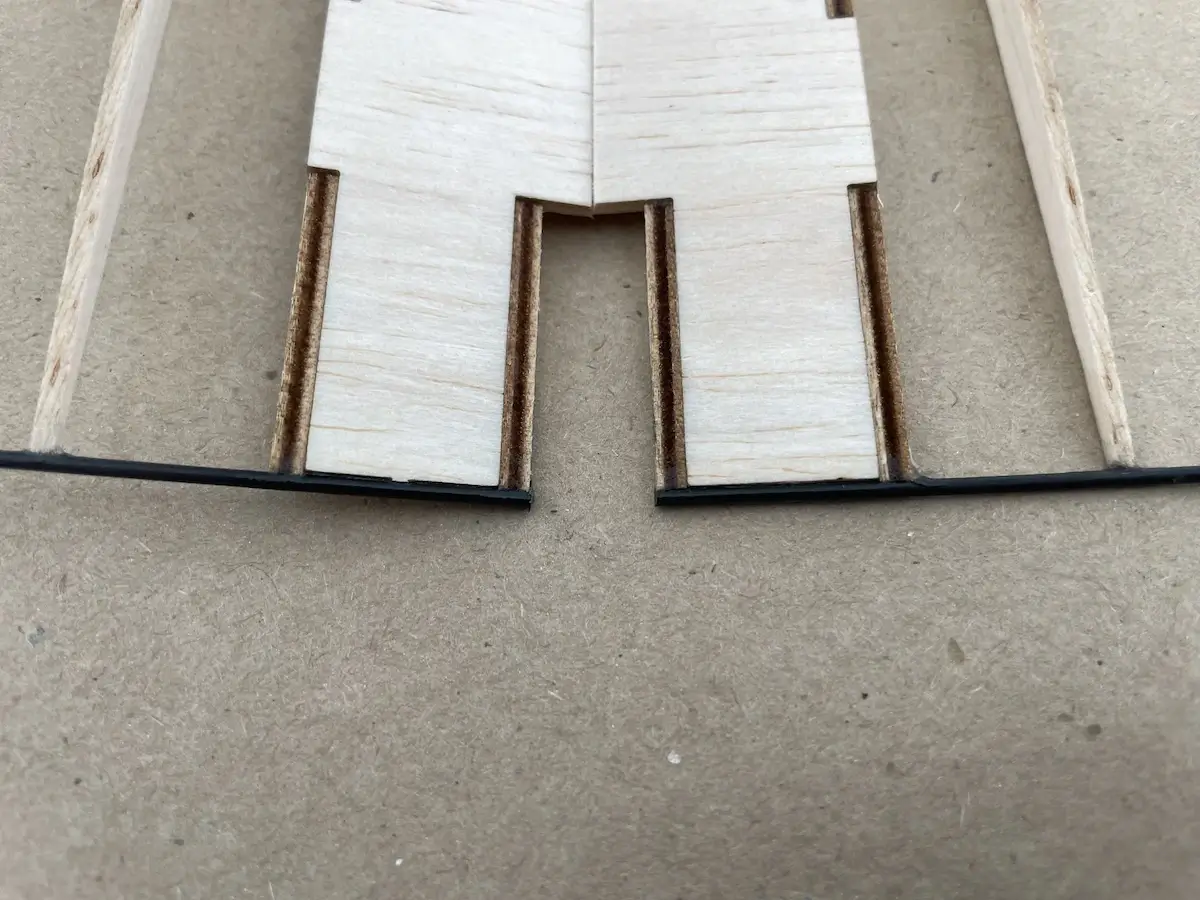
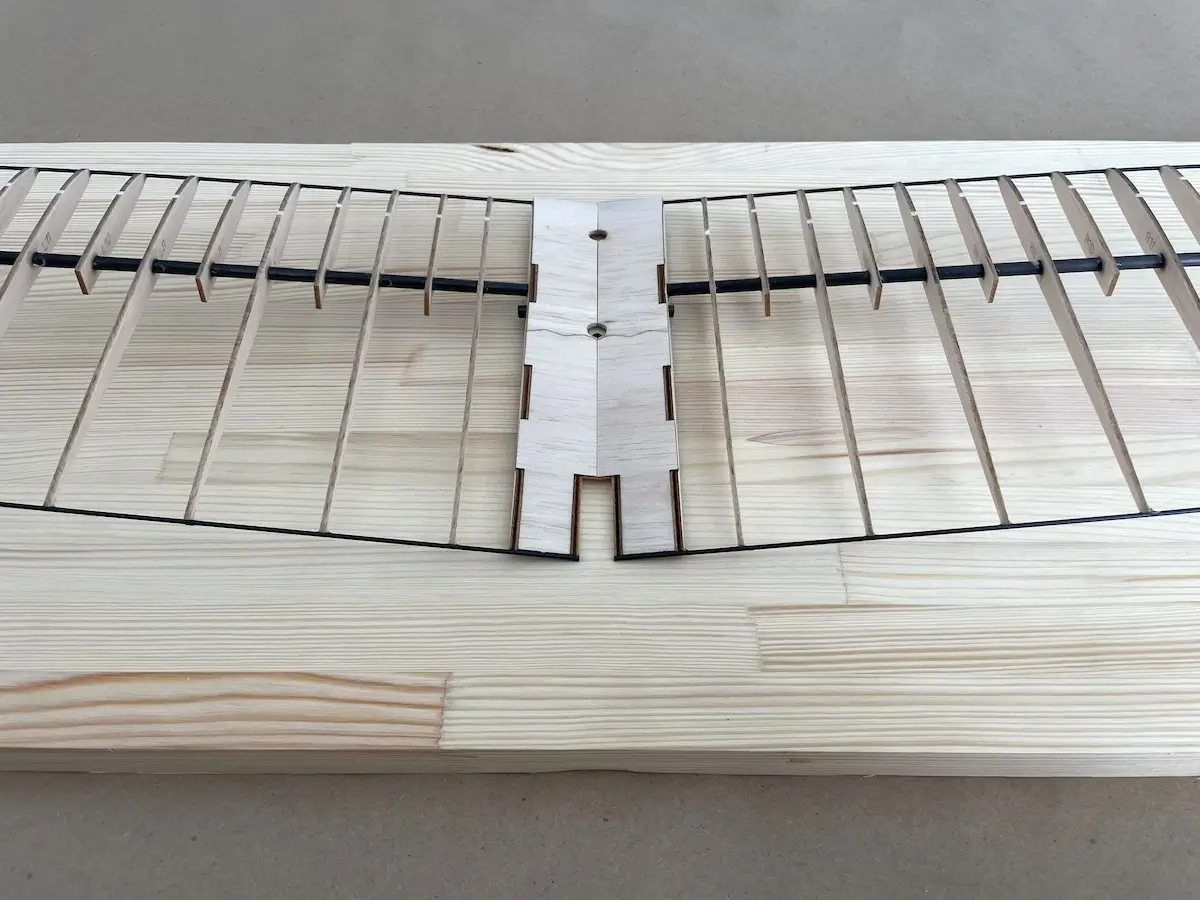
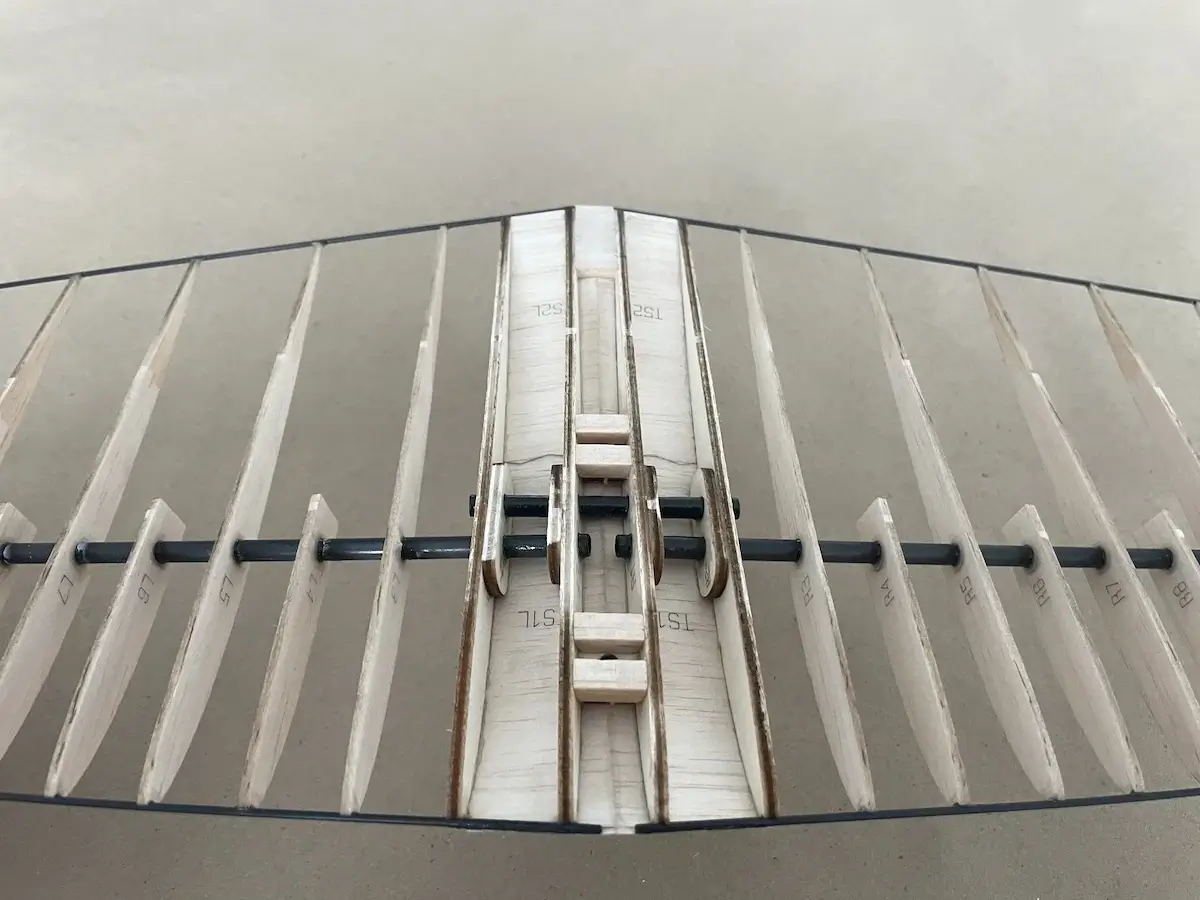
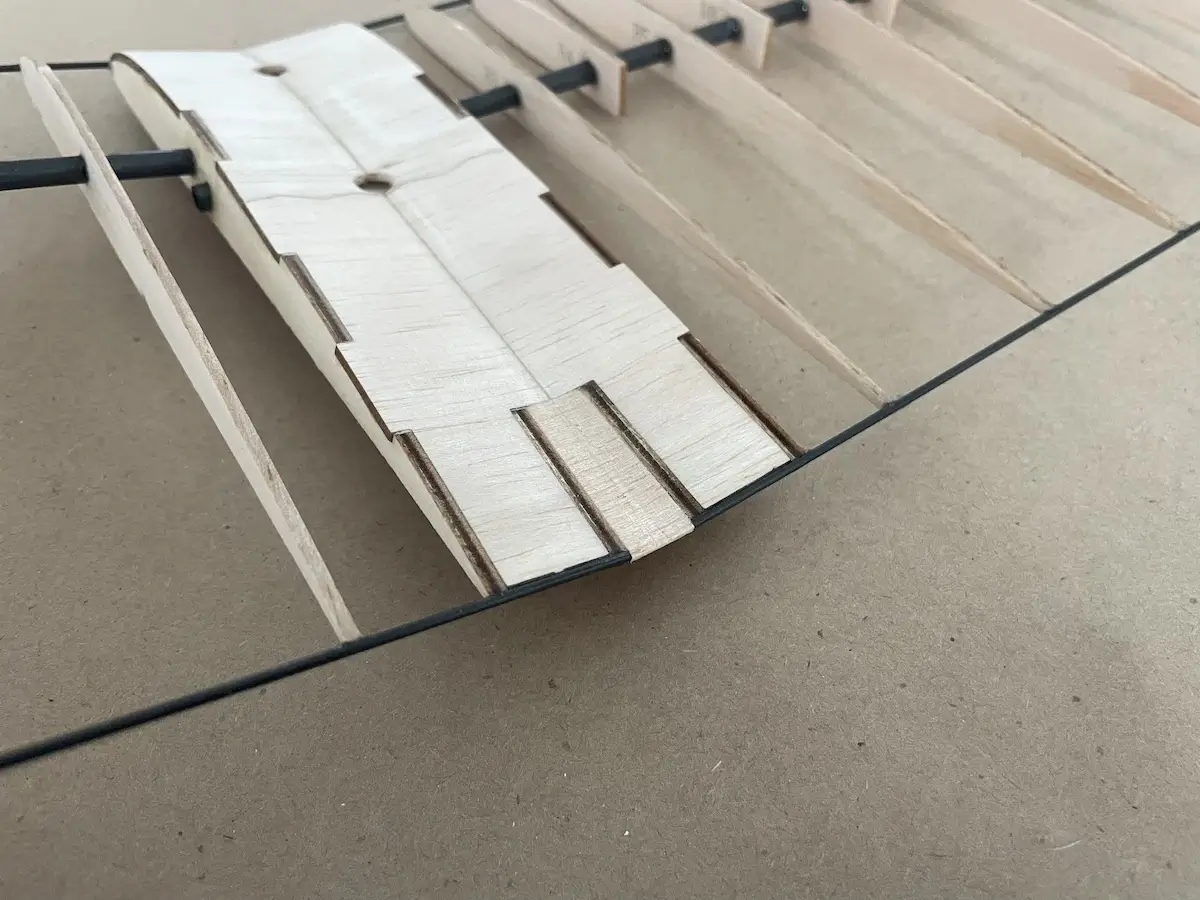
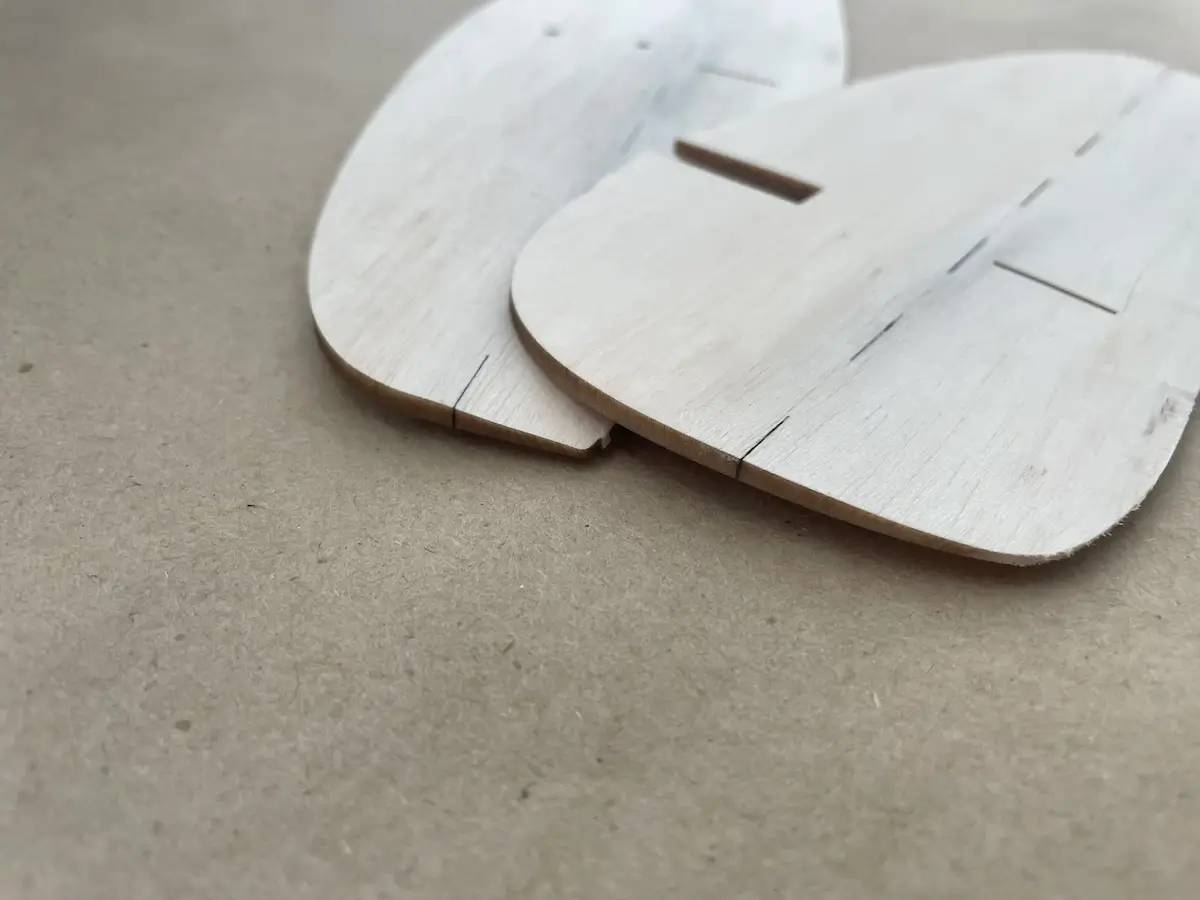
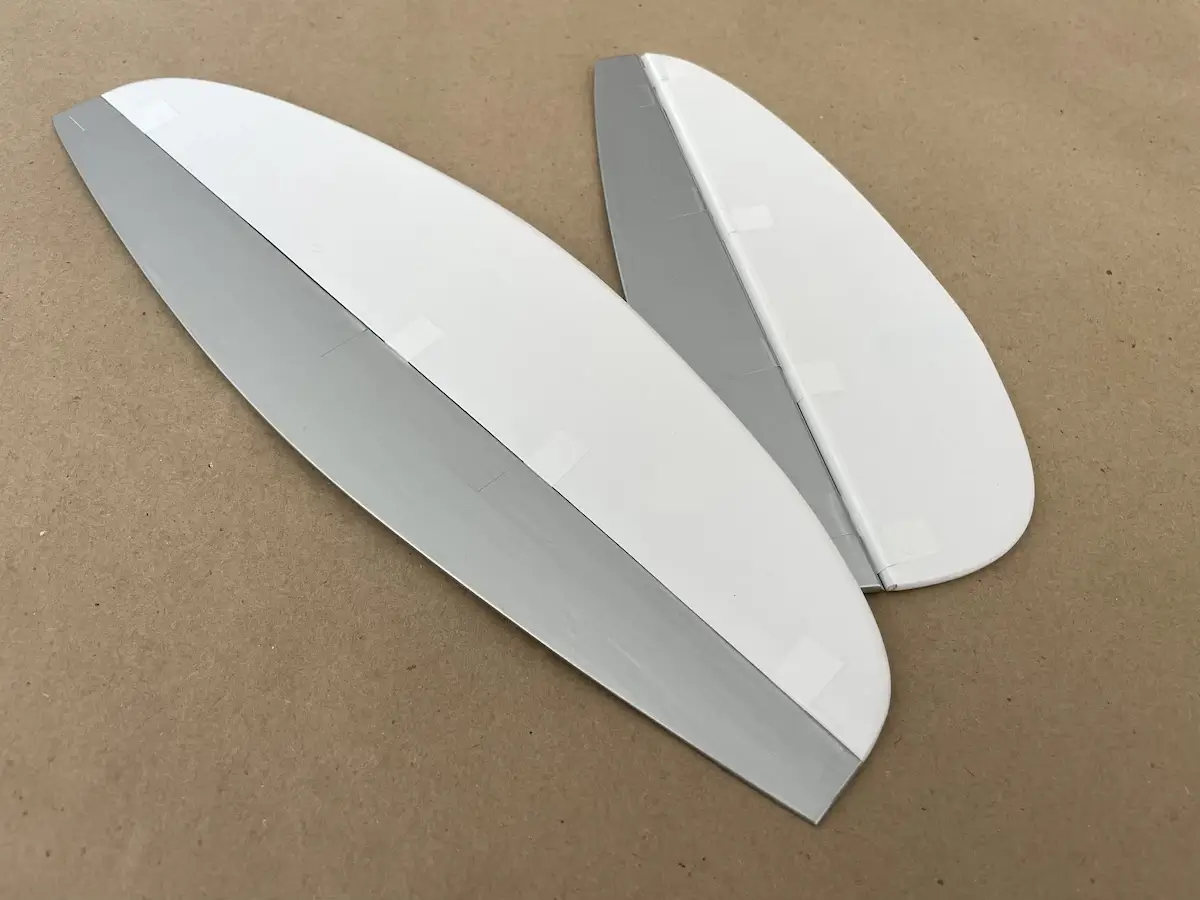
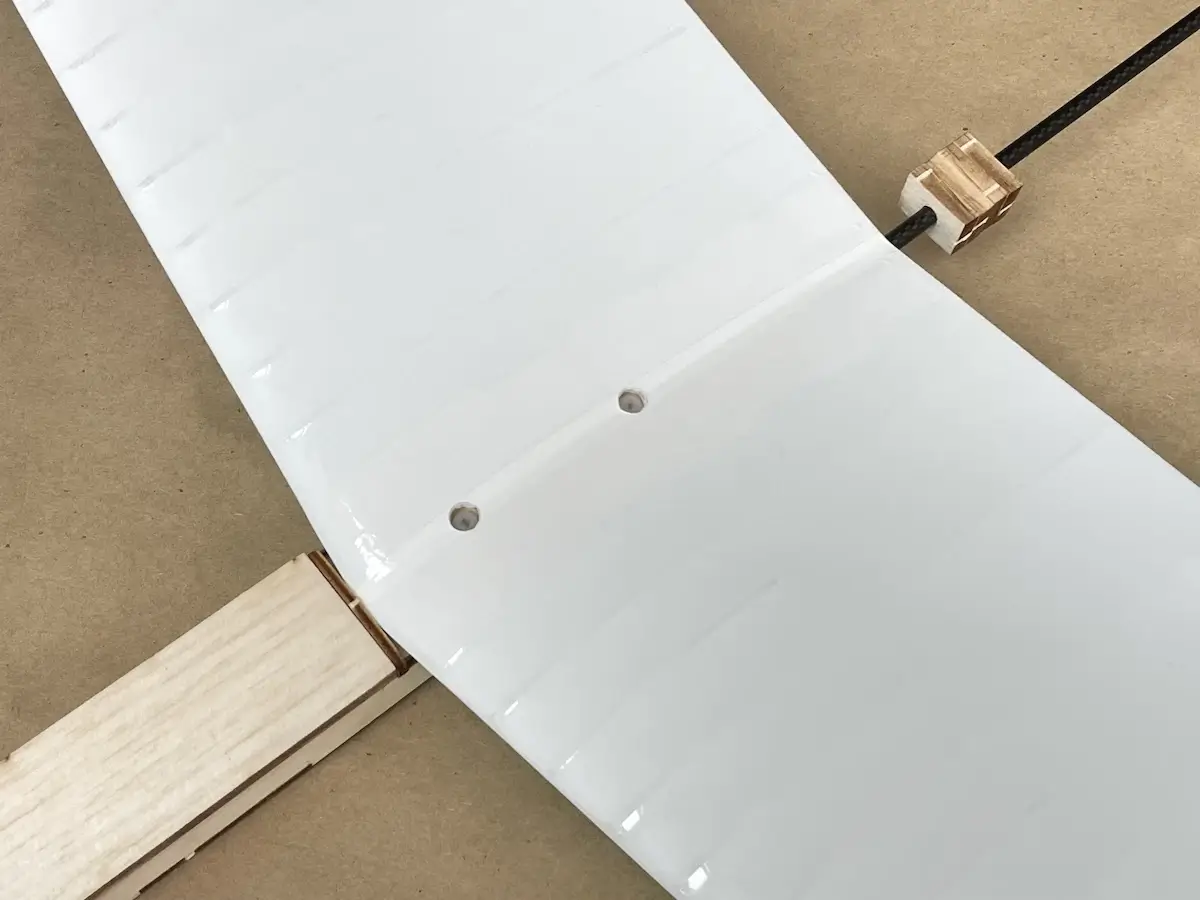
Have the 1st and 2nd ribs from the original kit ungluedReplace these with the split wing kit, and dryfit them as on the pictureFit this unglued assembly onto the wing spar and use the plan to find the needed positionMake sure that fiberglass mounts are pushed all the way into the corresponding slotsInstall the plastic tube into the right wingFix the assembly in placeInstall the top sheeting on, DO NOT GLUE the 4mm joiner just yetUse scrap 6mm balsa to make roots fillers around LE and TE cornersSand the fillers and top sheeting. CAREFULLY trim the centerline of the top sheeting, so it fits together with no gaps and uneeded tentions. Glue the 4mm joiner once you are happy with the fitting.Cover the wings Install round standoffs onto the fuselage, stacking them one over another
Solid Wing? Follow Along…
If you wish to build a solid one-piece wing instead, please skip the images above and follow the process below.
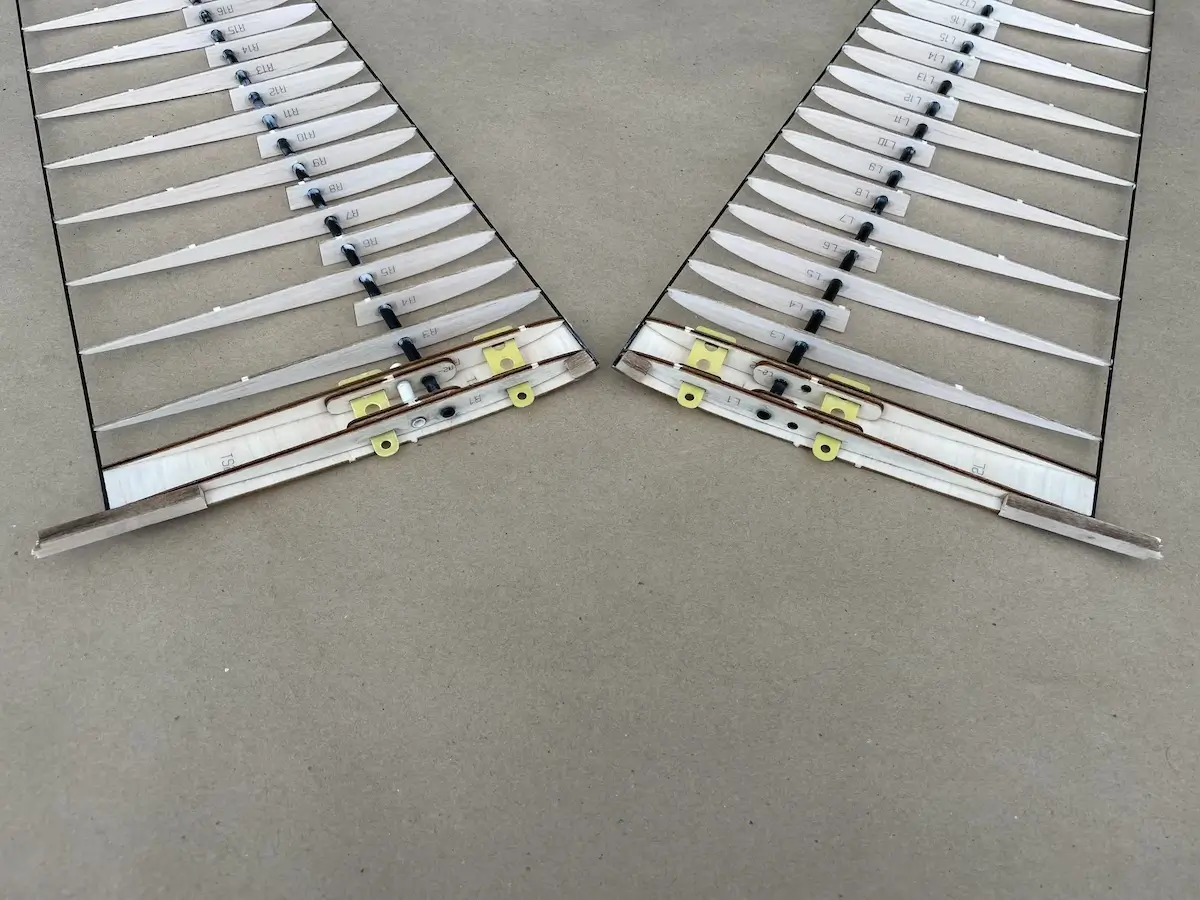
Use CF tube wing joiner to align the L1+ and L2- reinvorcememnts and glue them to the corresponding ribs. DO NOT GLUE the CF wing joiner part yet!!!You can use PVA glue for his tals as it doesn’t stick to the CF and will give you more time to remove the latterFor right-hand launchers, soak the Left launch peg opening with a thin CA Do that on both sides.Prepare the top root sheeting by glueing its parts togetherThen, install it onto the wing and fix in placeRepeat every step above for the right wing as wellTEMPORARY install the wing joiner in place to check how both wings join togetherUse a sand paper over a flat surface or a big sanding block to raper the edges of the wing sheetingJoin the halves together and make sure that there are no gaps. Take this part slowlyInstall wing bolt holders in slots of the root ribsMake sure these are centered and enlarge the wing bolt openings in the sheeting to make a space for the wing bolt coming in and out freelyTrim the trailing edges to be flush with the root ribsUse a flat surface to align both wing panels by the root ribsAfter making sure everything works as expected, apply glue to the edges of the sheeting and the CF wing joinerUse scrap 6mm balsa to fill in the gap between the roob ribs on the rear and under the wing bolt holders. There are also parts marked with WBF which you can use hereSand the fillers making them flush with the ribsDo that on the top side as wellProtect the ribs with a few layers of clear sticky tape before sanding the wing tips Round the edge and taper the launch peg reinforcement slightlyPay attention to the bottom surface as wellSoak 30-40mm of the rear part of the wing ribs with thin CA to prevent it bending under the load of shrinking covering filmCover the wing and make openings for the wing bolts. Hot soldering iron tip might help hereFor right-hand launchers, jpen the covering on the left with tip for the launch pegIf using stickers, cut them in partsThen, position and apply to the wing where desiredCut the launch peg from the 5x4mm CF tube. For strong launchers, use 5x3mm tube insteadRound the edges and push it into the wingtip opening. Then, make a healthy fillet around it with a medium or thick CA(Optional) Add up to 3° of wash-out to the wing tips, to improve the wing performance and stall characteristics
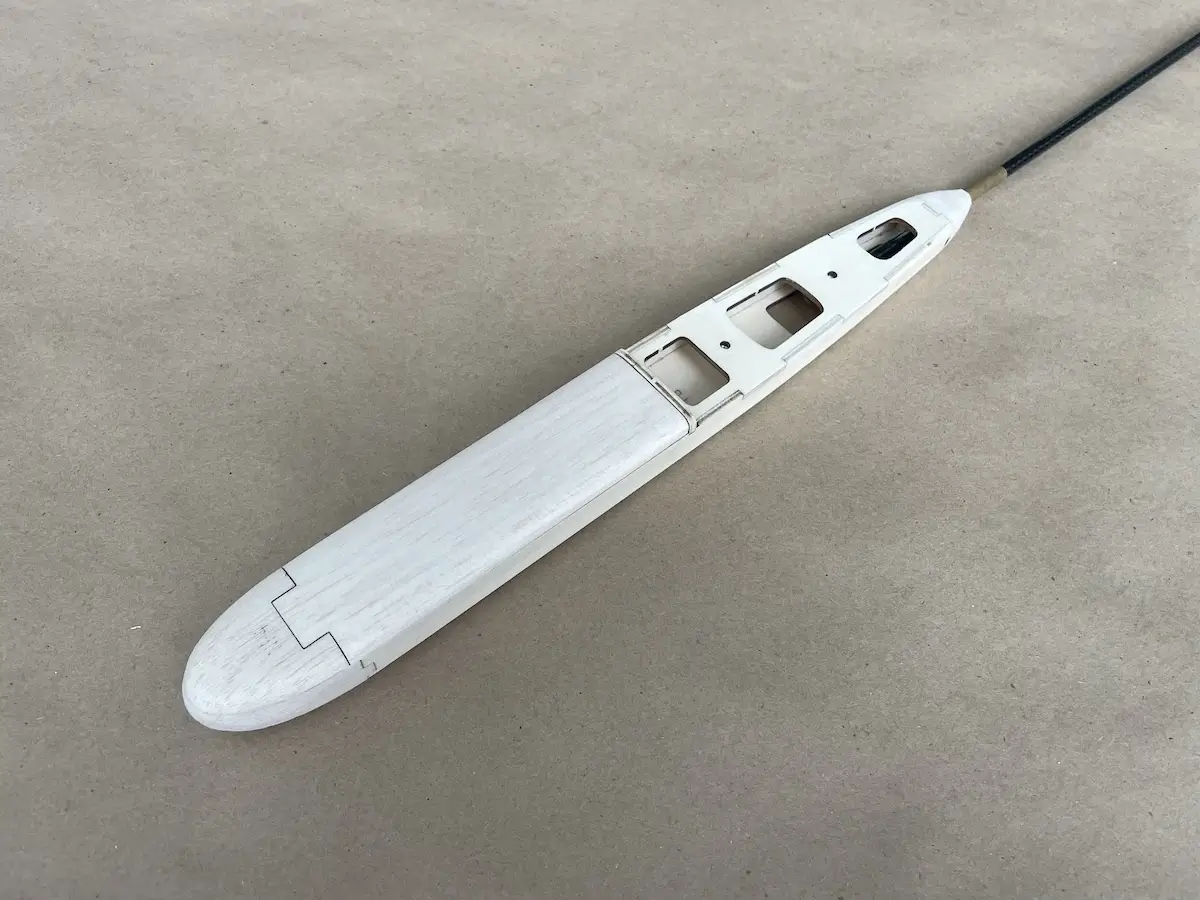
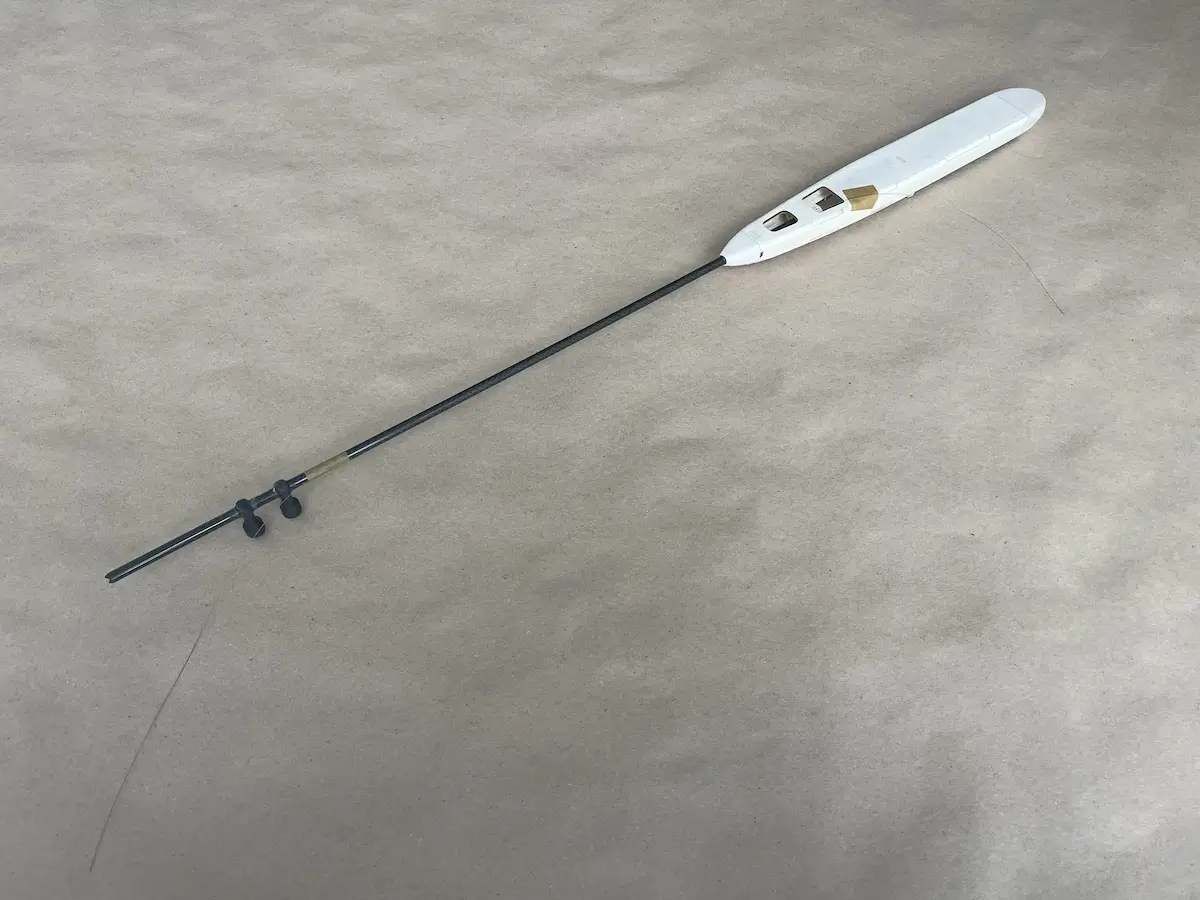
Part 2. A Fuselage
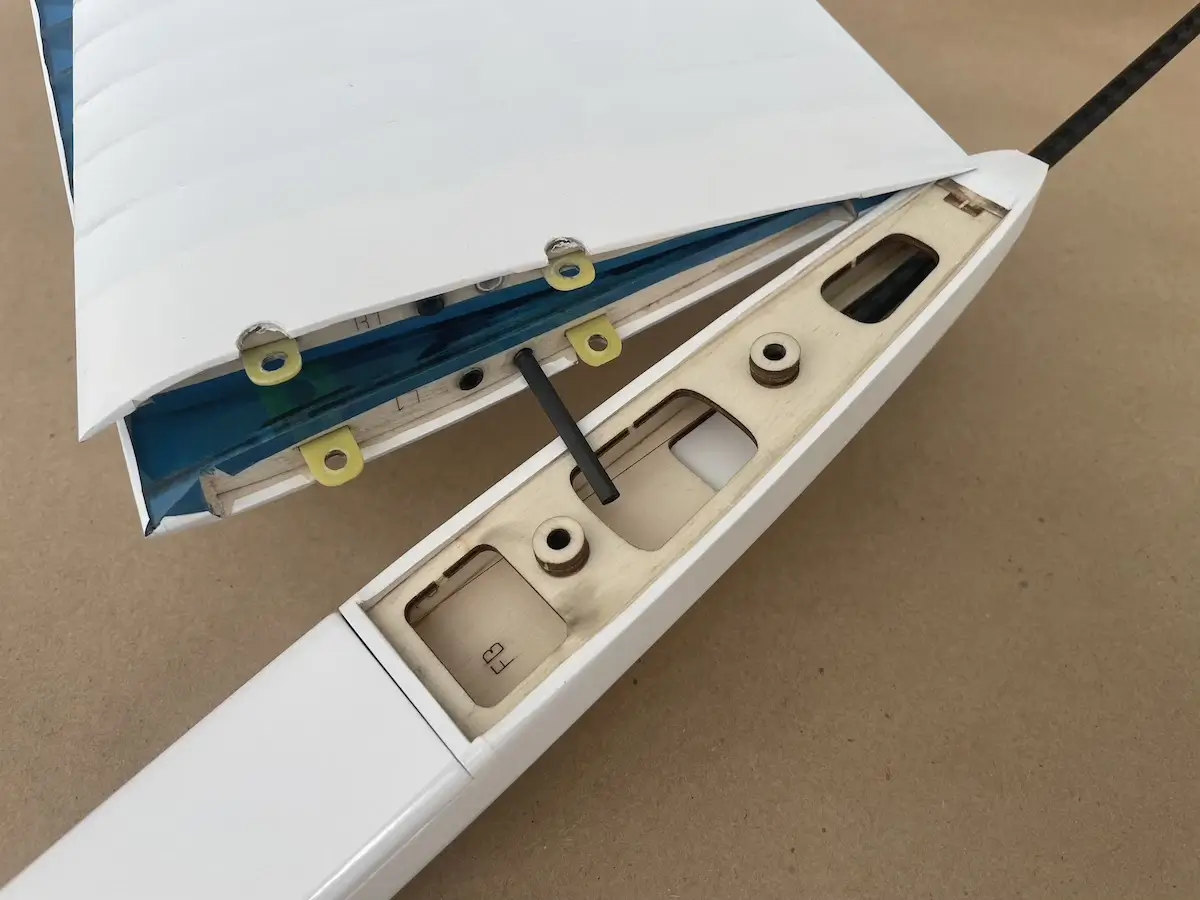
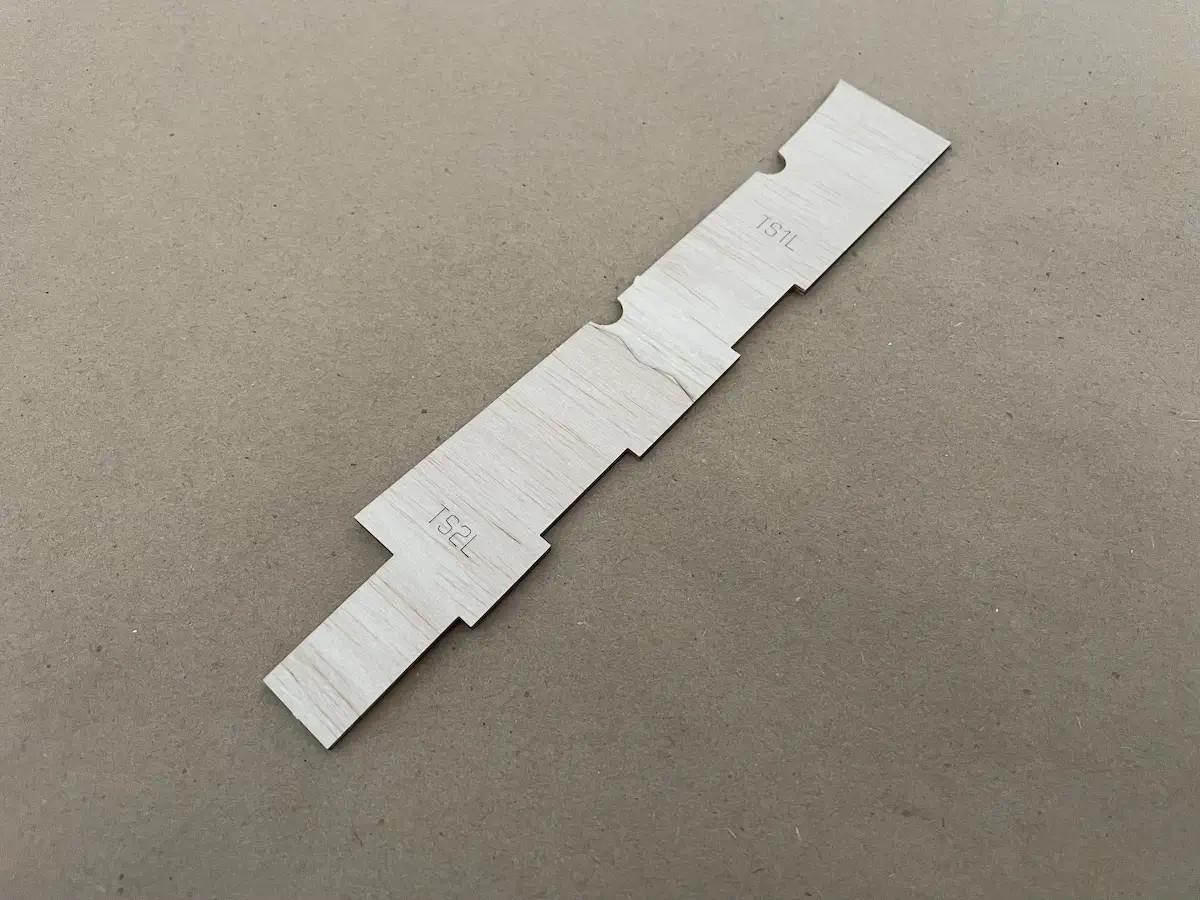
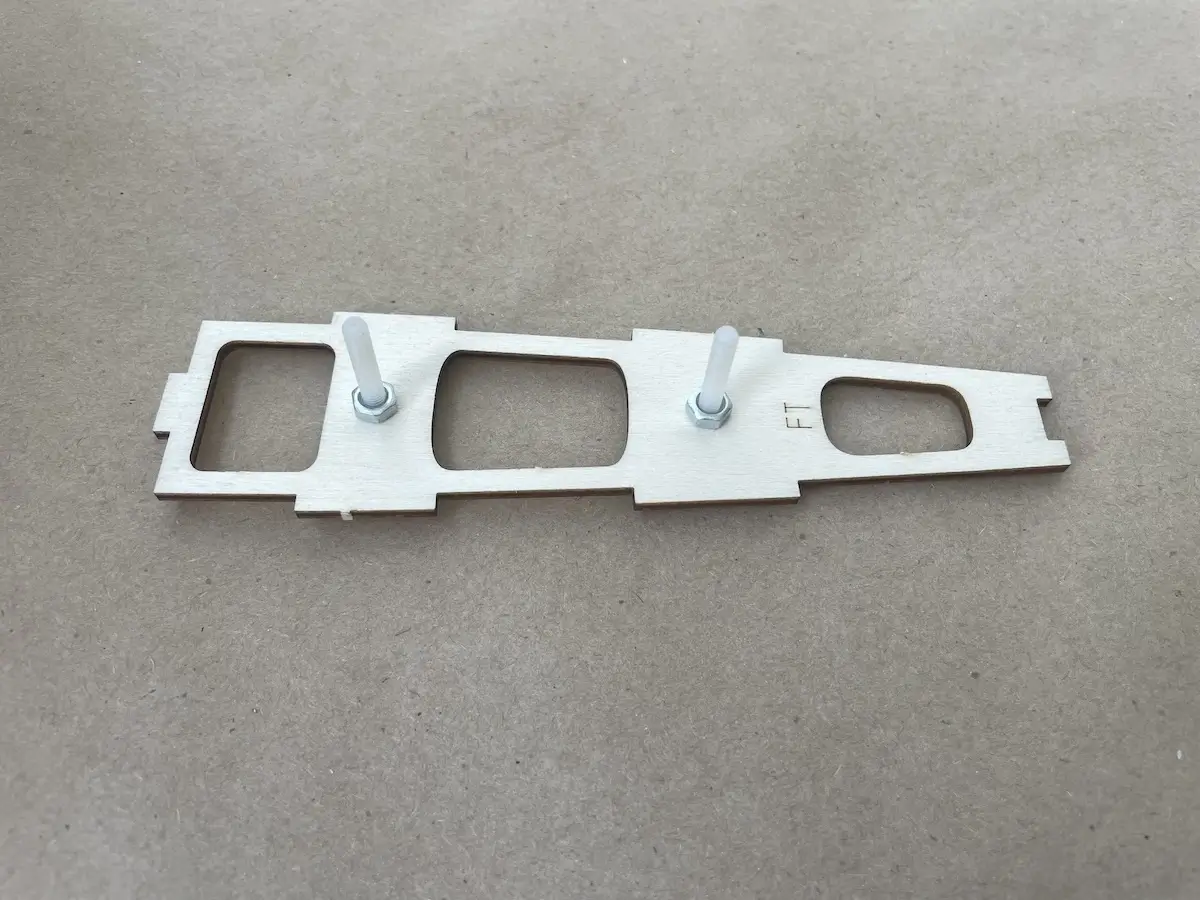
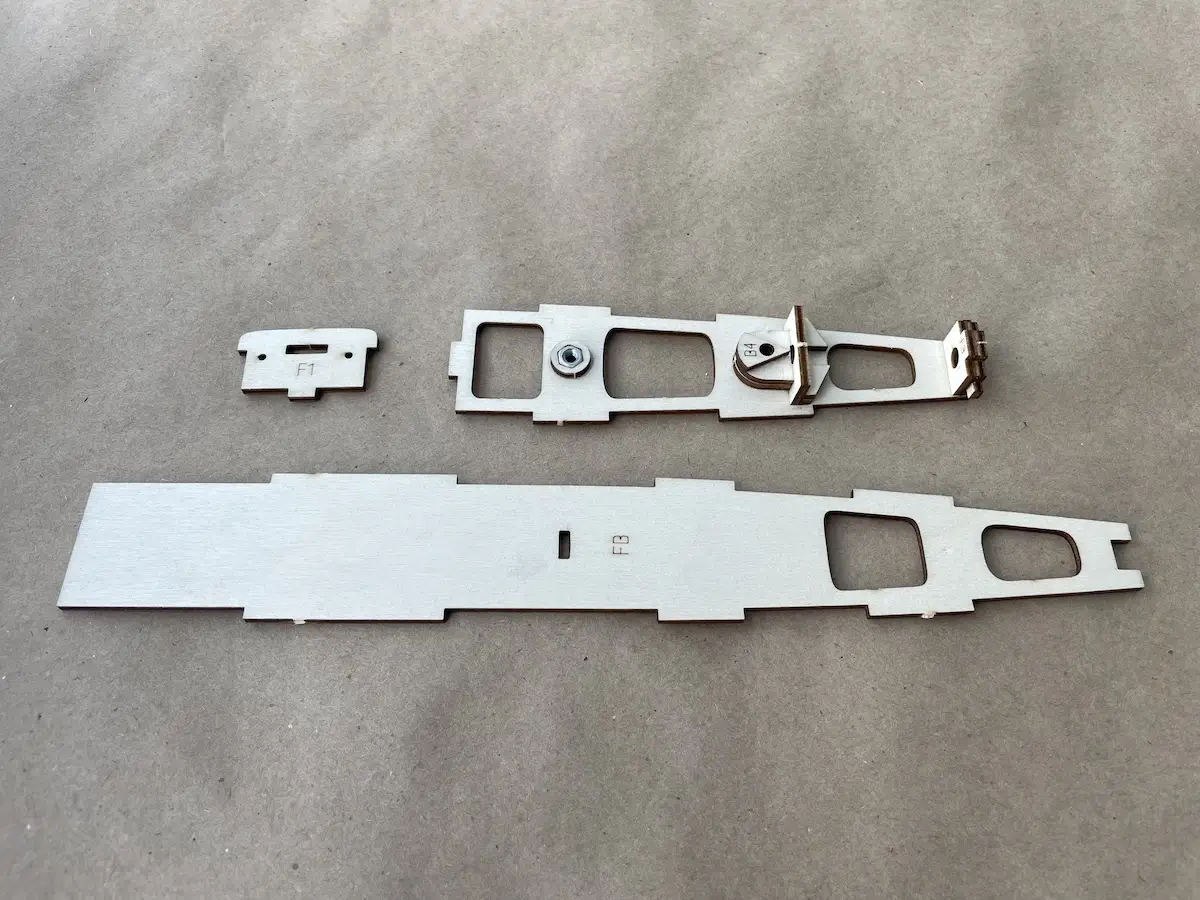
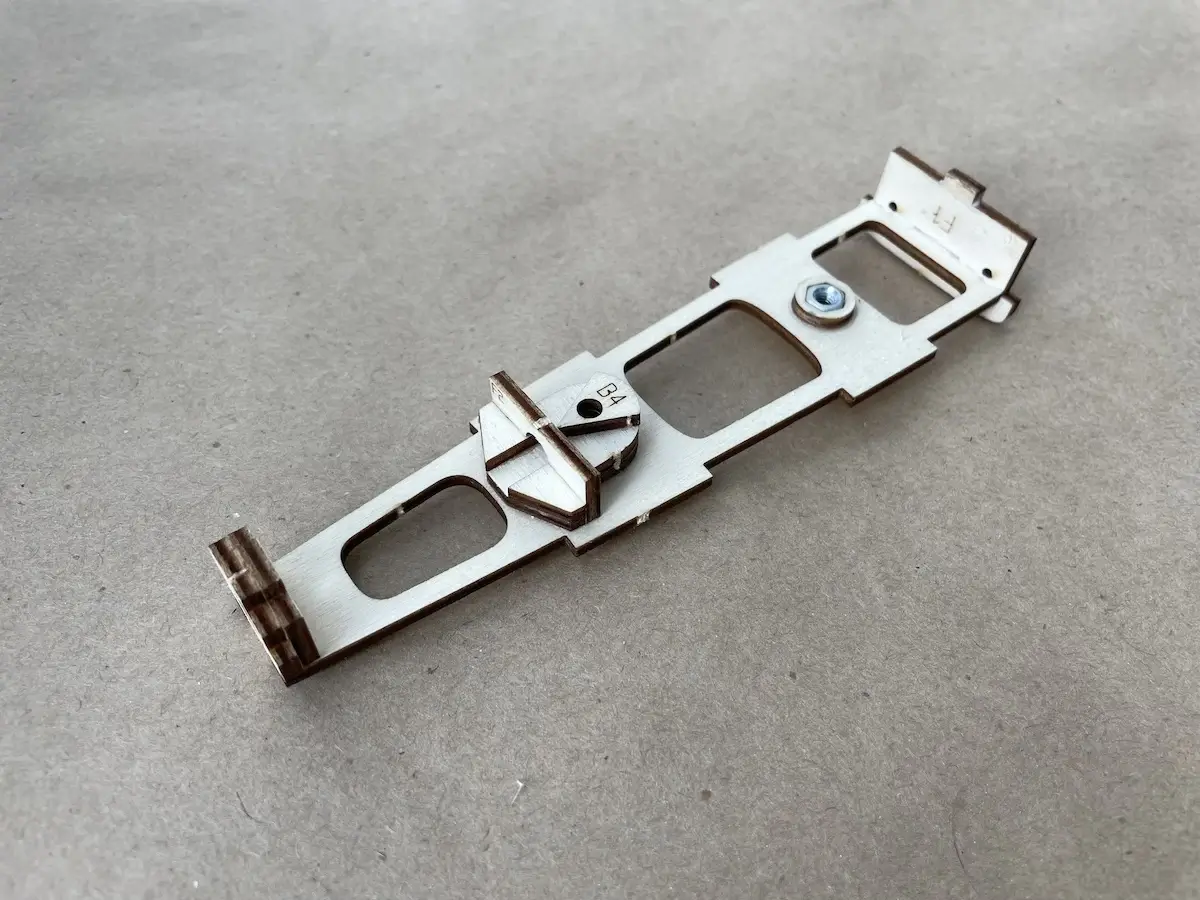
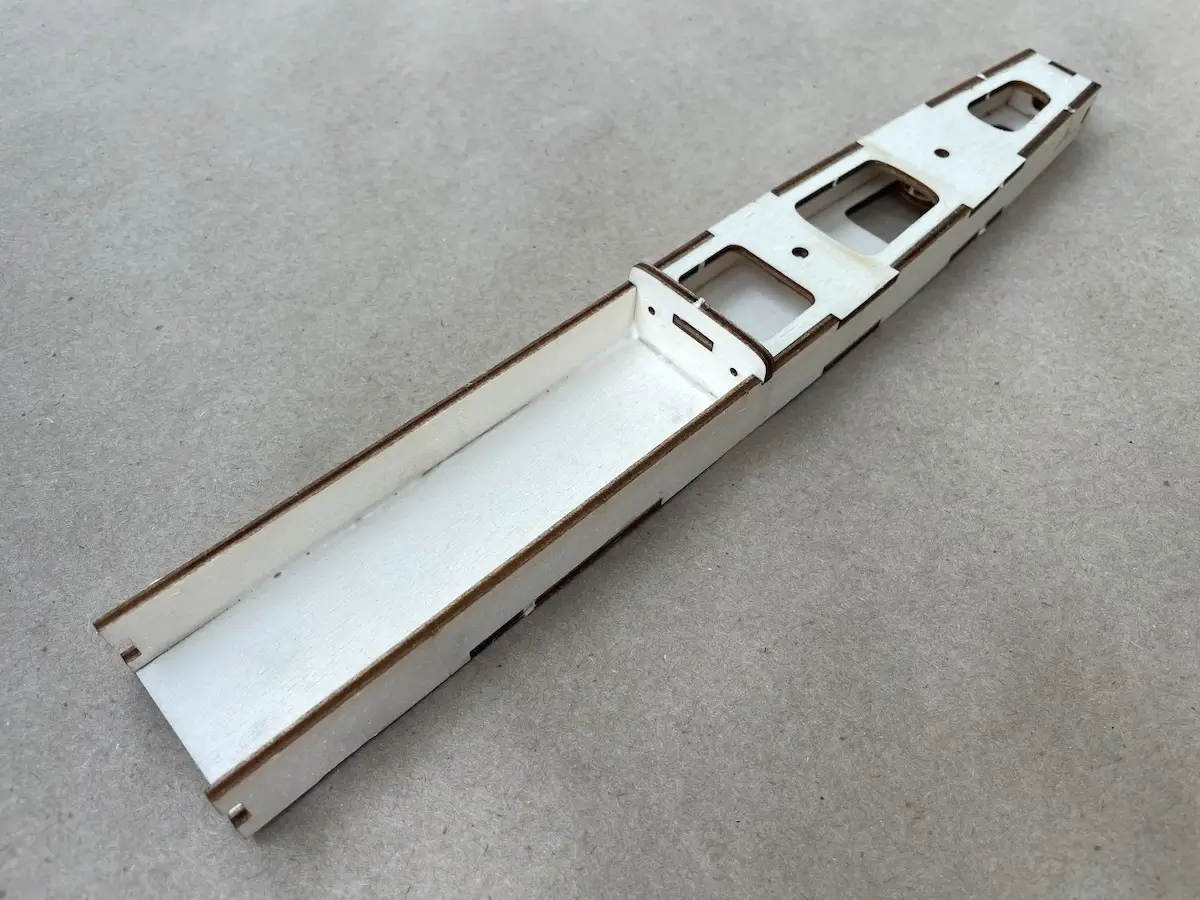
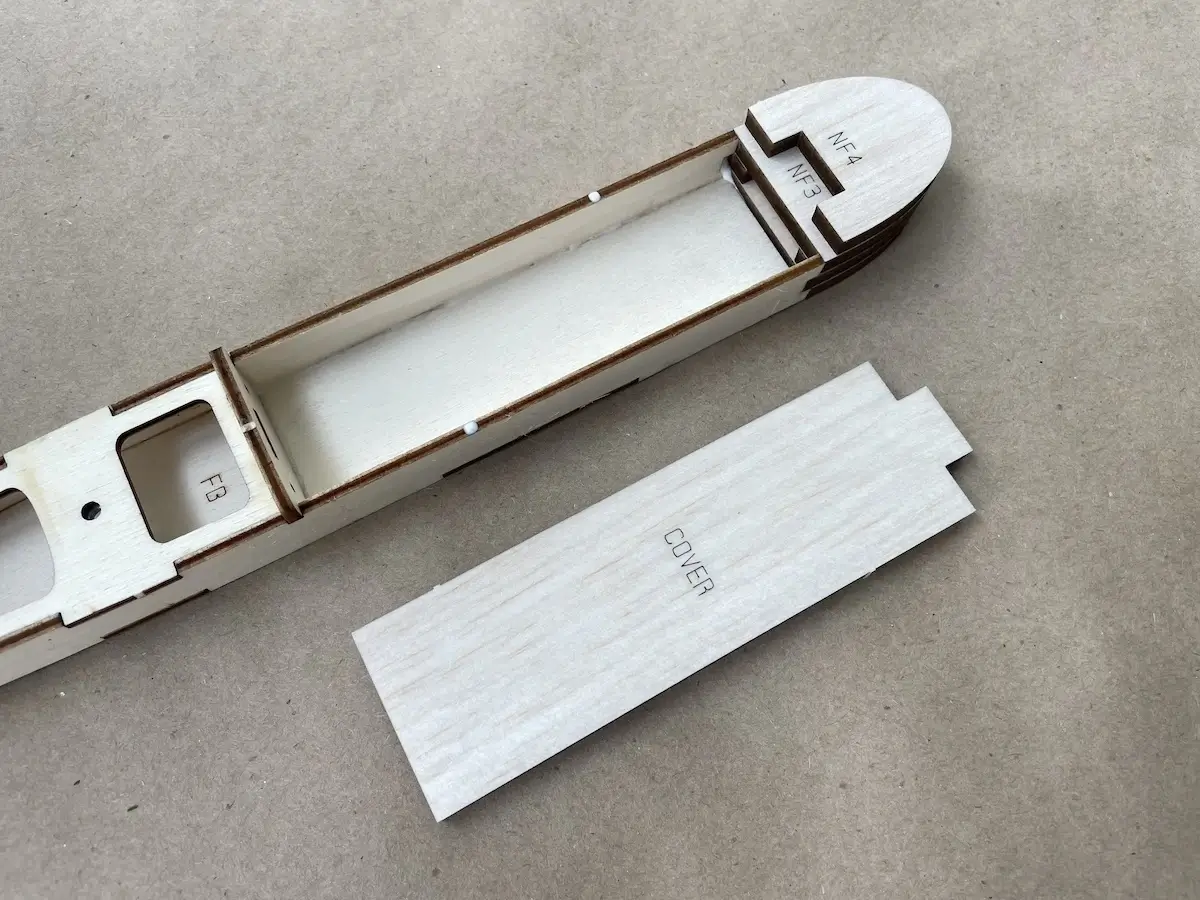
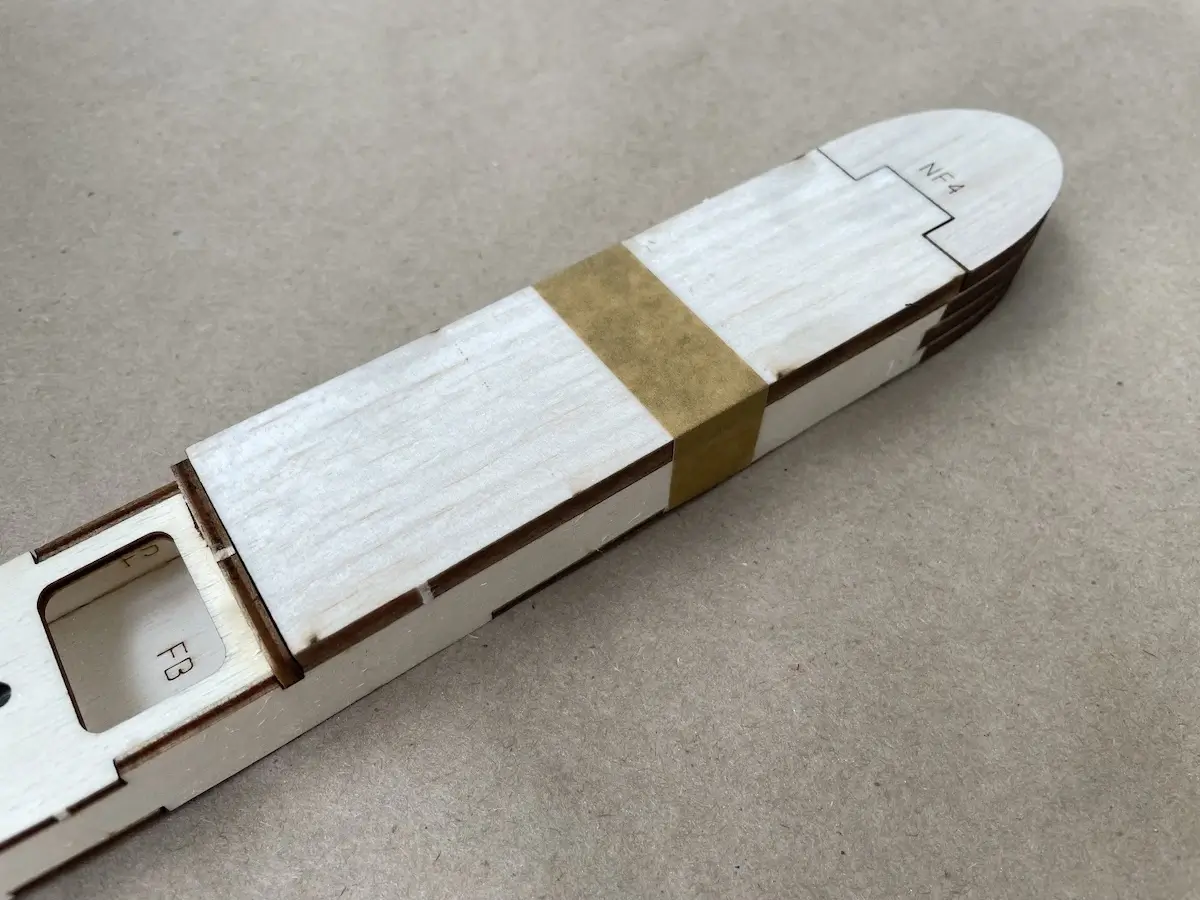
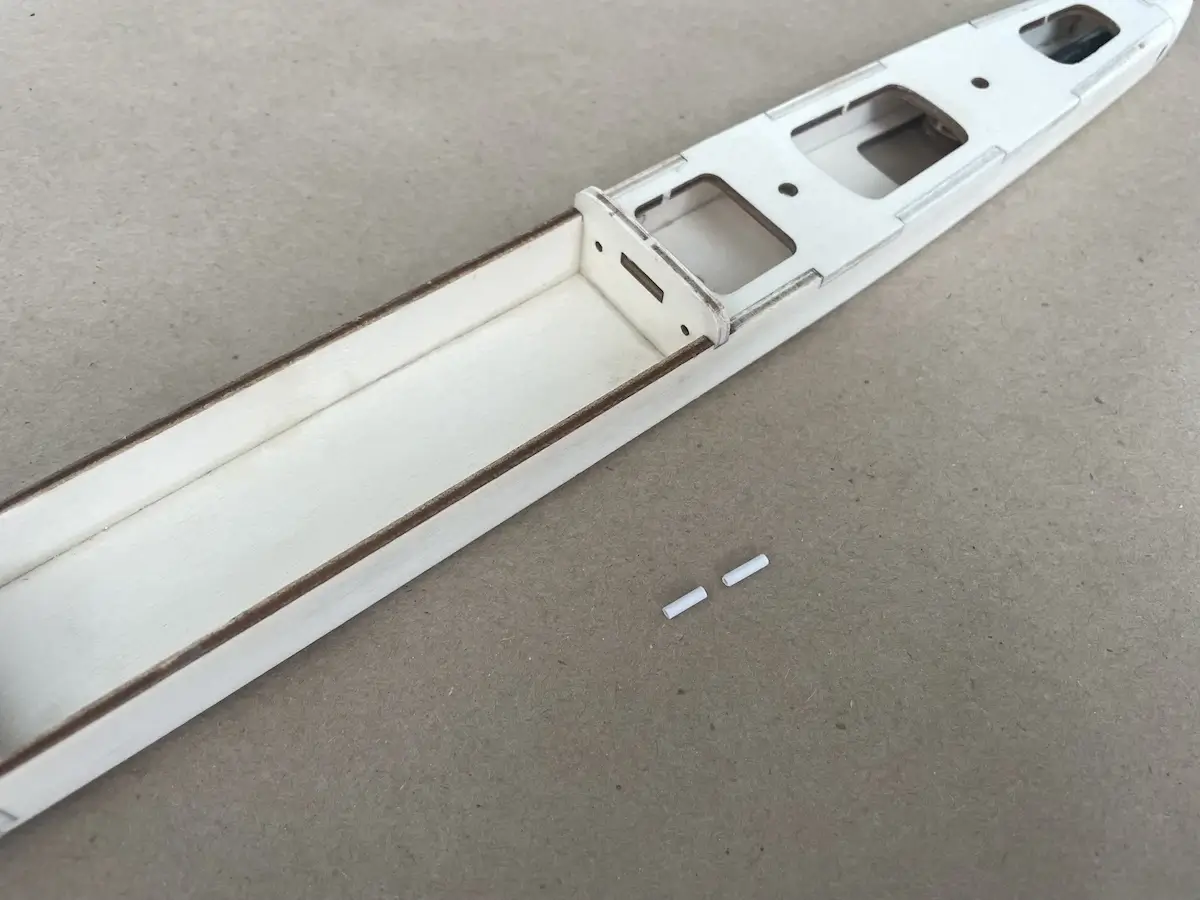
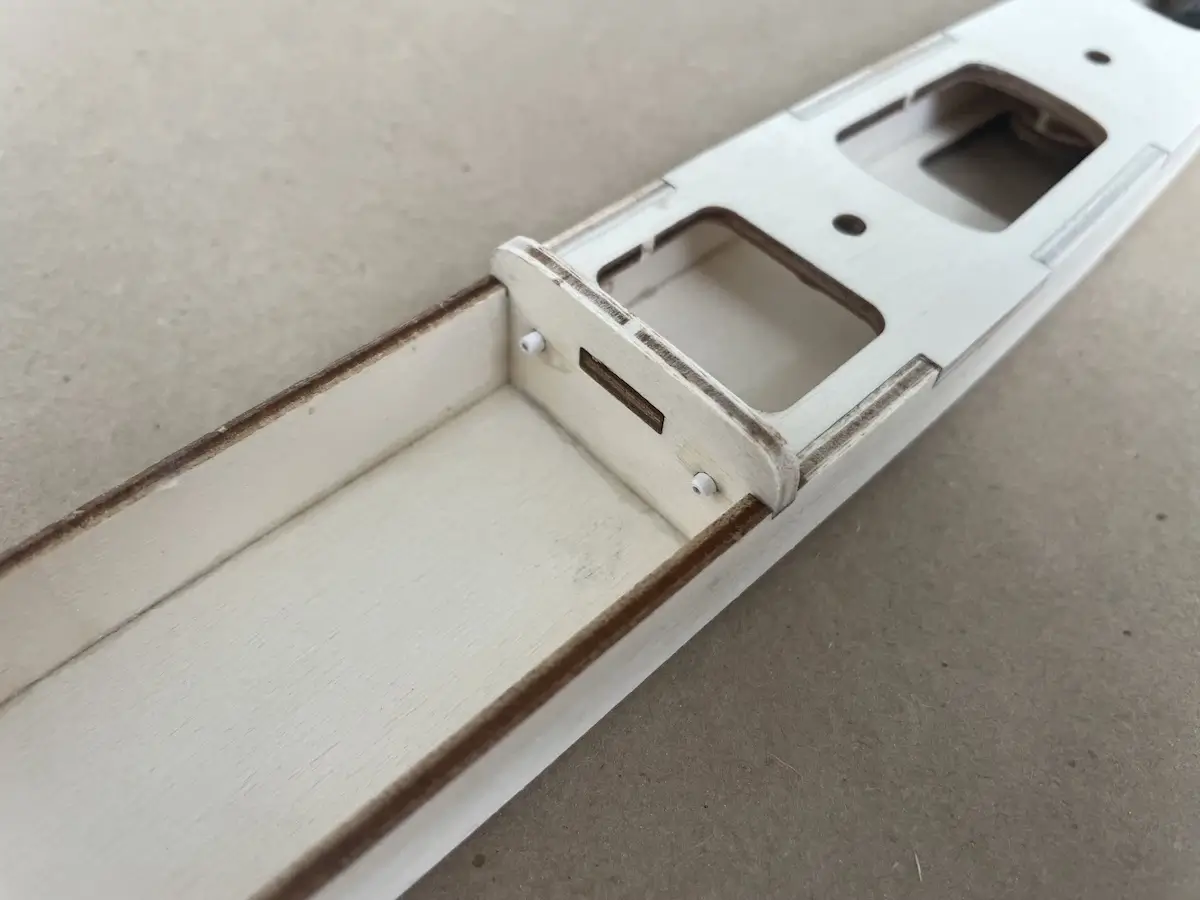
Prepare the parts and assemble them as shown in the pictures
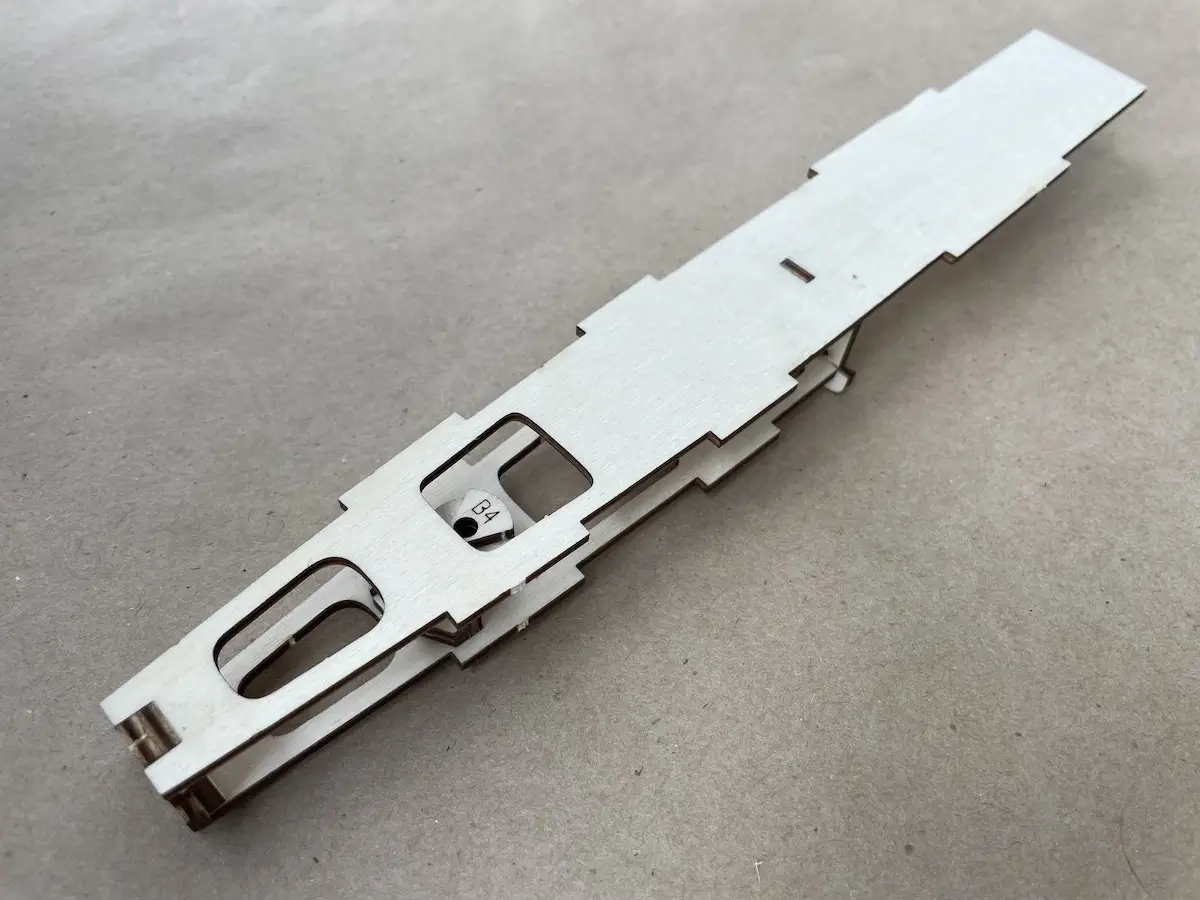
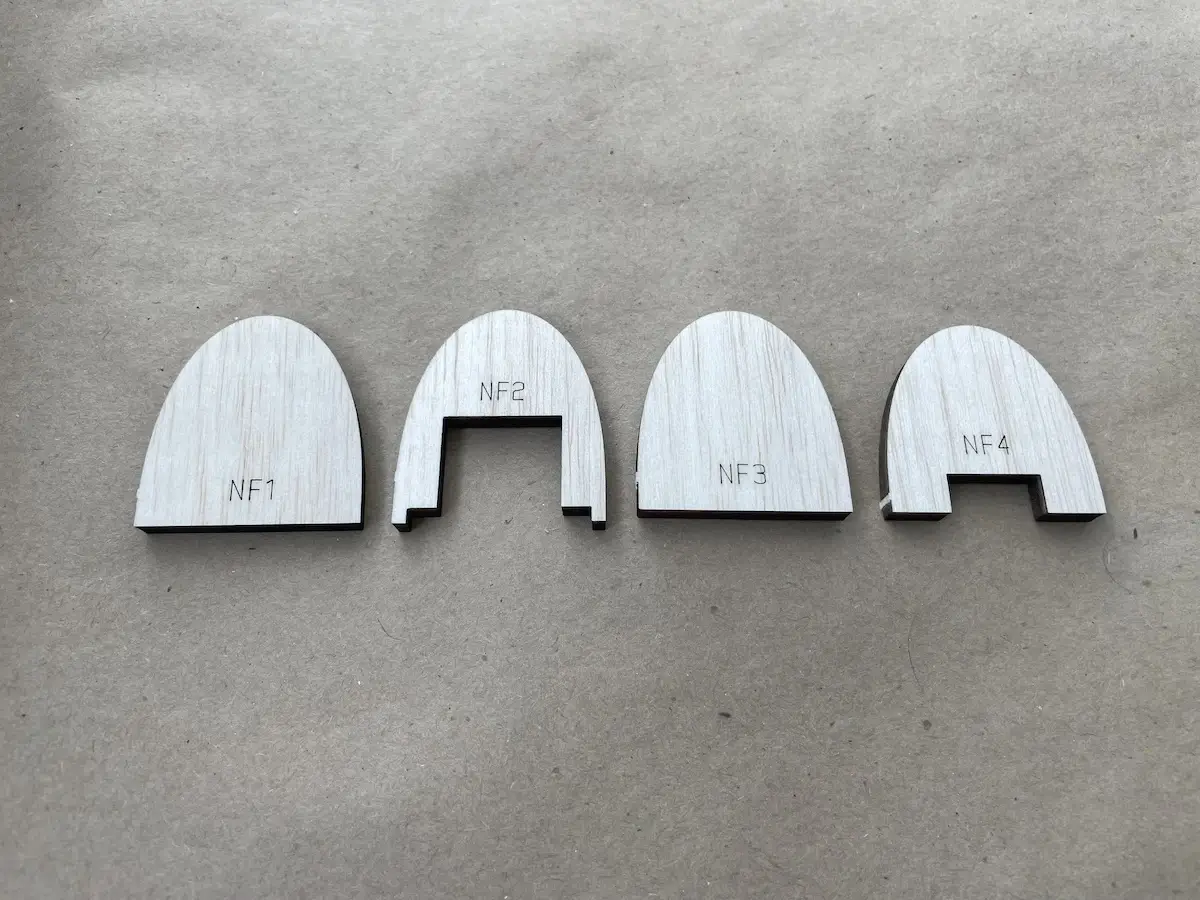
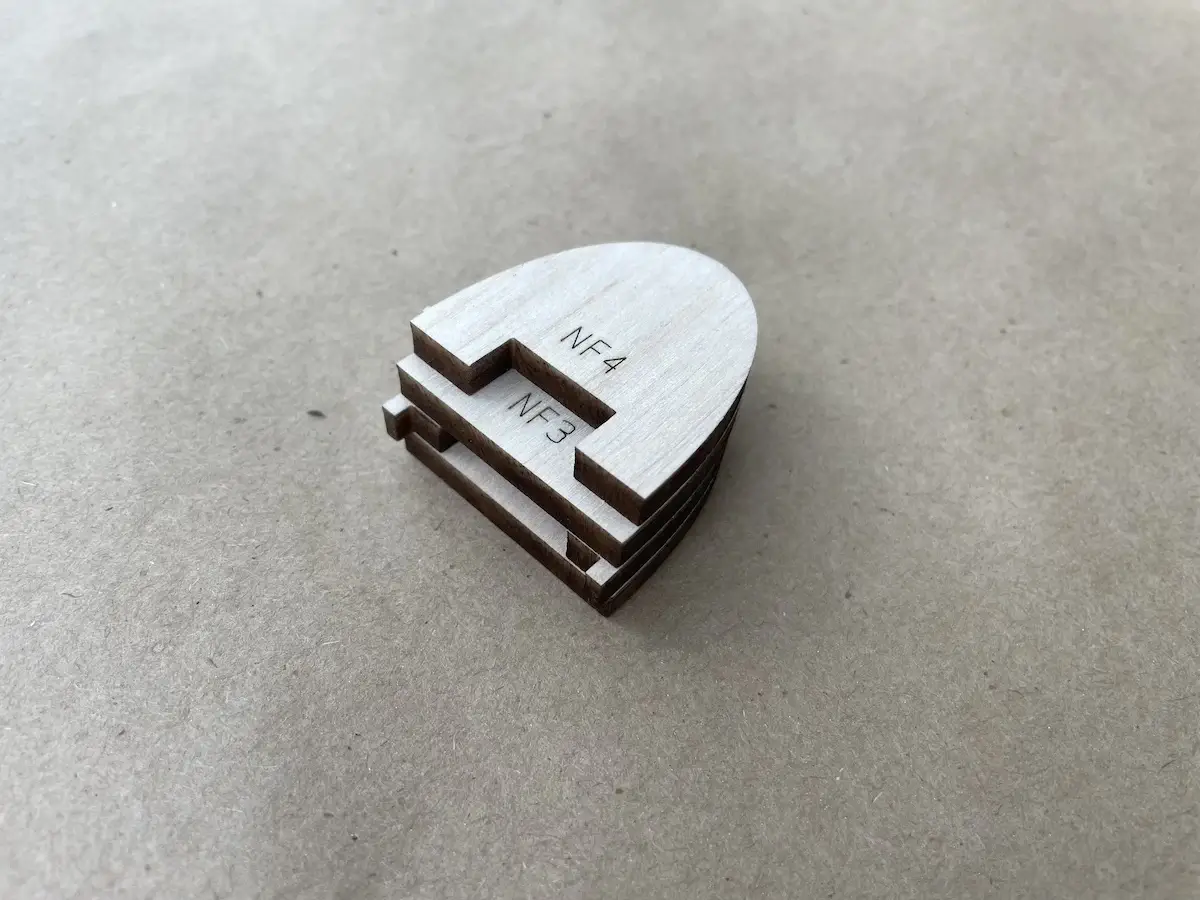
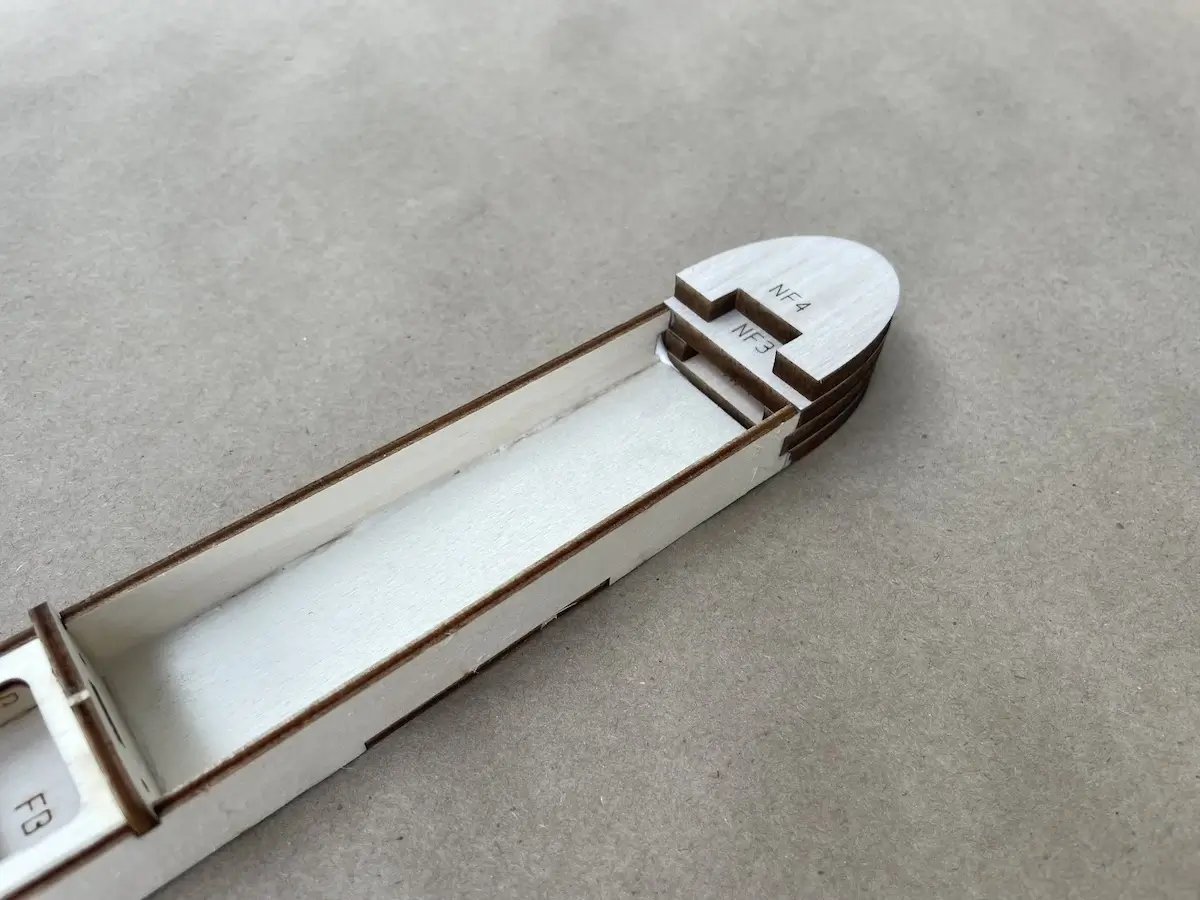
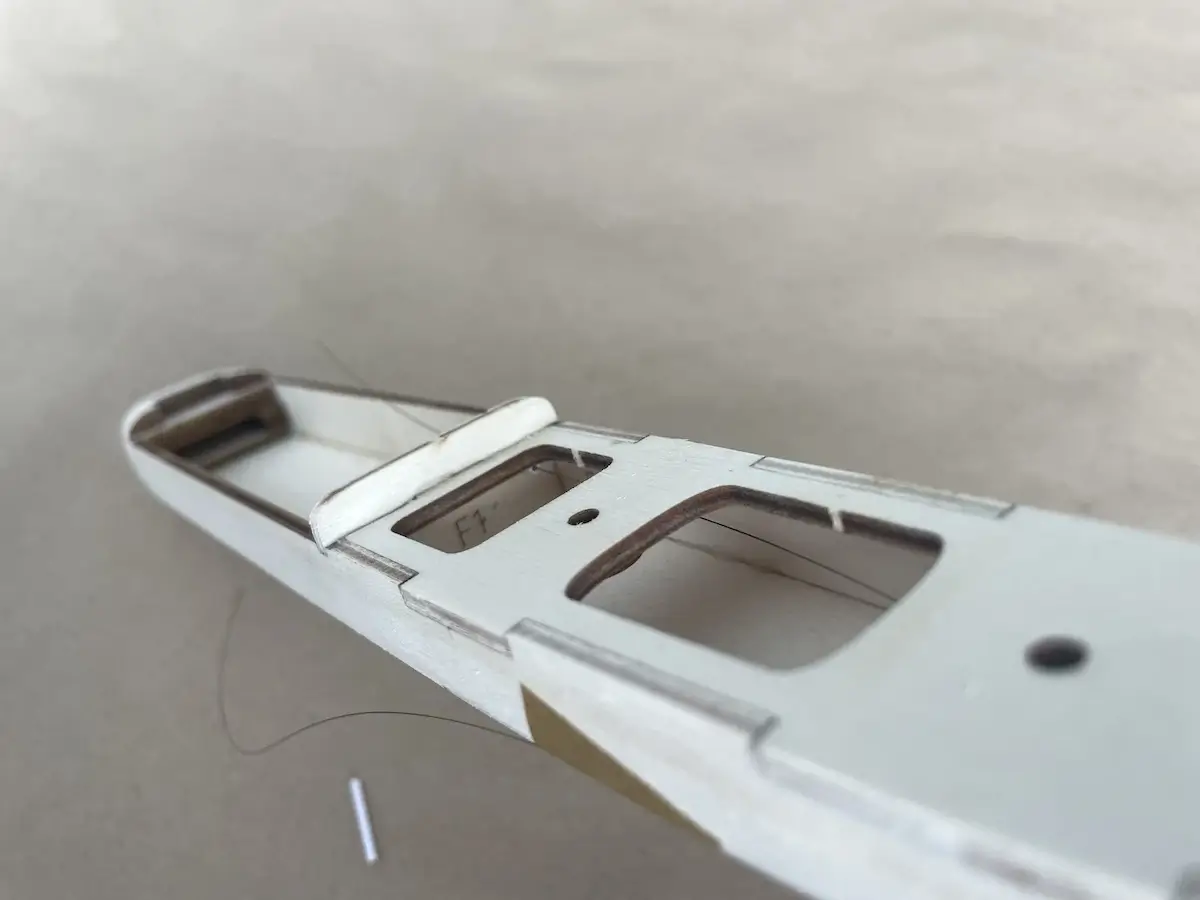
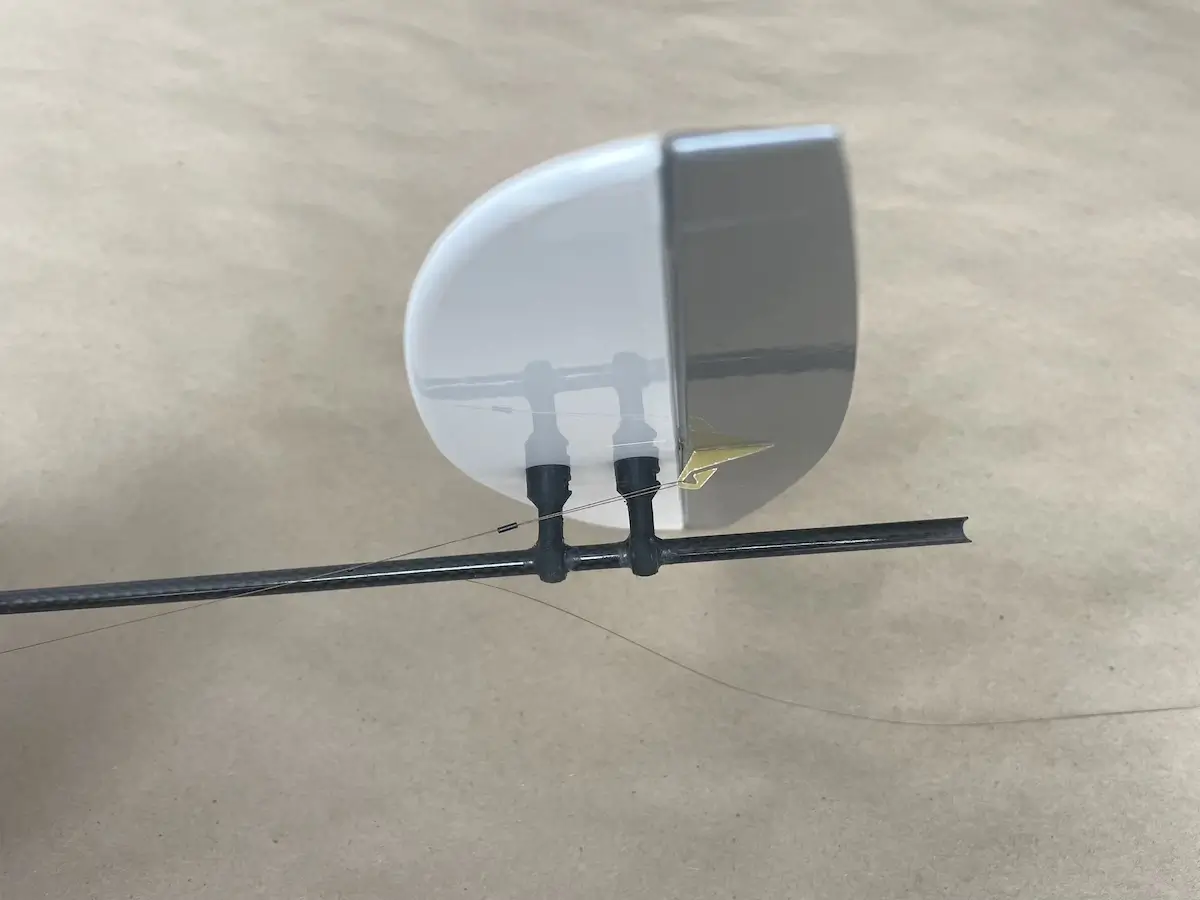
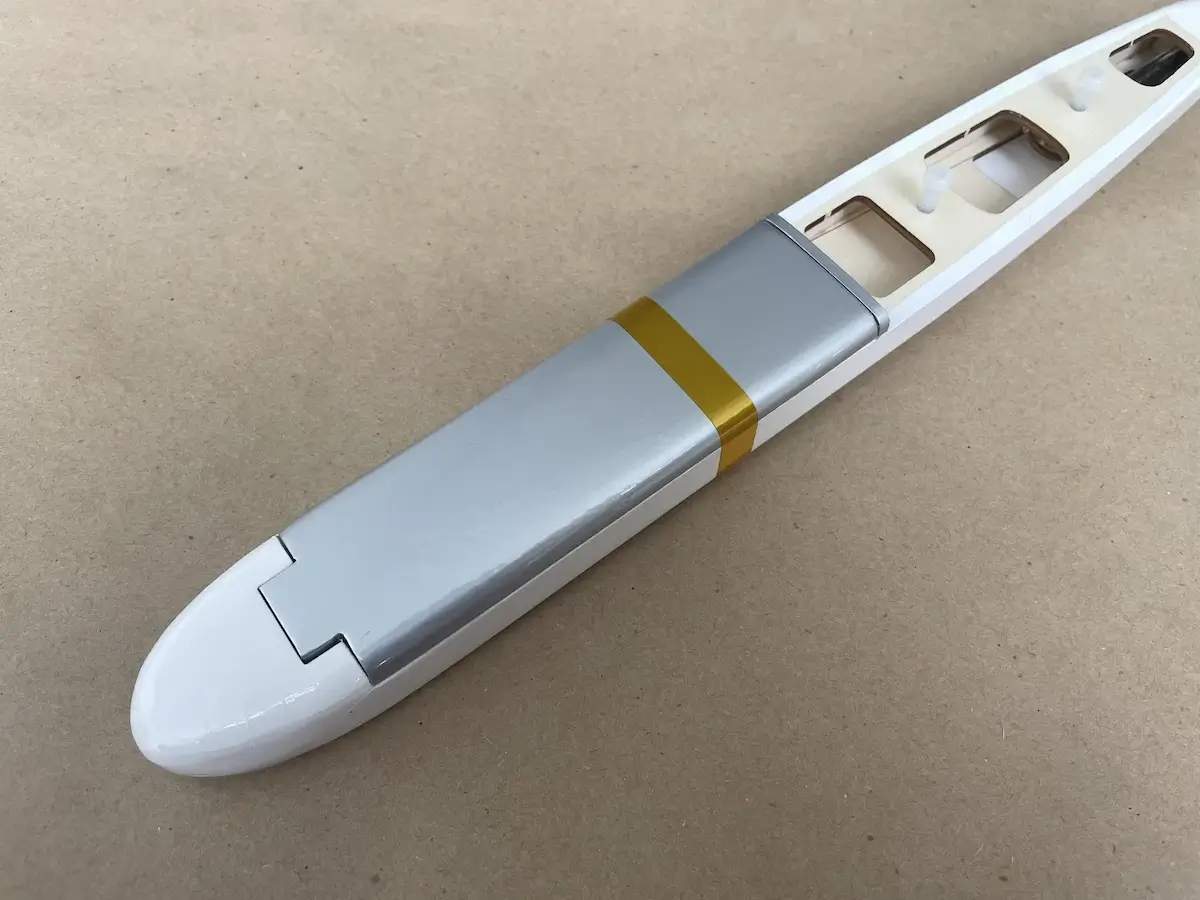
Start with installing the wing mounting nutsInstall the wing mounting bolts and screw the nuts on all the way. Turn tightInstall the wing nut holders making sure that the threads are clear of any glueCenter the rear parts to the top plate of the fuselage, and press them tightInstall the front boom holder in placeThe rear boom holder consists of two partsAlign both parts on the future boom, to make sure the opening are dead straightInstall the “firewall” onto the top plateInstall the bottom plate in place. Flip it upright from this stage and continue working on a flat surface, to keep the fuselage nice and straightGlue the nose fillers together. The cut out in the NF2 part is for the ballast, so keep this area clean of the access glueInstall the side walls in placeNow, install the nose fillersApply just a few drops of fat glue on the side walls to temporary fix the cover in place. You will need to break this joint after shaping down the fuseFix the cover in place and let it cure before proceeding
Part 3. Tails & A Tailboom
Since DLG pilots may launch gliders with either left or right hand, you can build the Lull DLG to suit both categories.
Before starting this part of the build, you need to decide on what hand you will use for launching.
Most DLG pilots launch with their right hand, so if you are like that, follow along as the pictures below show how to build the glider to perform best for the Right-Hand launchers.
For Left-Handers, you will need to alter the positions of the following:
Rudder hinge – left on the pictures below to the right side of the fin
Rudder control horn – should be on the left side for Left-Handers
Elevator control horn – flip the entire stab from left to right to put the control horn slot on the right side
Pull cable exits – mirror the positions of the holes on the boom
For more info, please refer to the hints on the printed plan provided with the kit.
And make sure to build the tails
Also, in this build, we’ll be using Z-Stitch, aka Crossover hinges, made of a covering film.
For more info on this type of hinge, please, check the video below and scan through this tread on RCGroups.
So, make sure to build the tail boom and tails following the desired side of the launch peg.
Removable Fin?
Building the Lull DLG, you will have an option to make a removable vertical fin.
Please note that choosing this option will make your glider heavier.
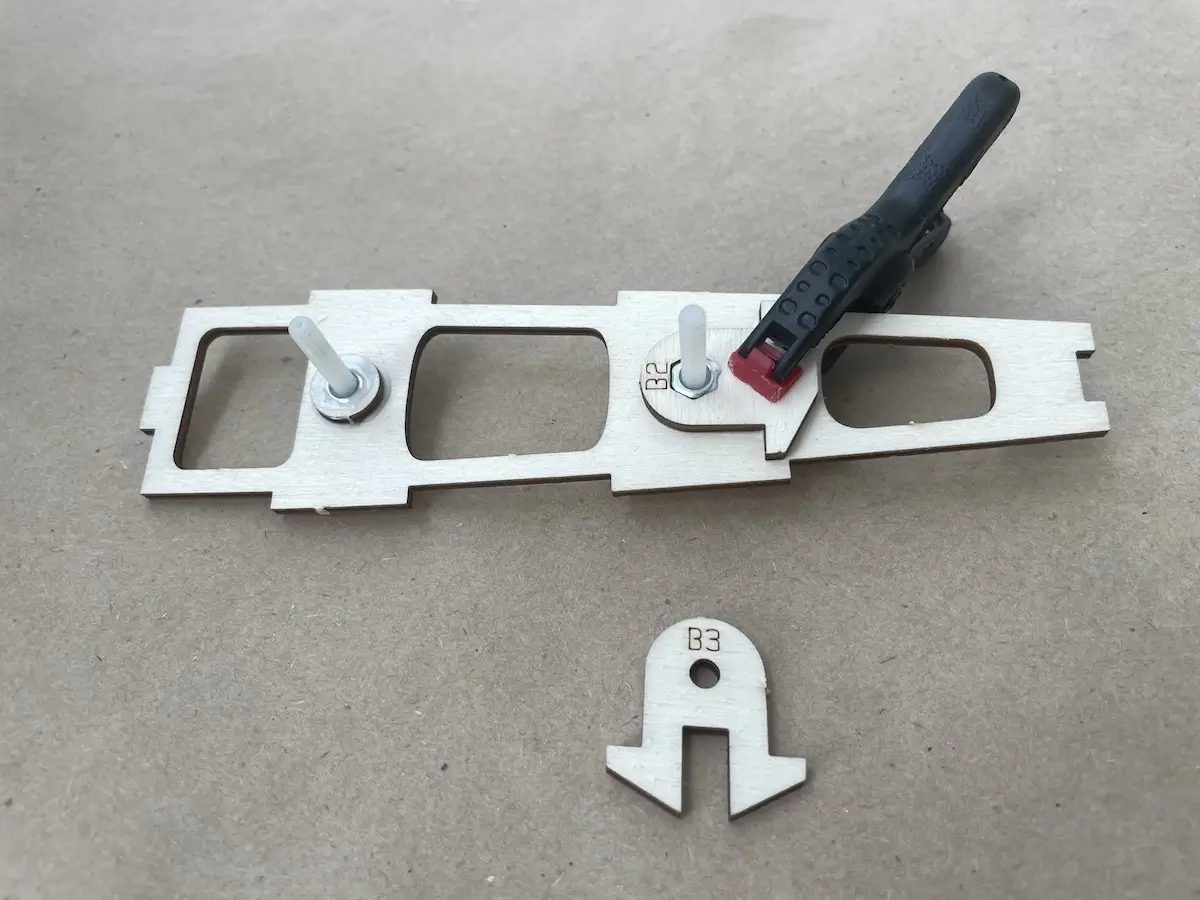
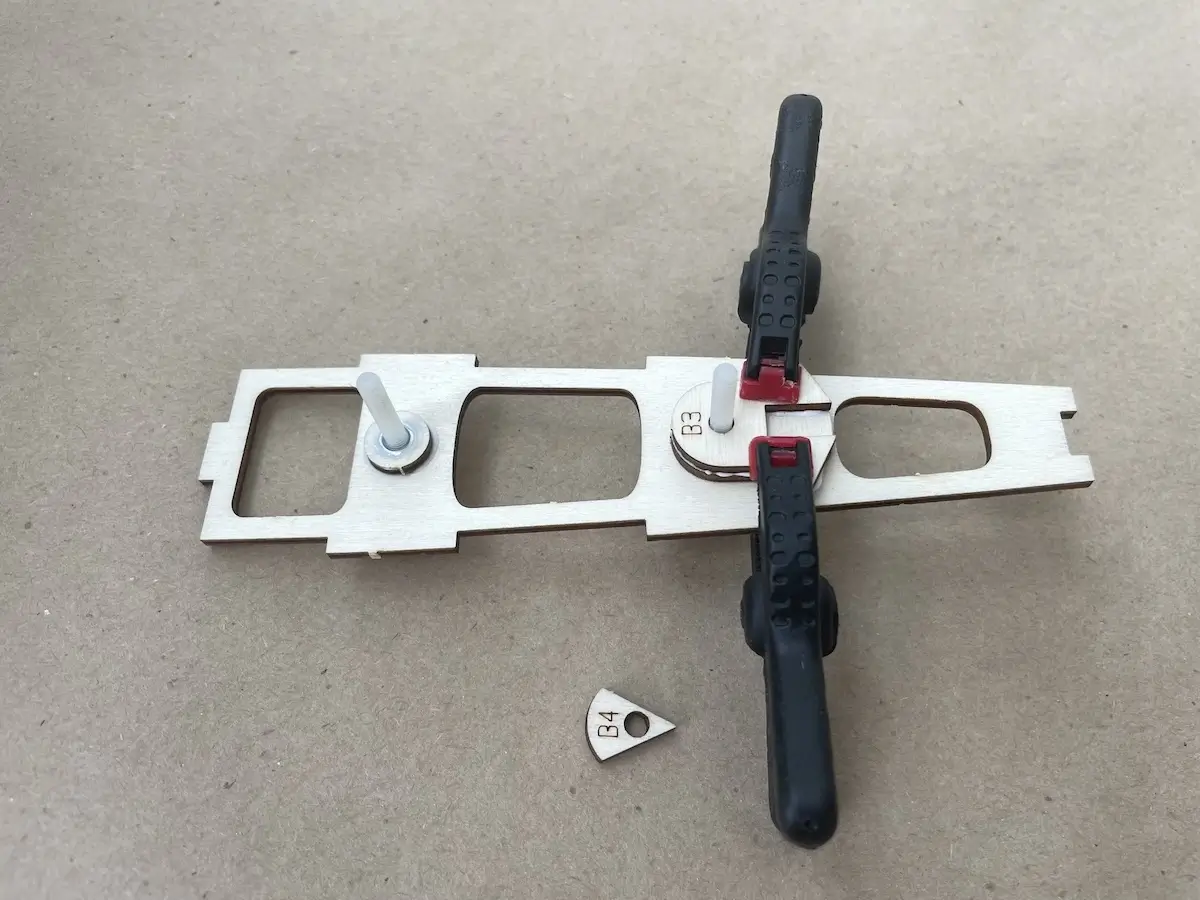
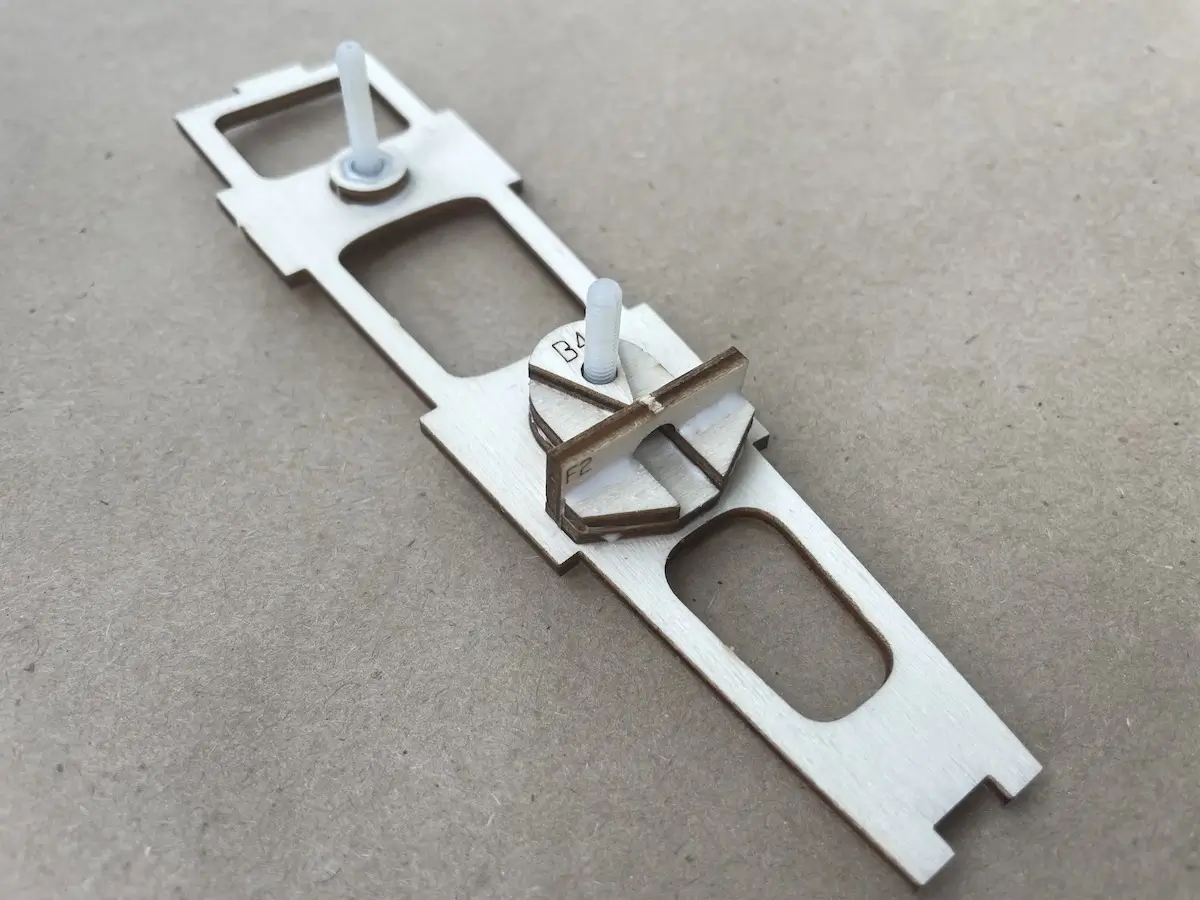
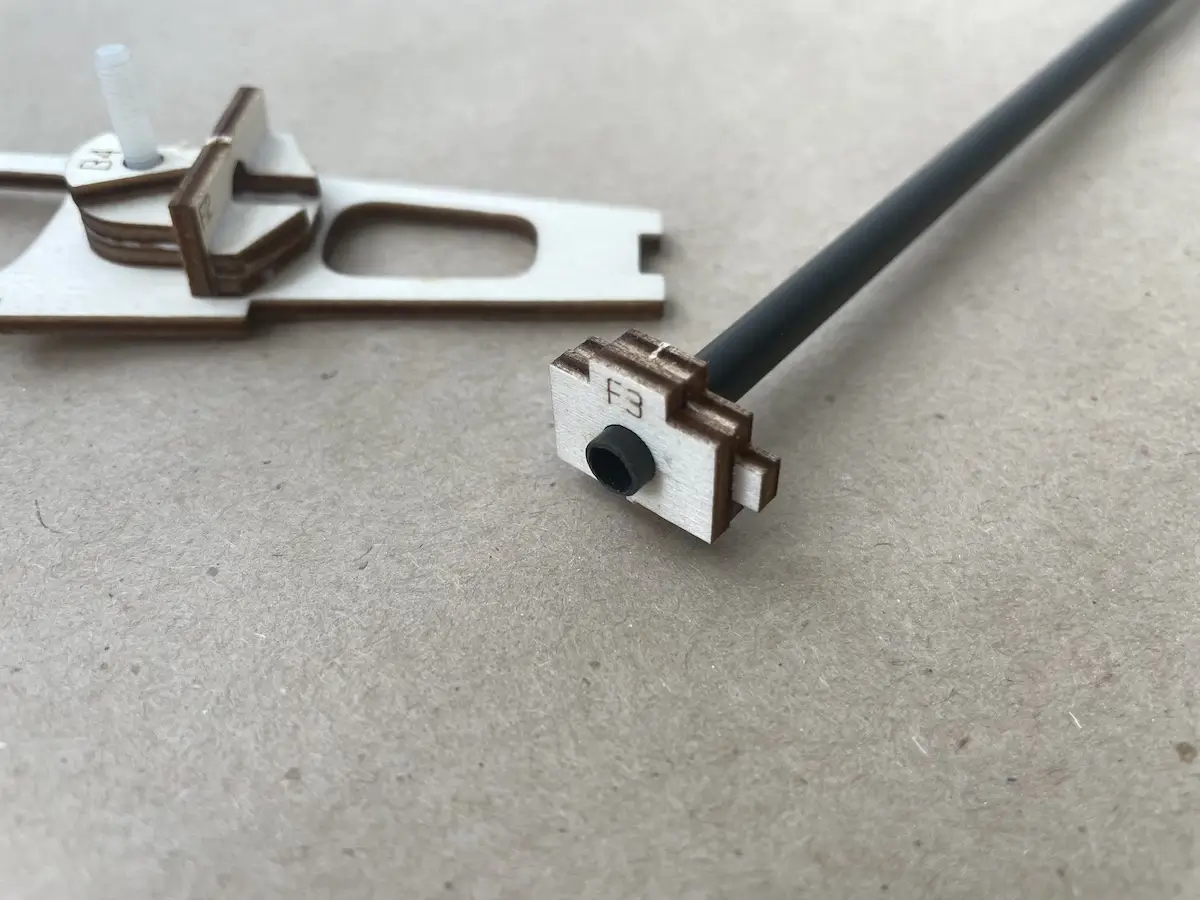
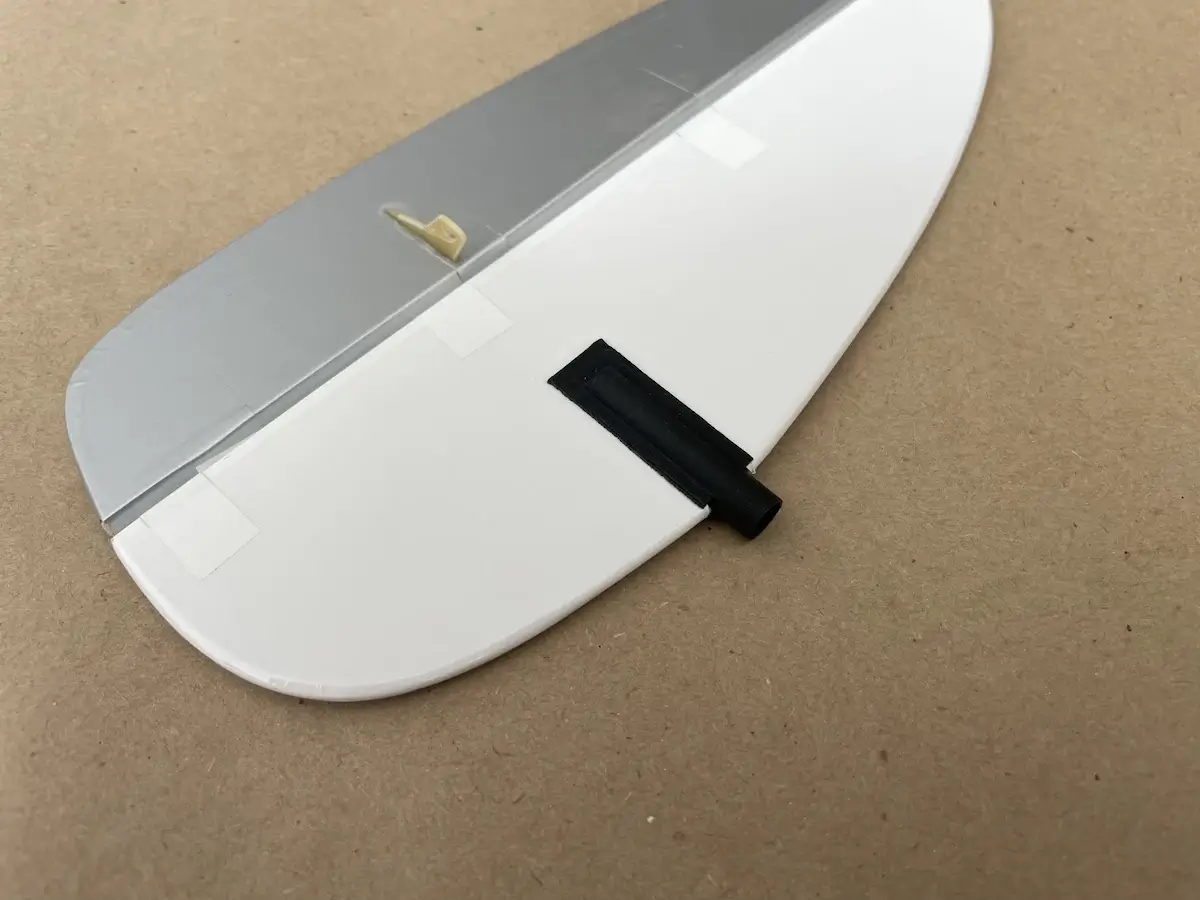
For this purpose, you must 3D-print a mount and use it as shown in the image sequence below.
The fin mount will increase the weight of the tail, which will also lead to adding nose weight for a correct CG.
So, we recommend going with a permanent tail install unless you strongly need your fin to be removable.
The latest kits will be supplied with the updated stab mount, which is lighter, stronger, more compact, and easier to assemble. In addition, it also allows for an easier under-the-boom tailplane installation.
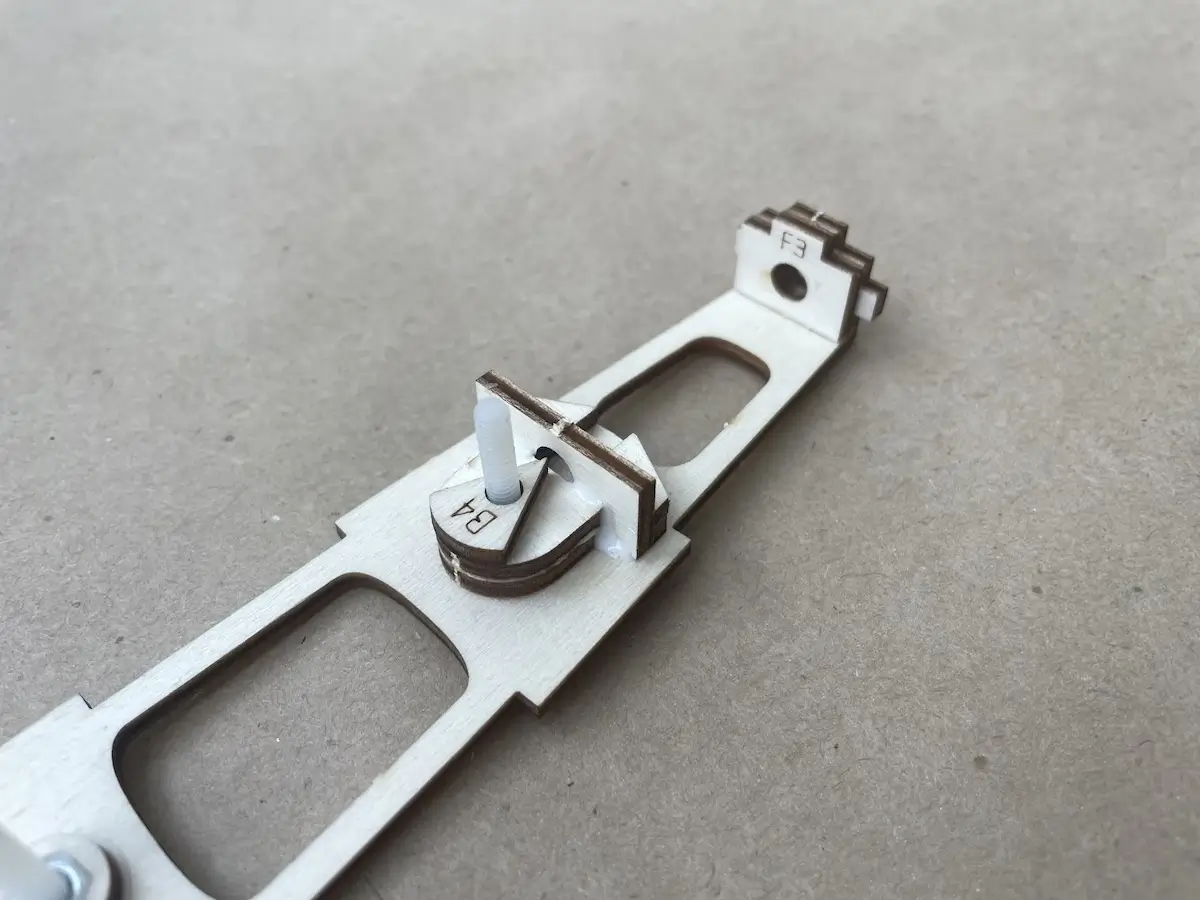
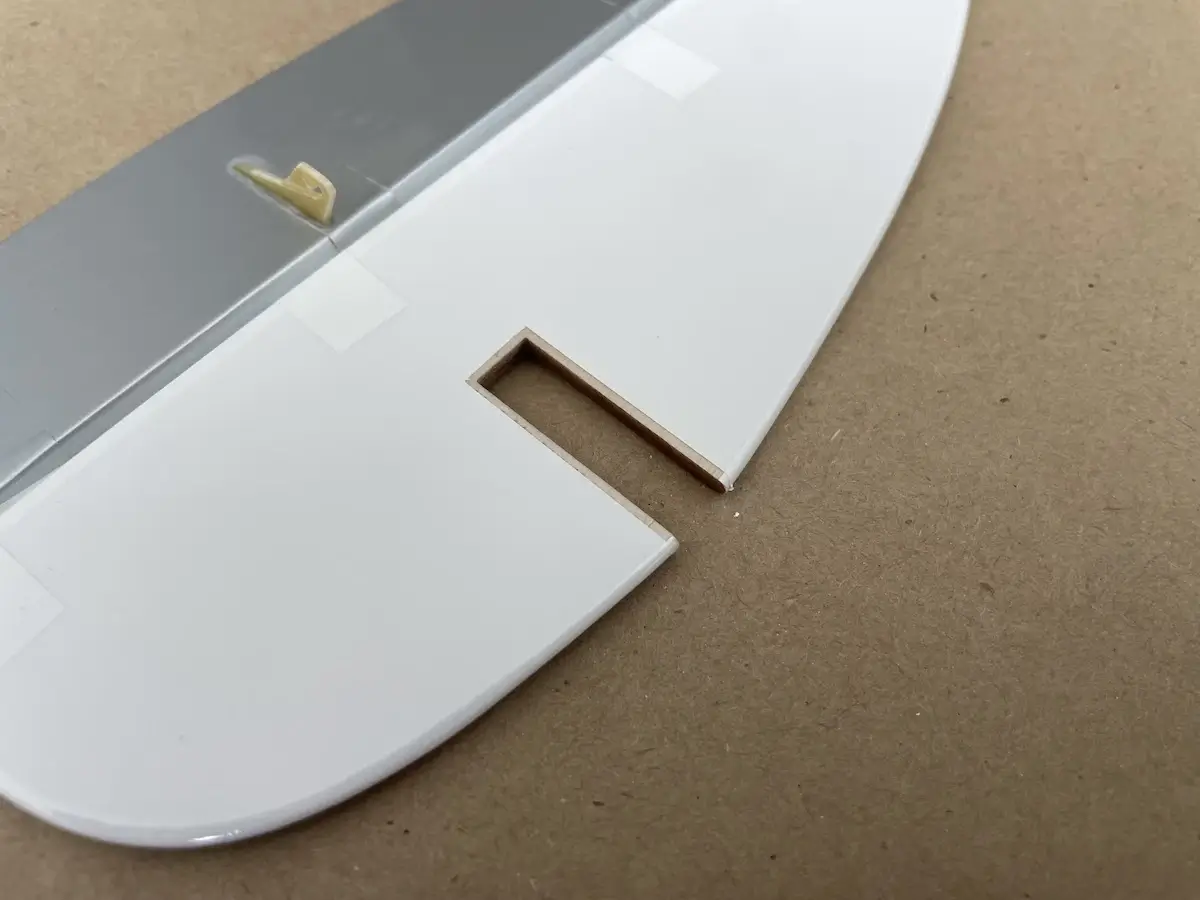
If you choose to use the mount, expand the opening in the fin using the laser cut marks as guides and cut the central “pin” from the slot as well.
The pictures below show how to build the Lull with the removable fin.
So, back to our build:
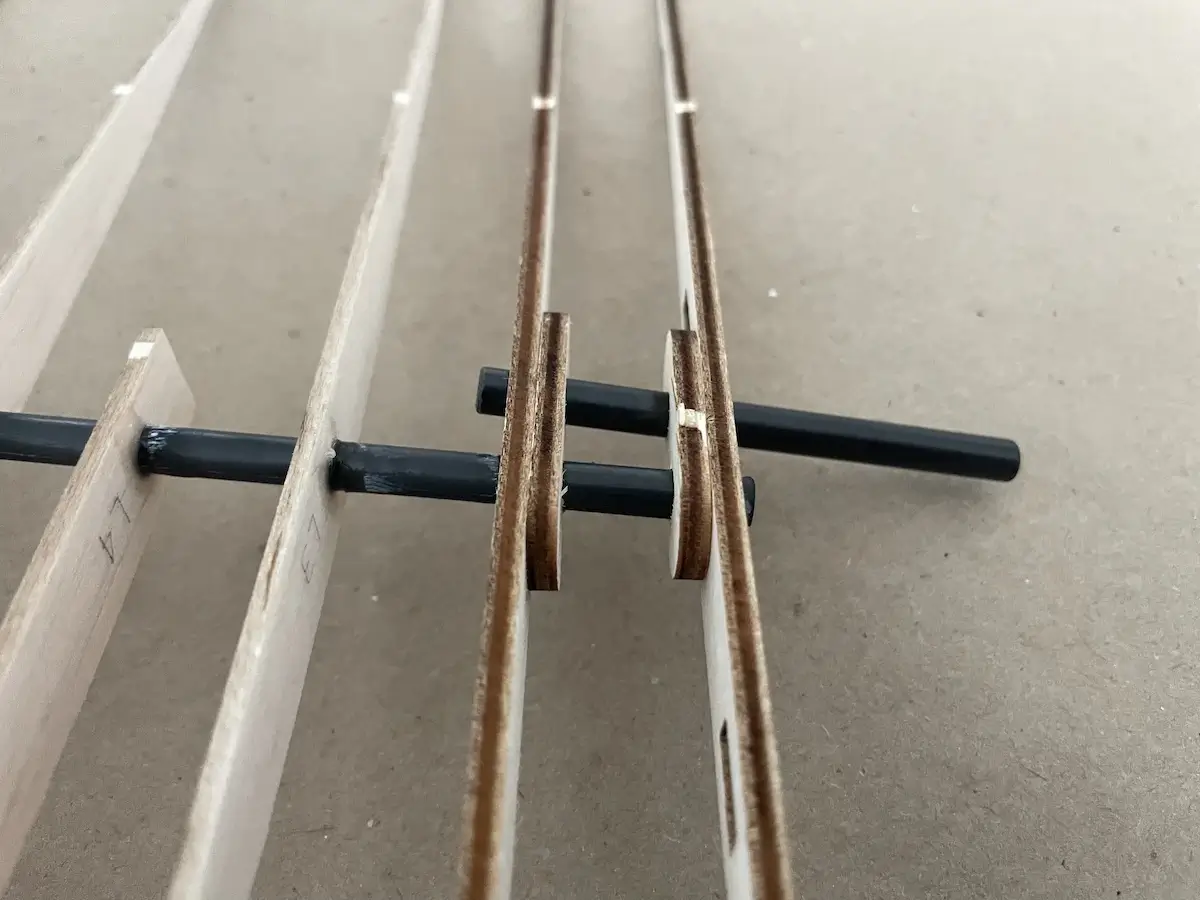
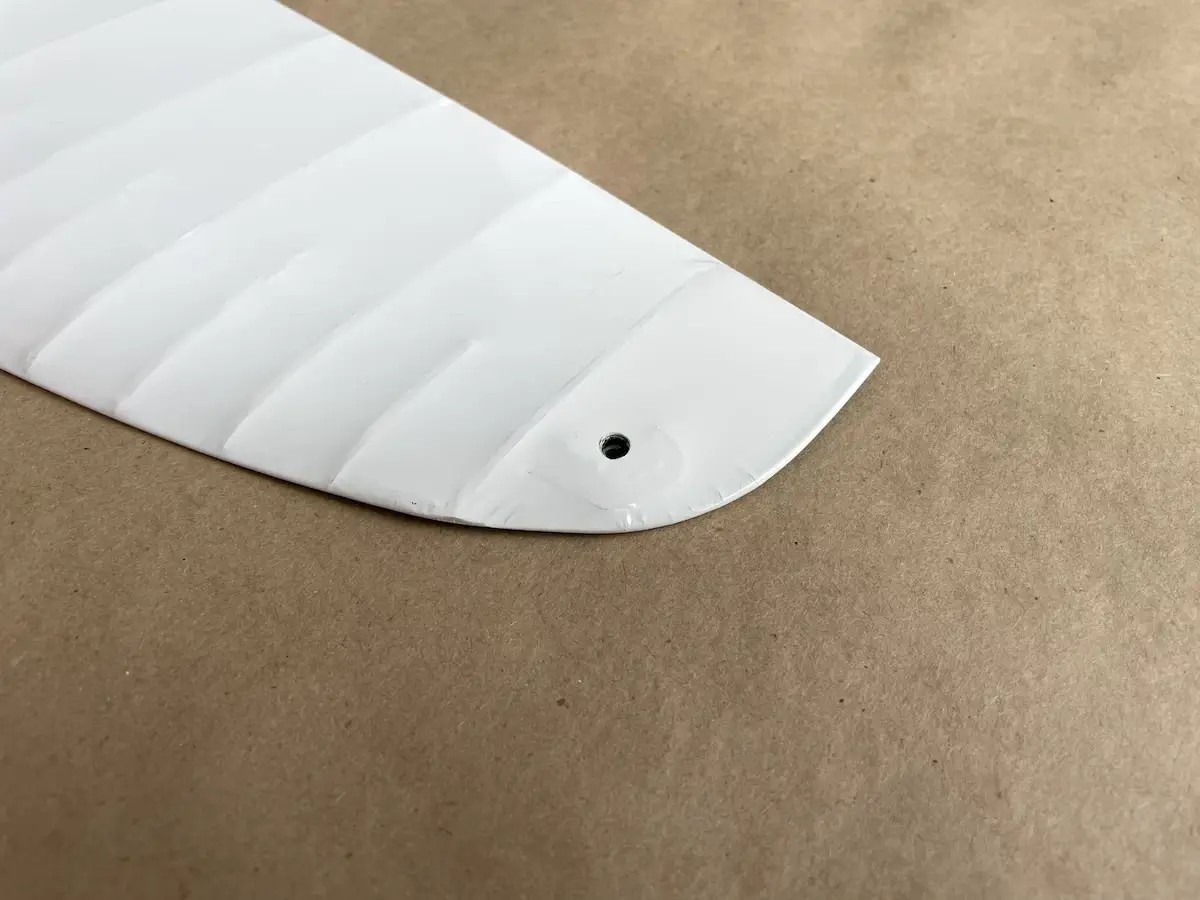
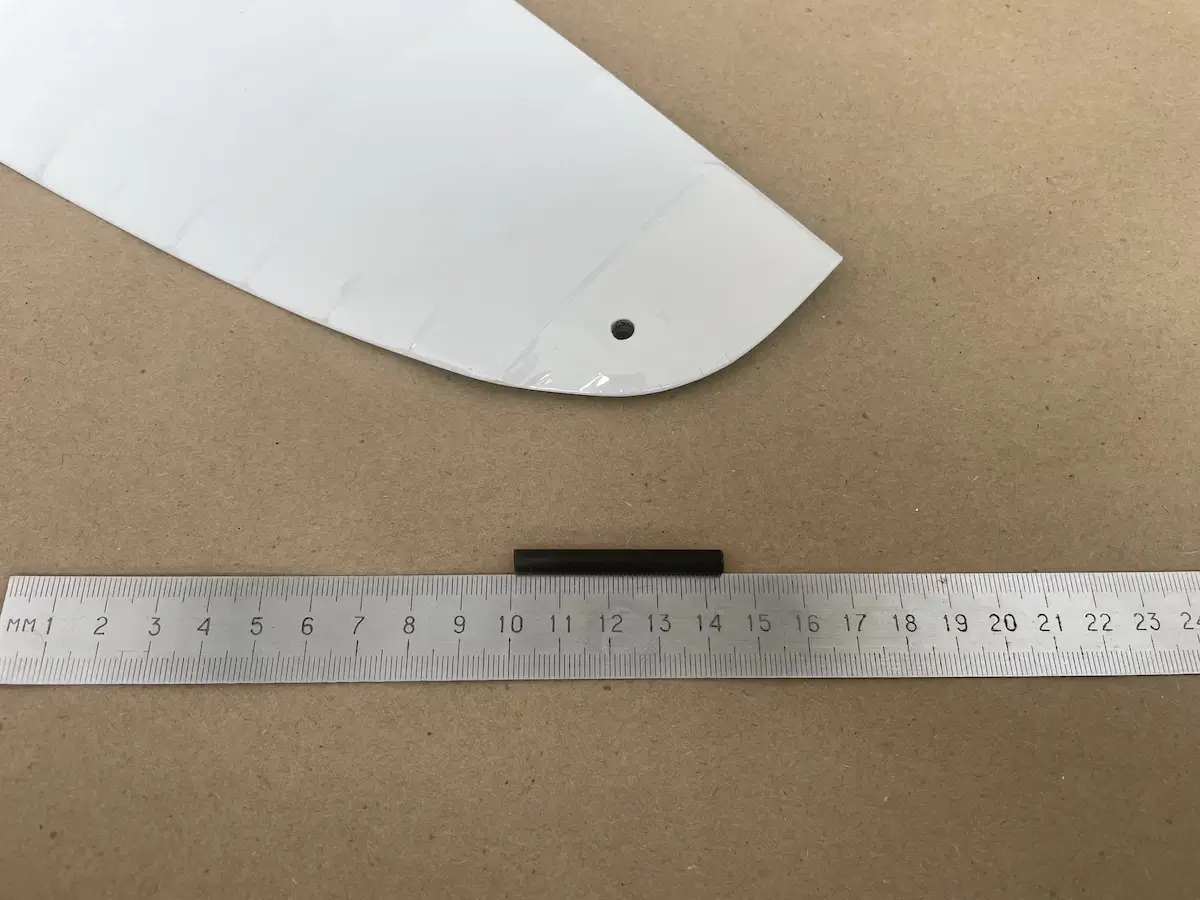
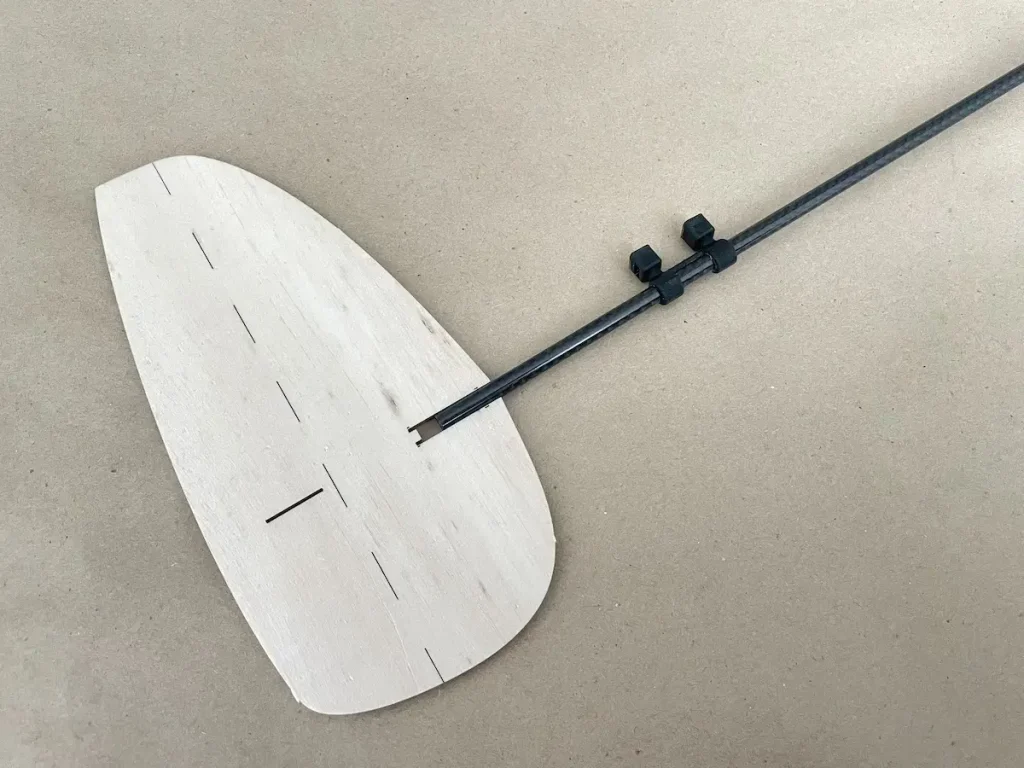
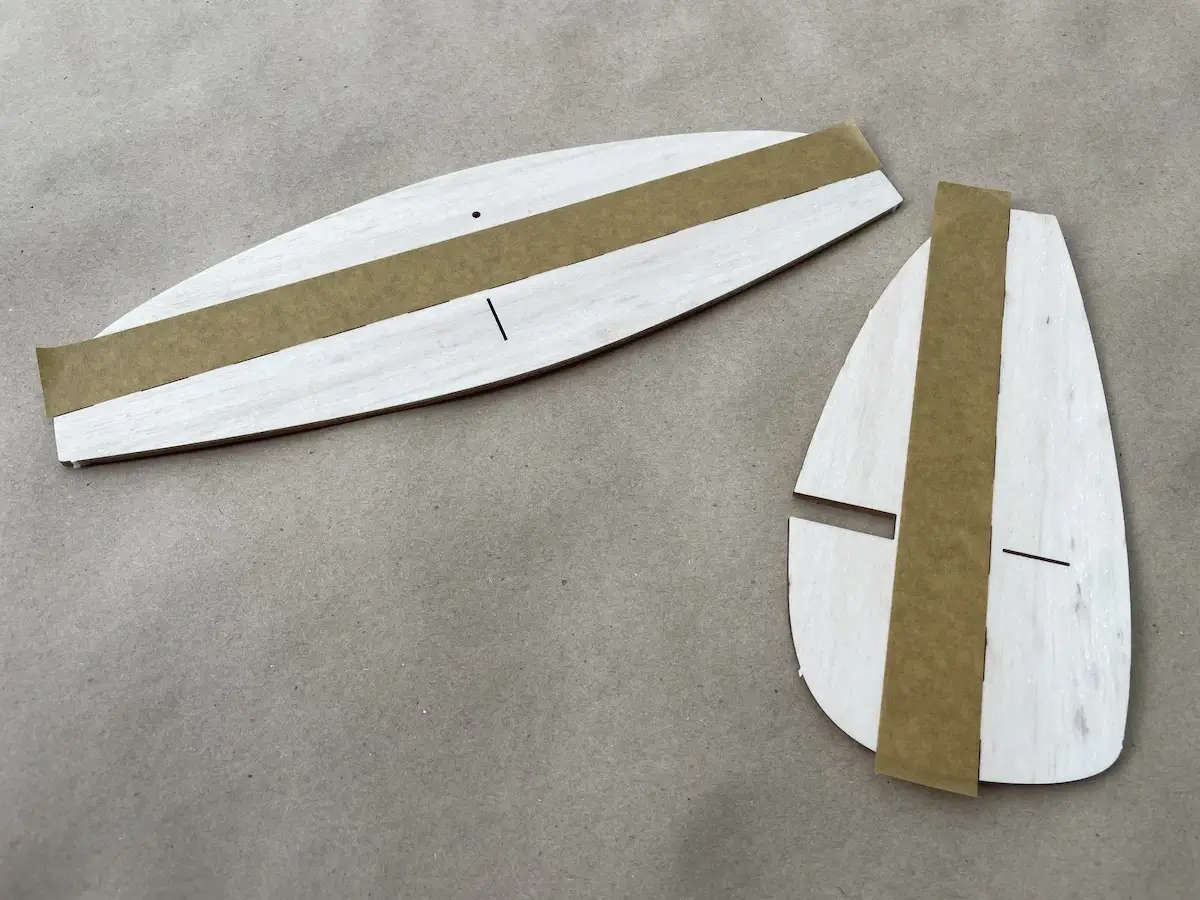
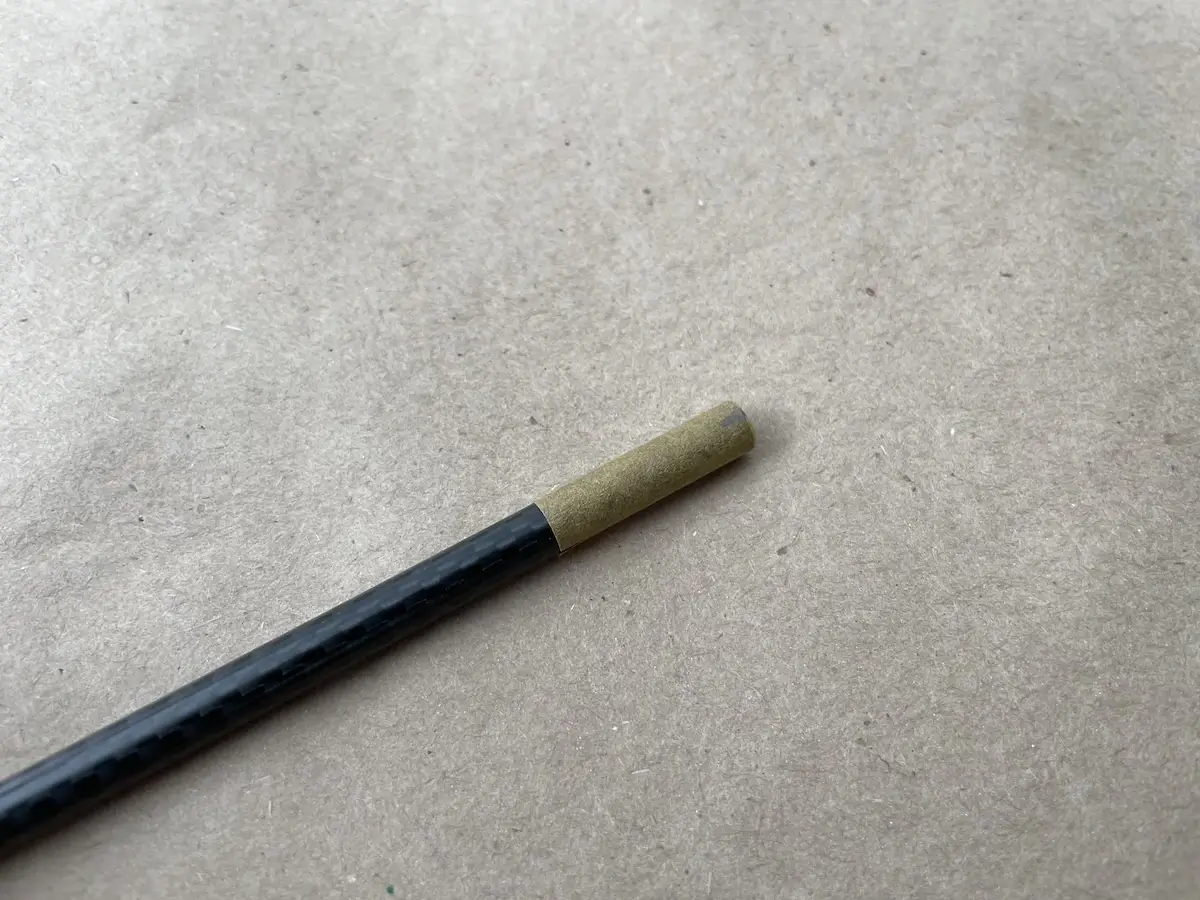
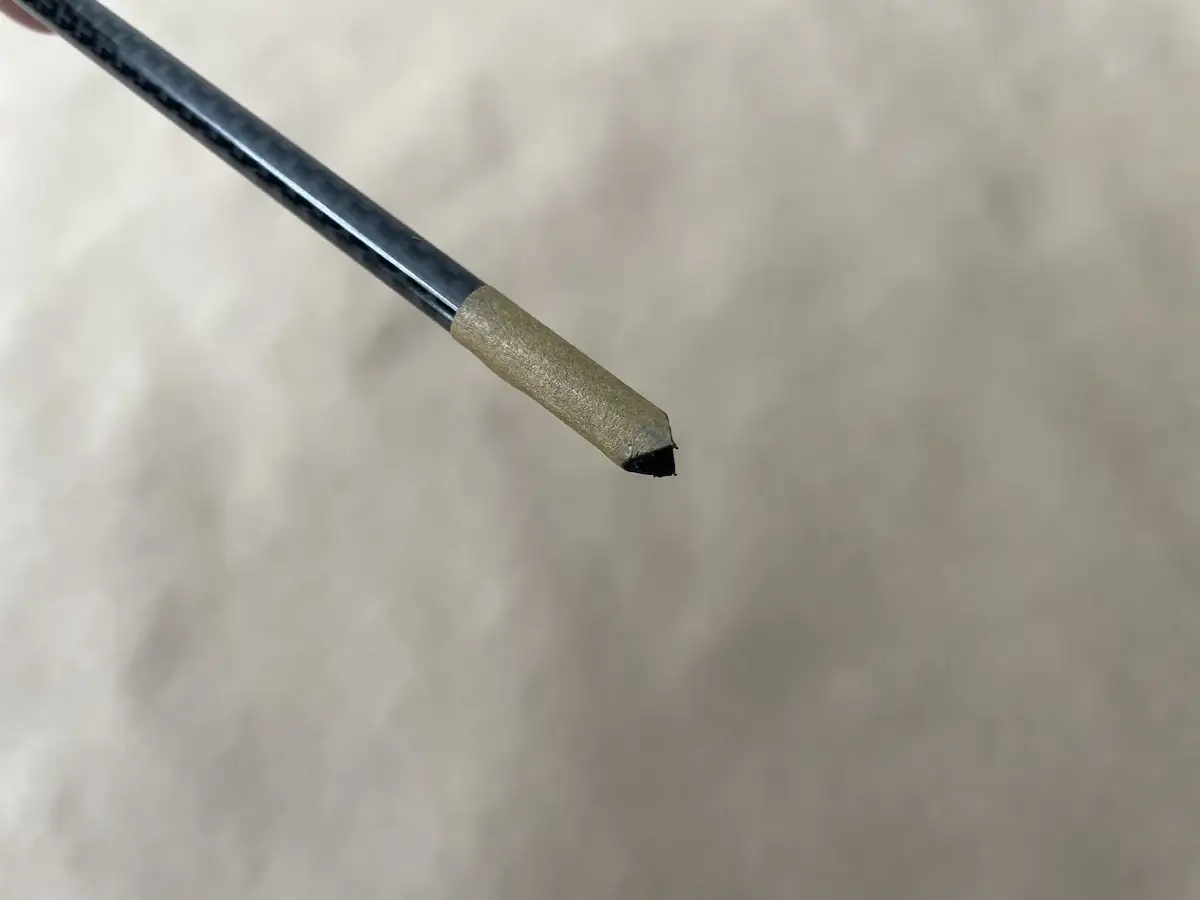
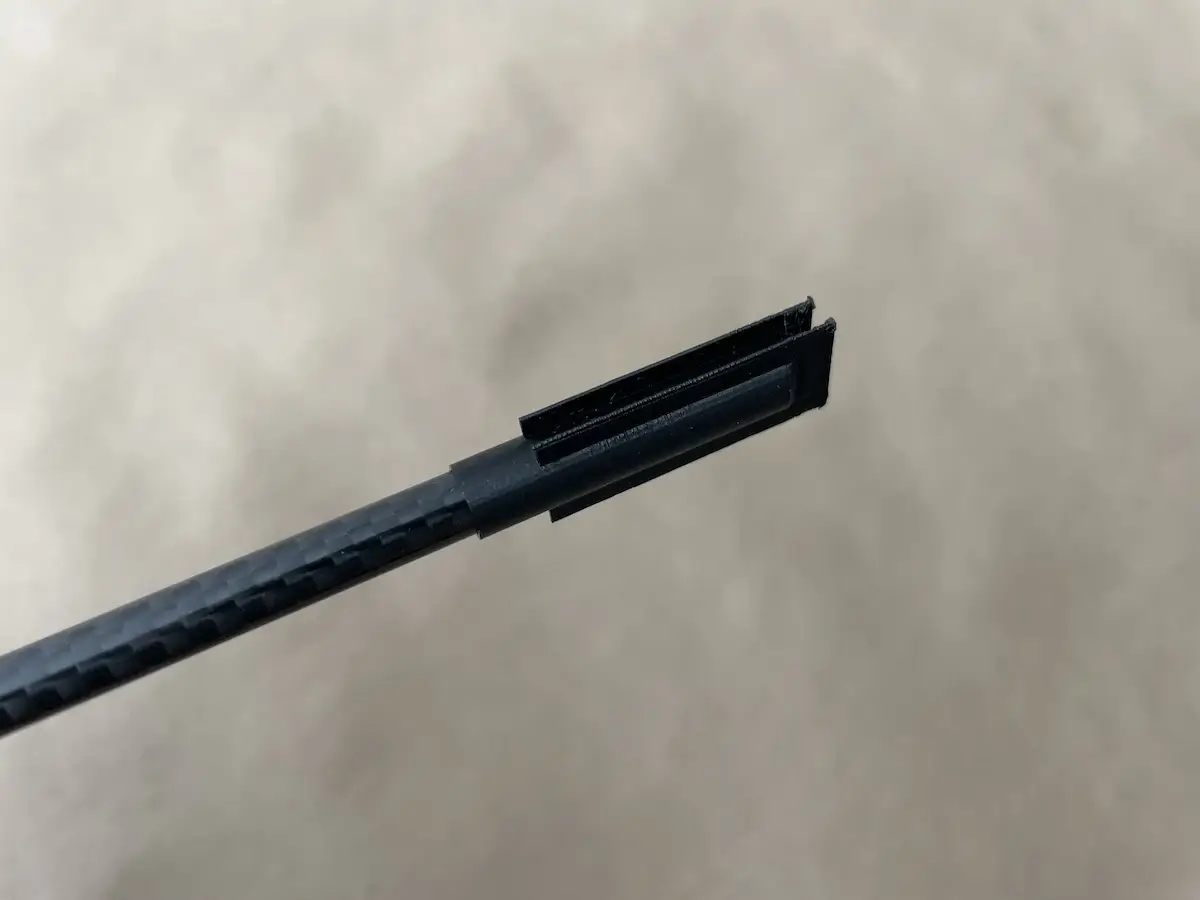
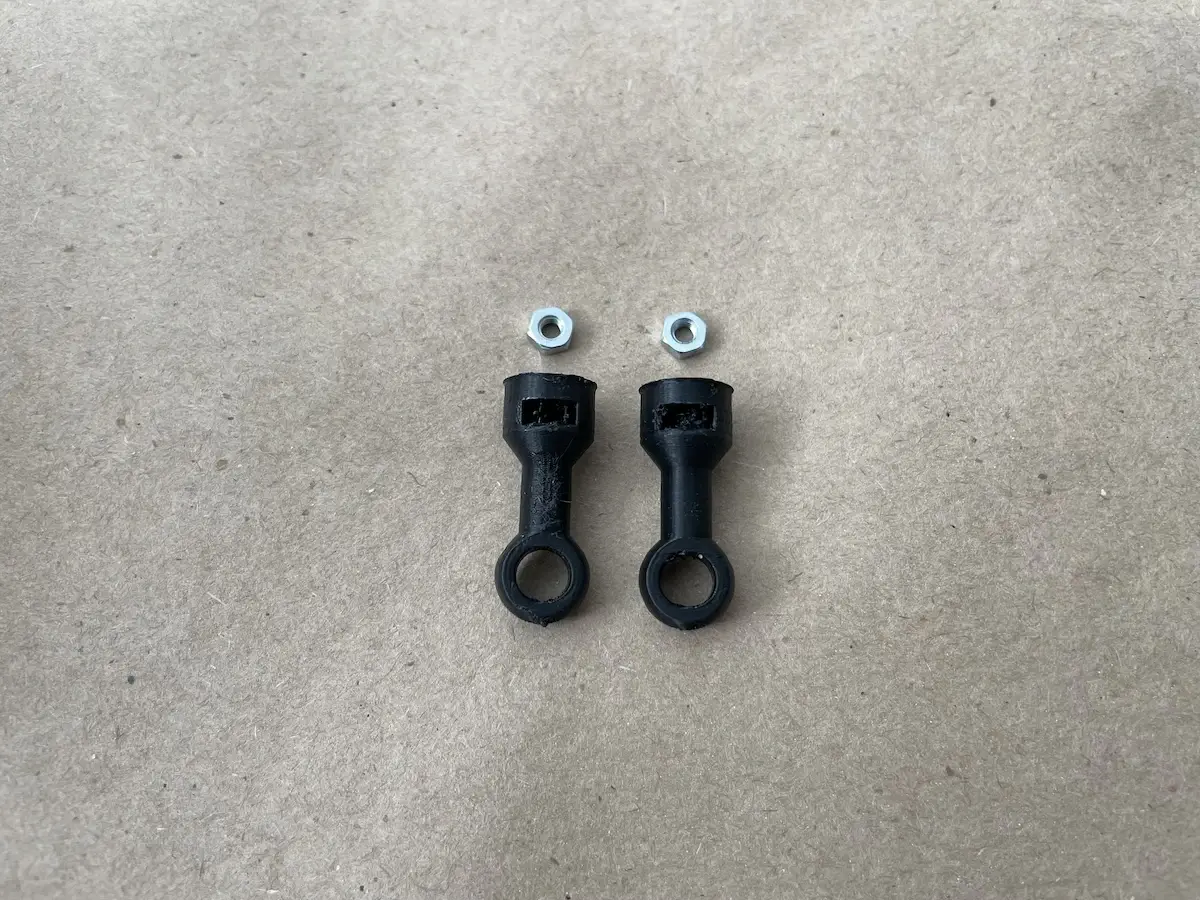
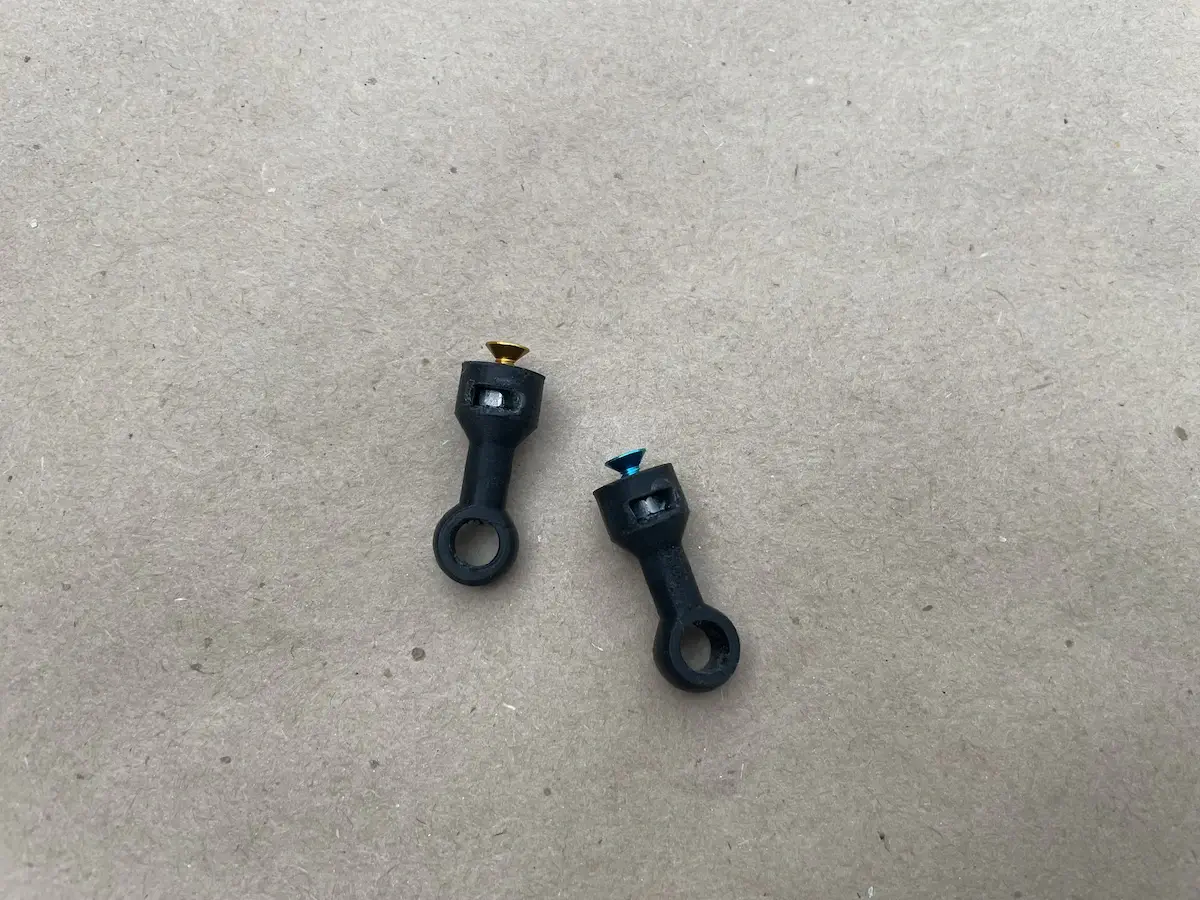
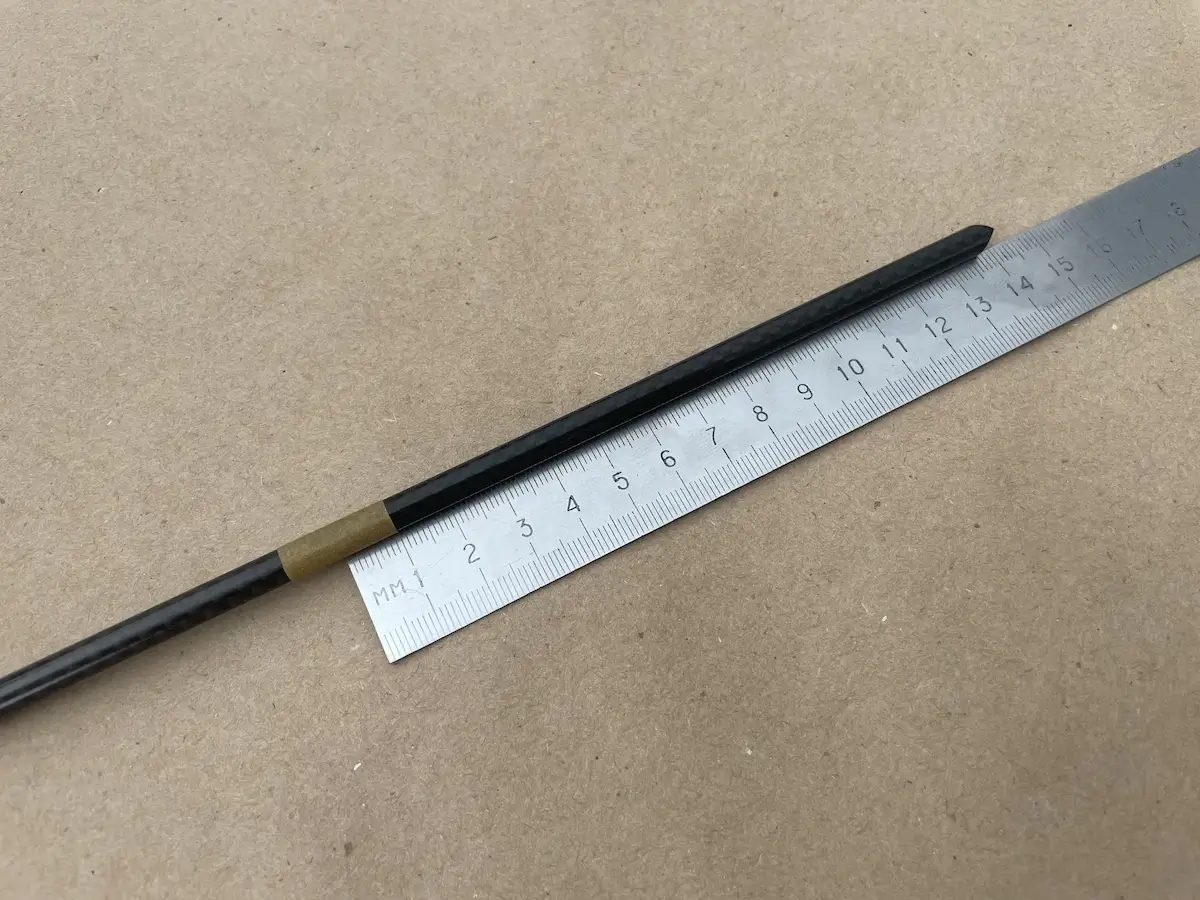
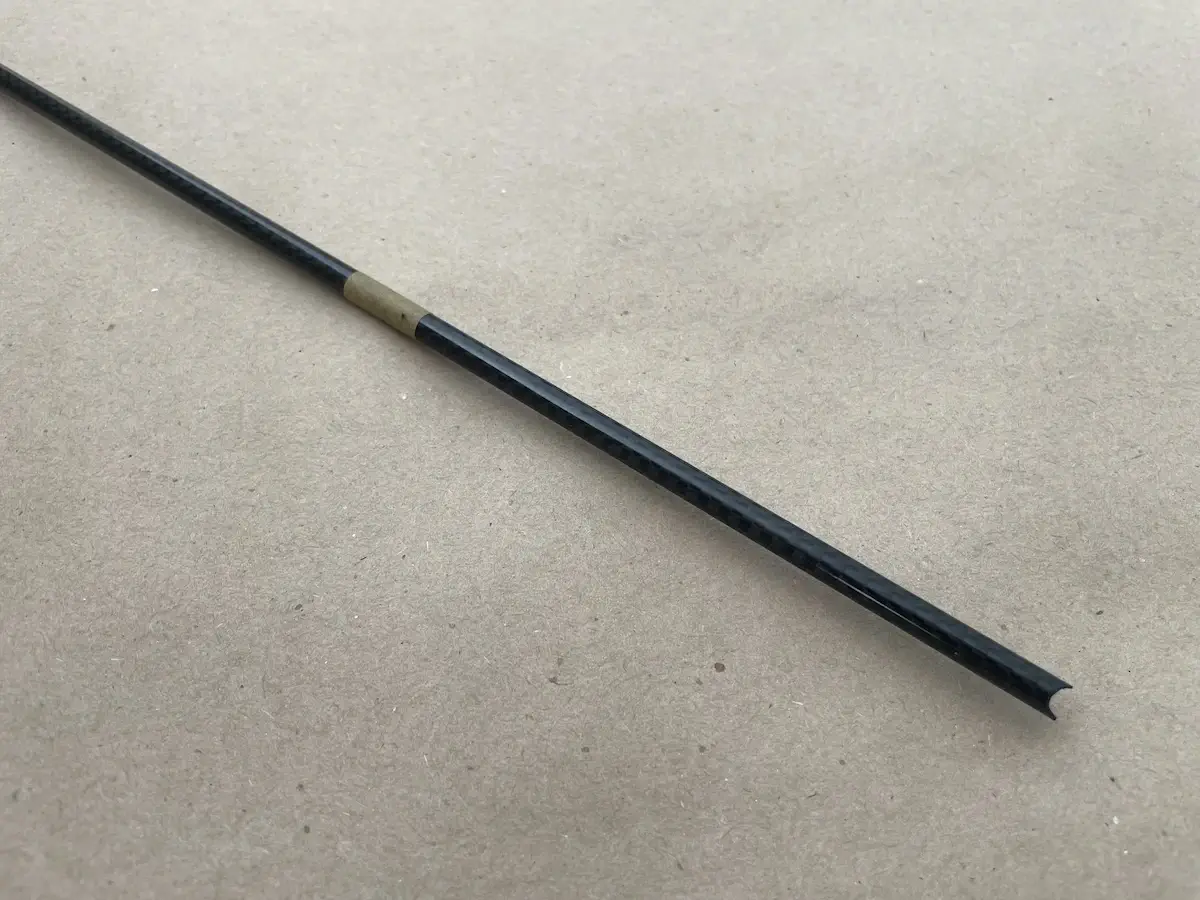
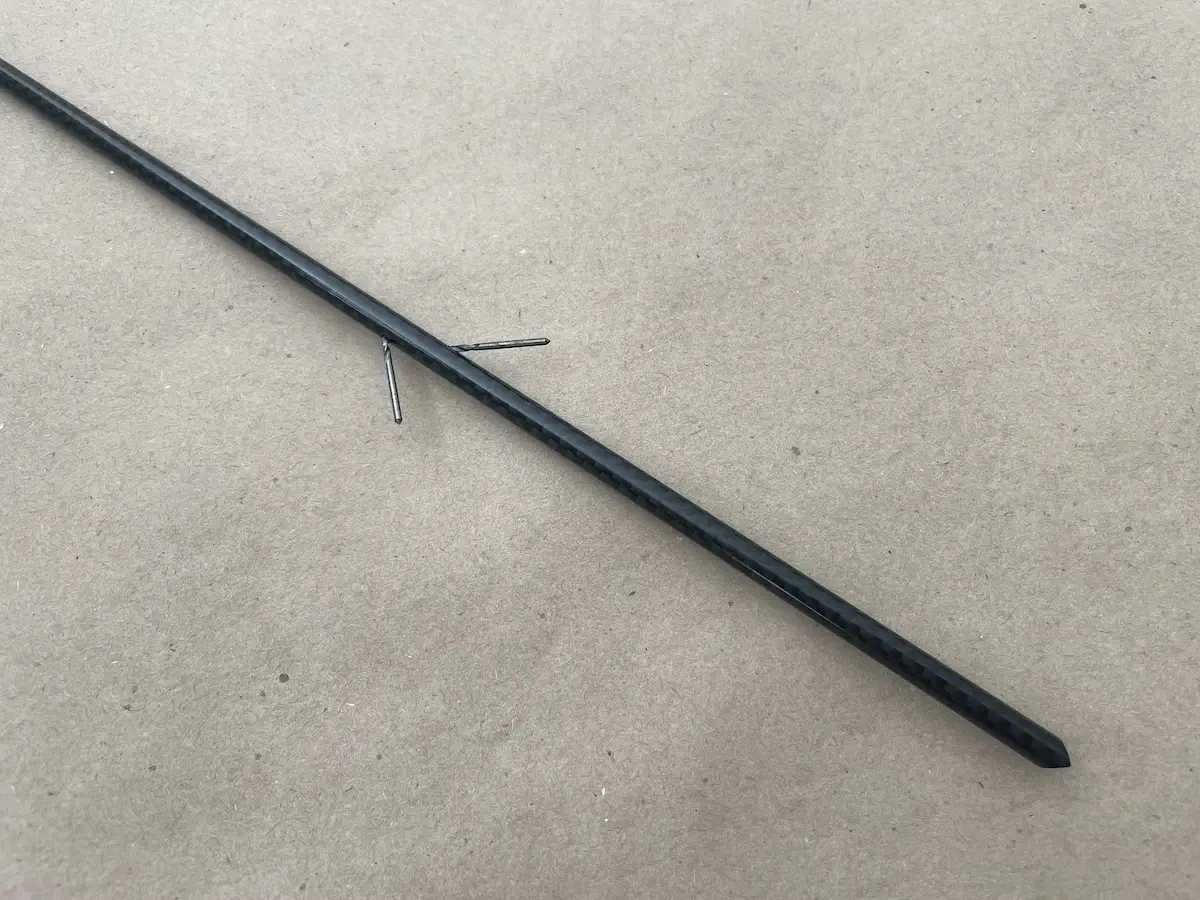
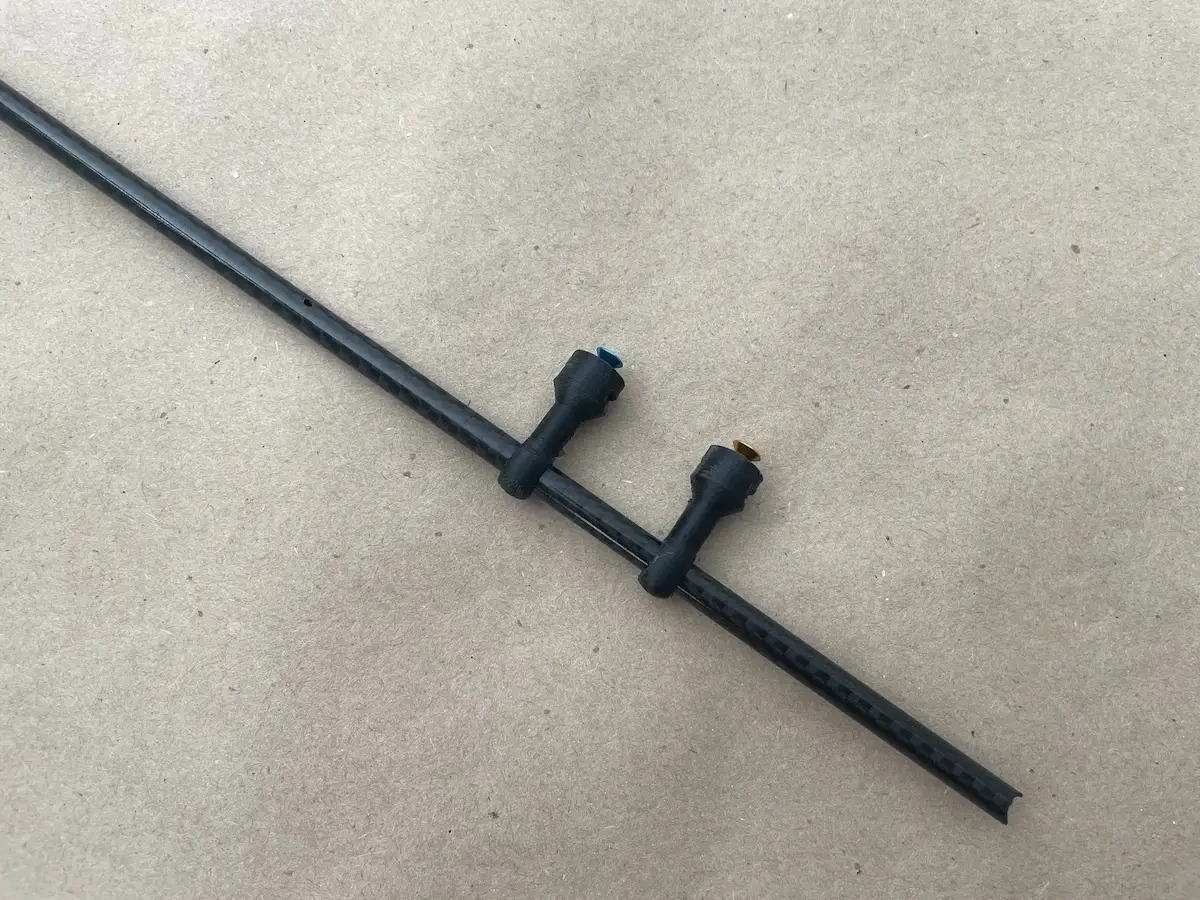
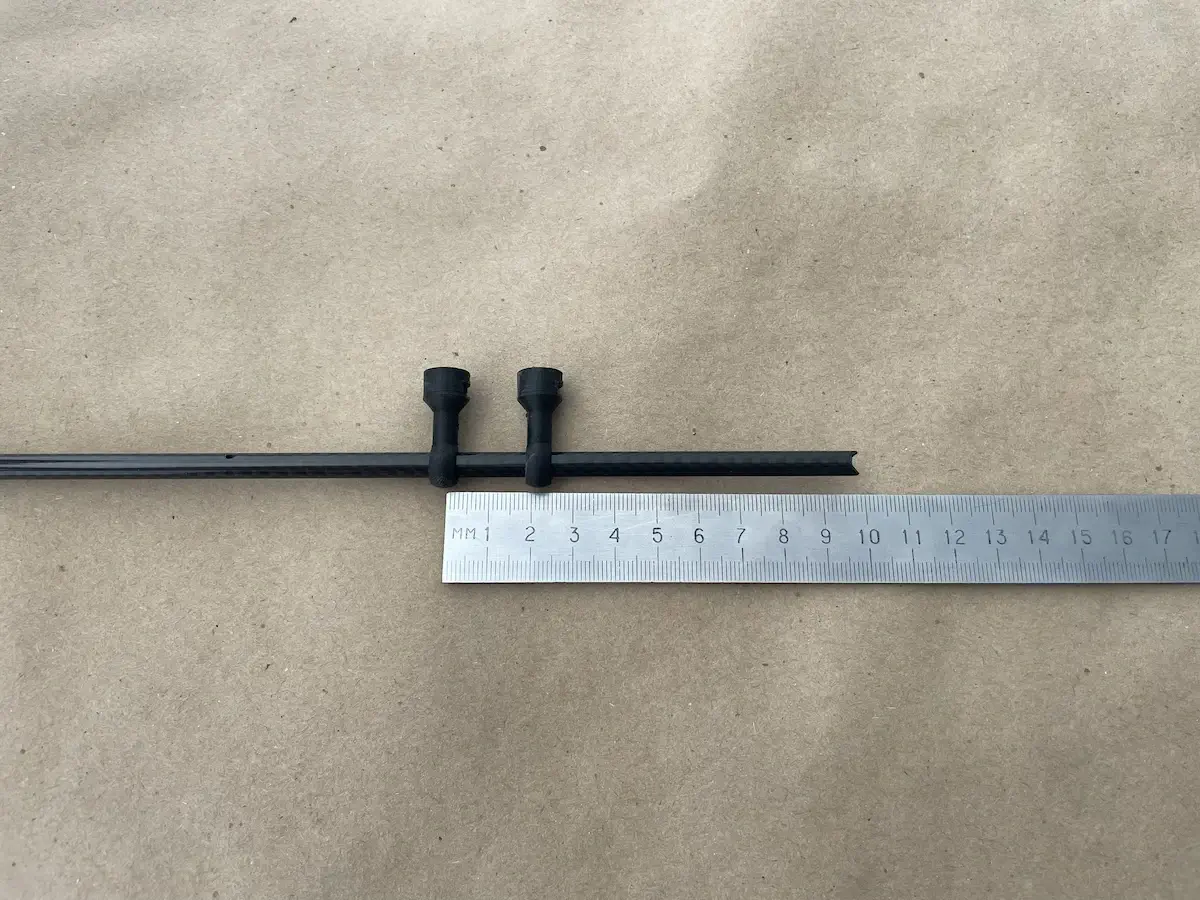
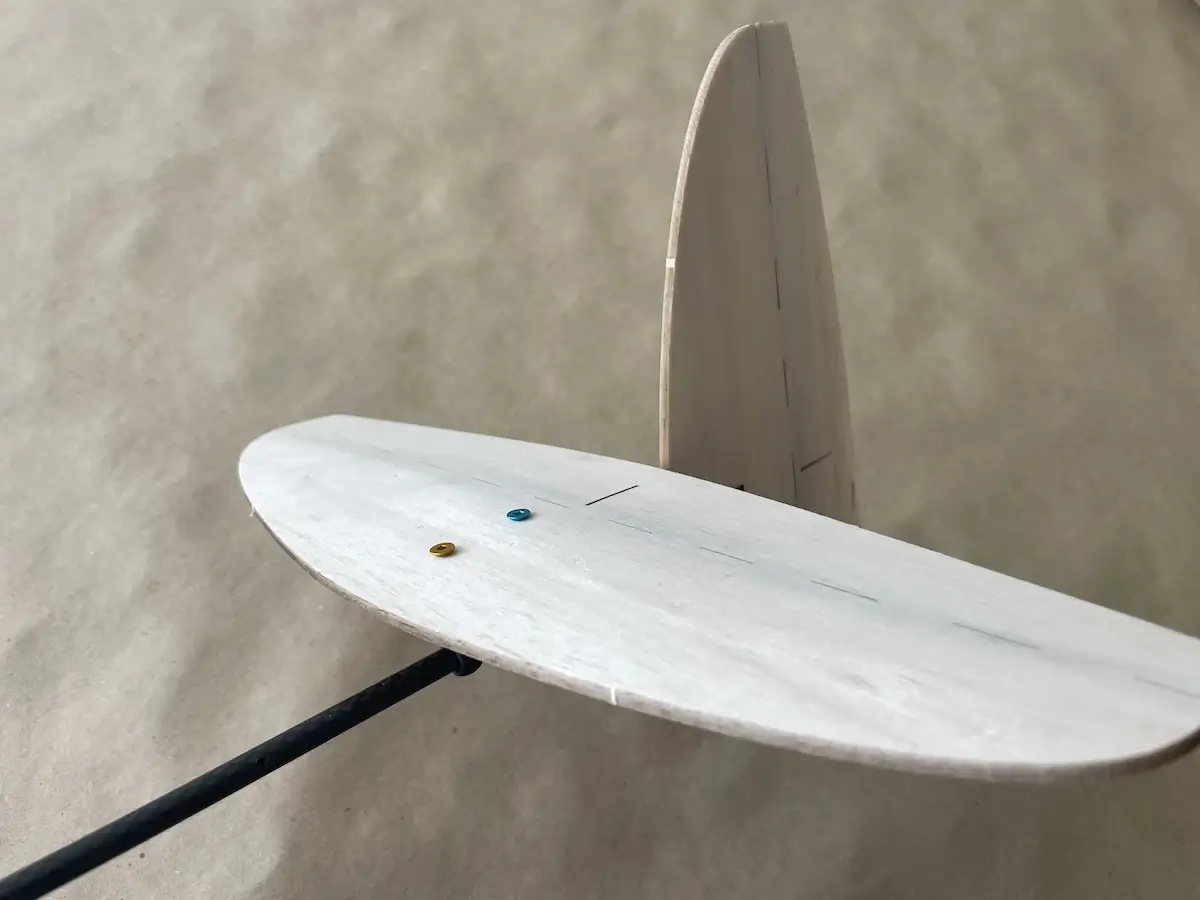
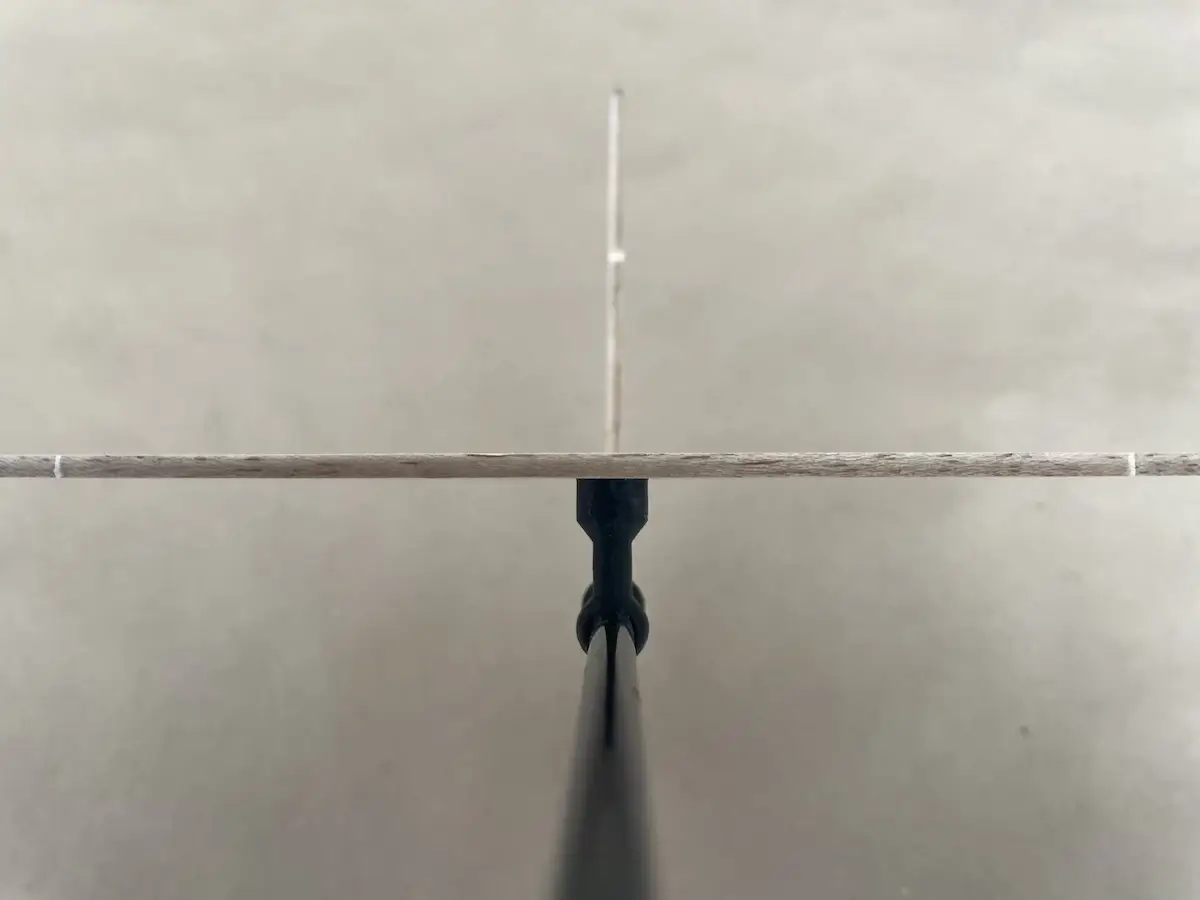
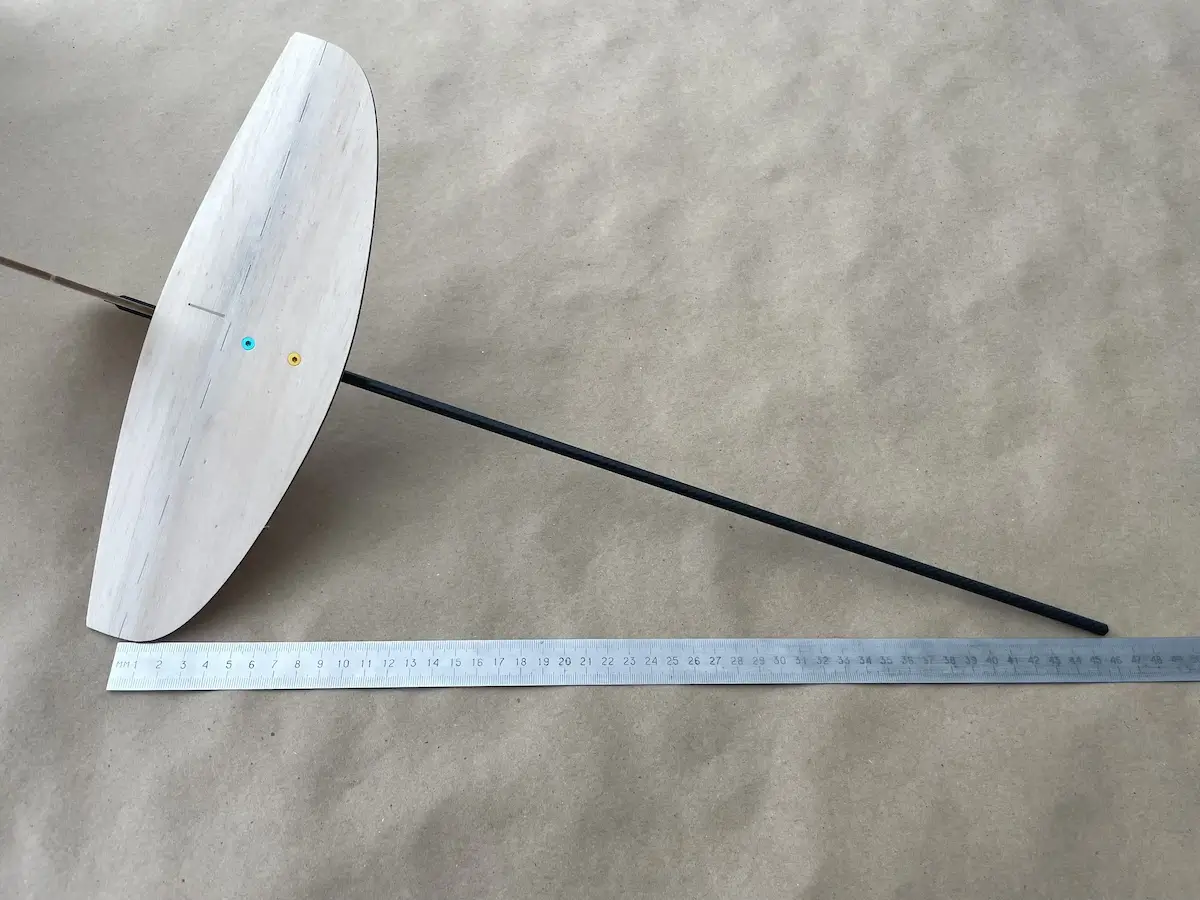
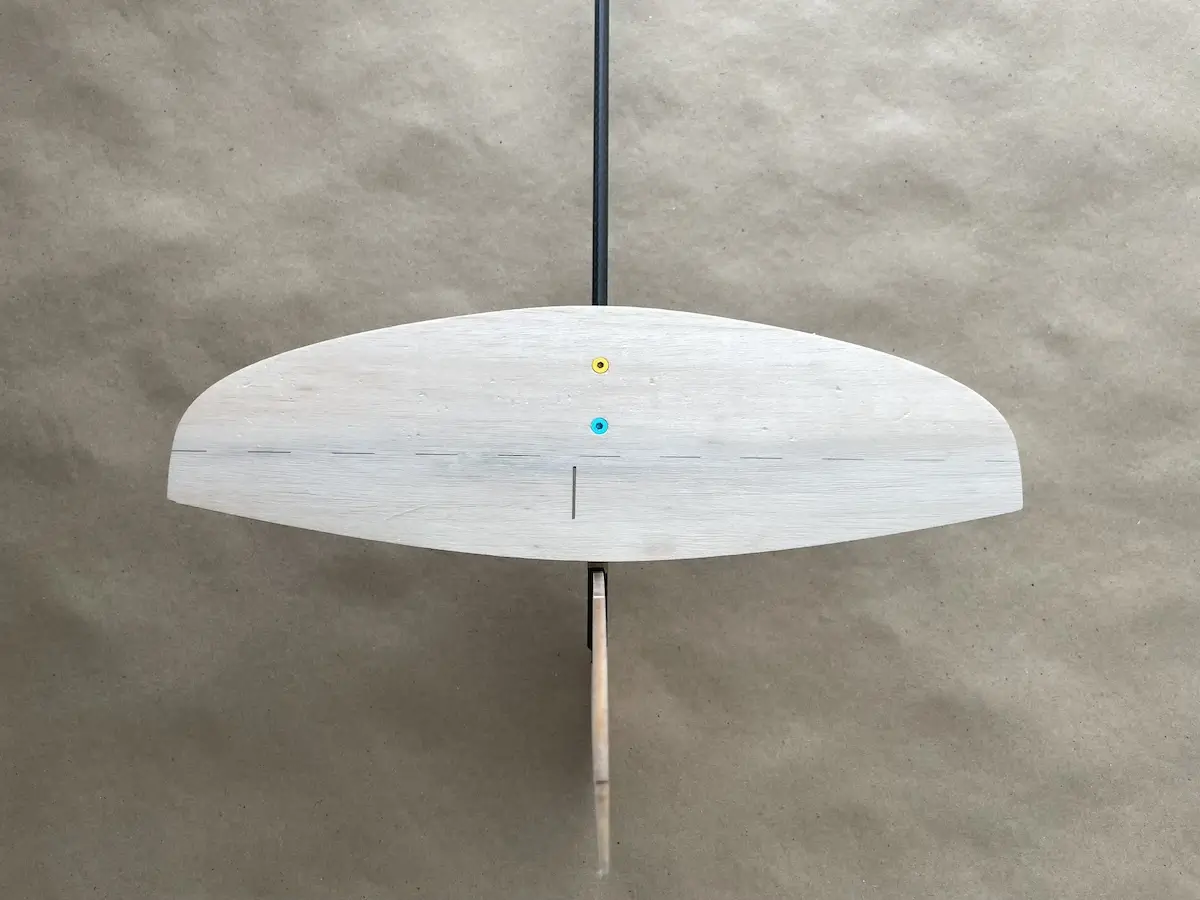
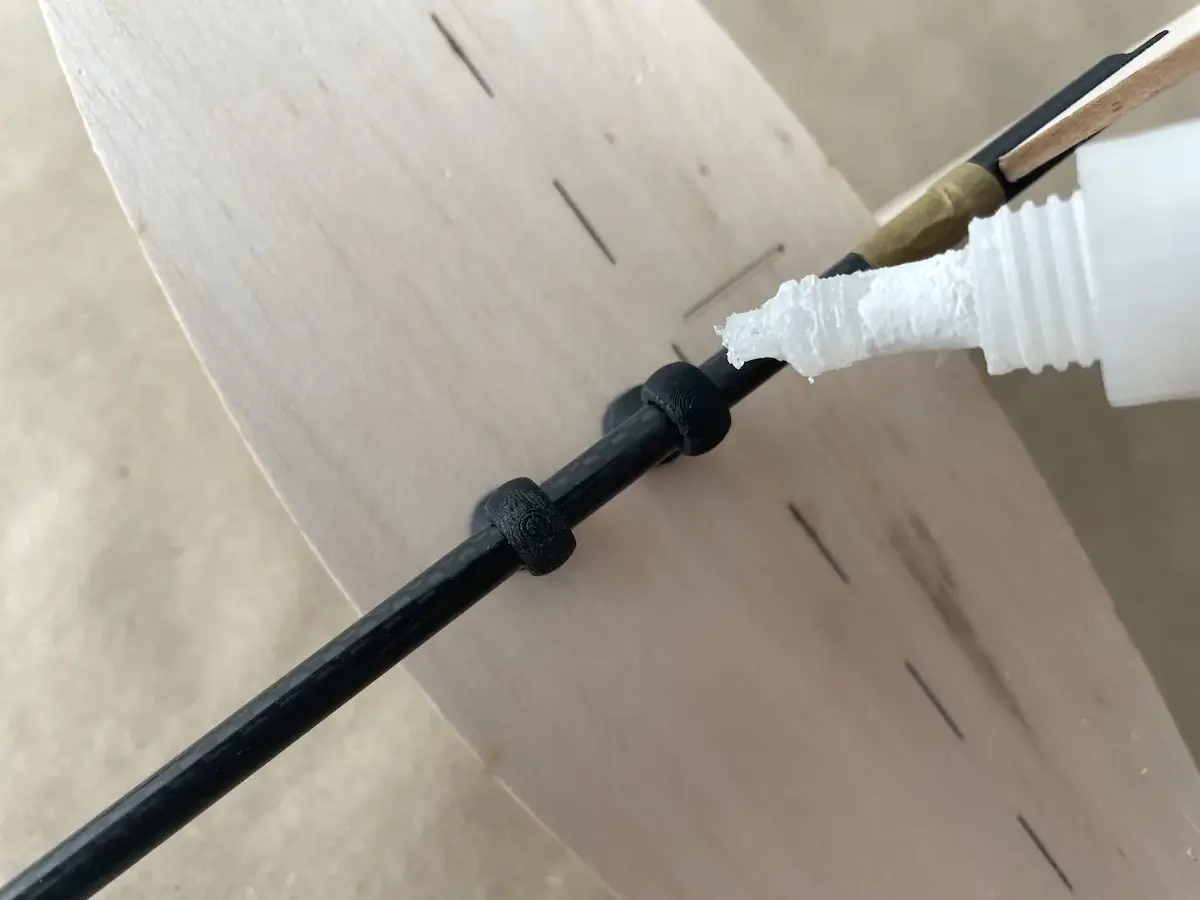
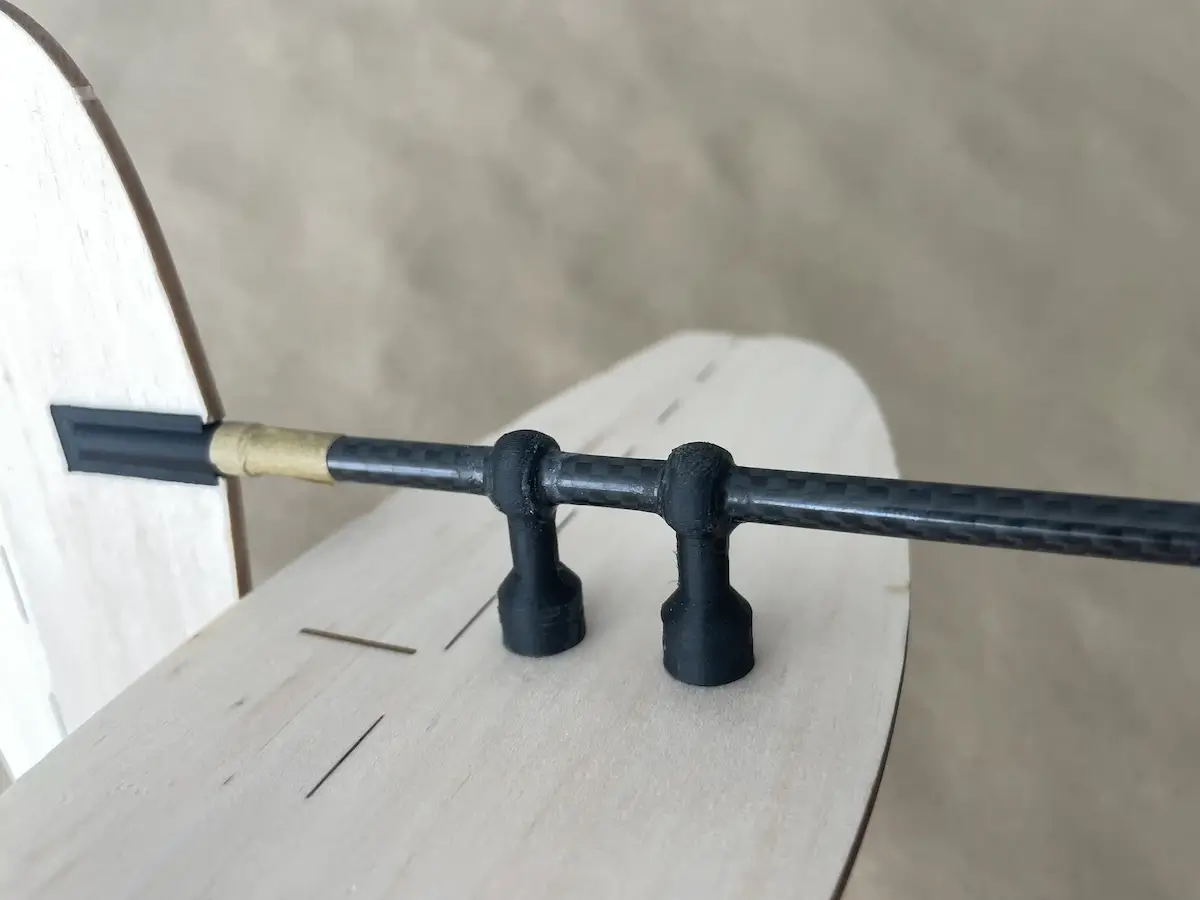
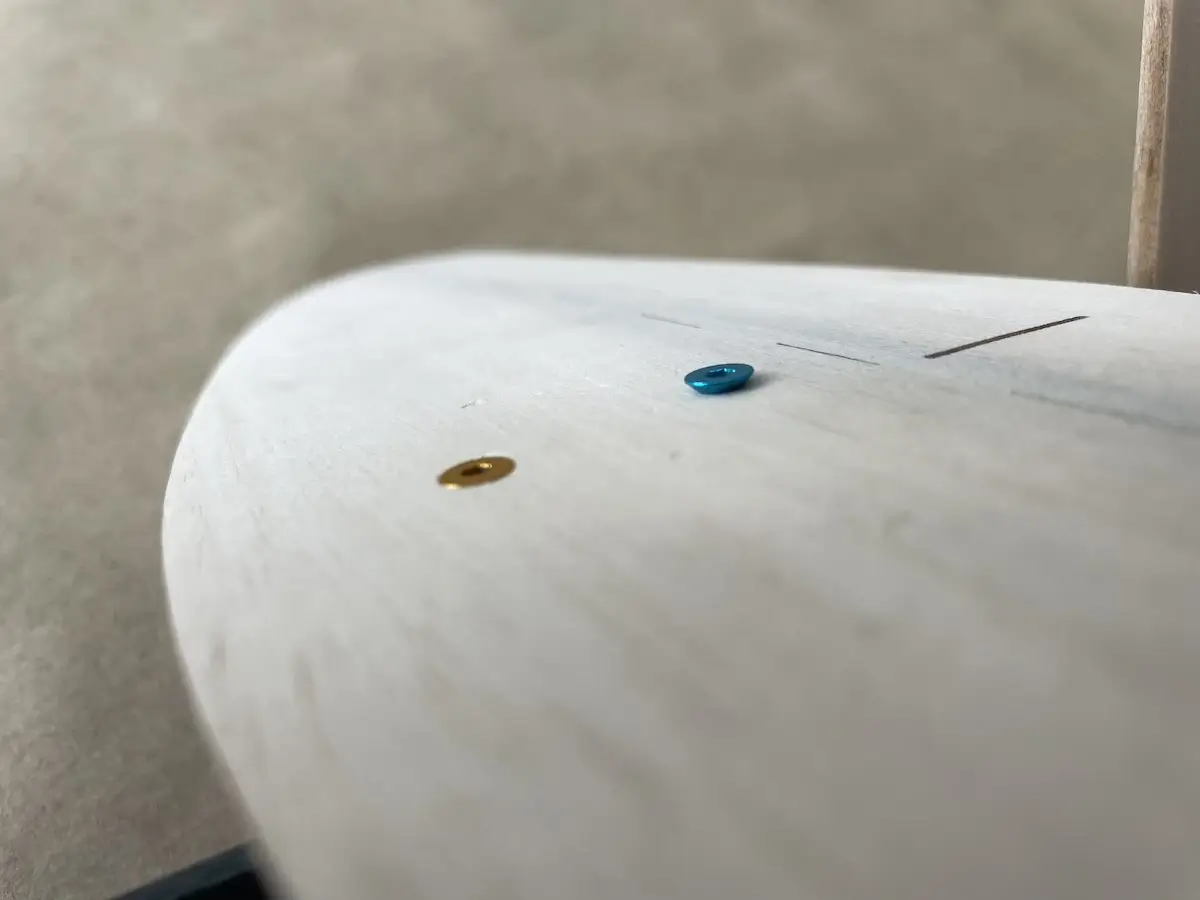
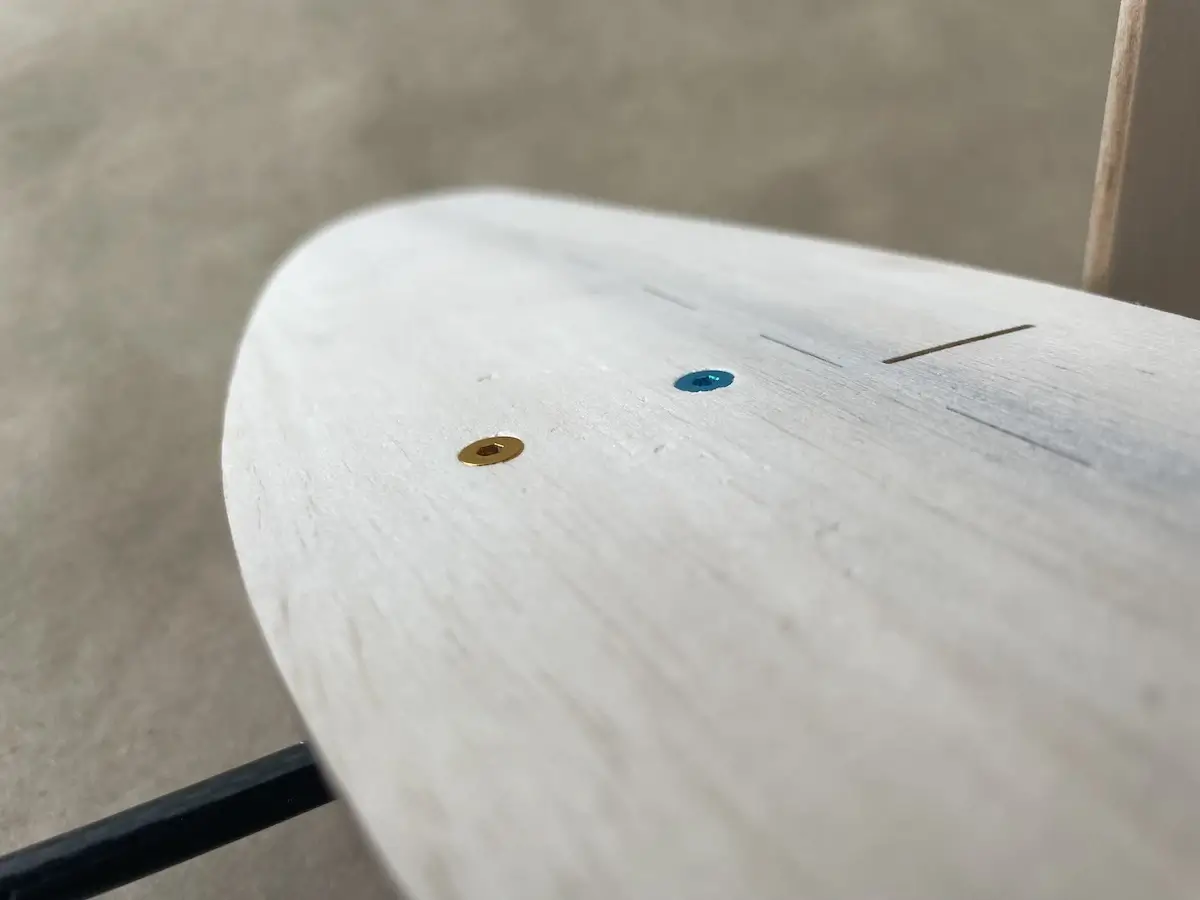
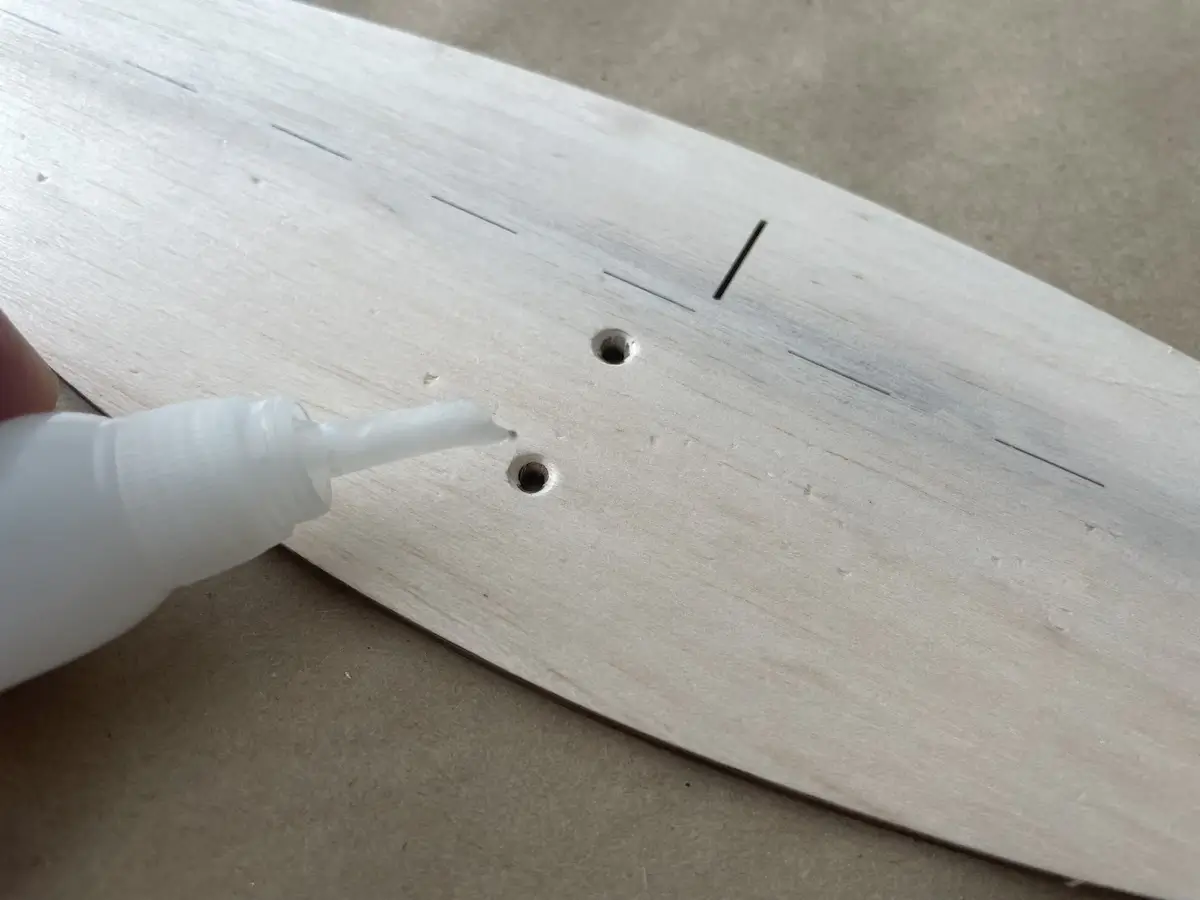
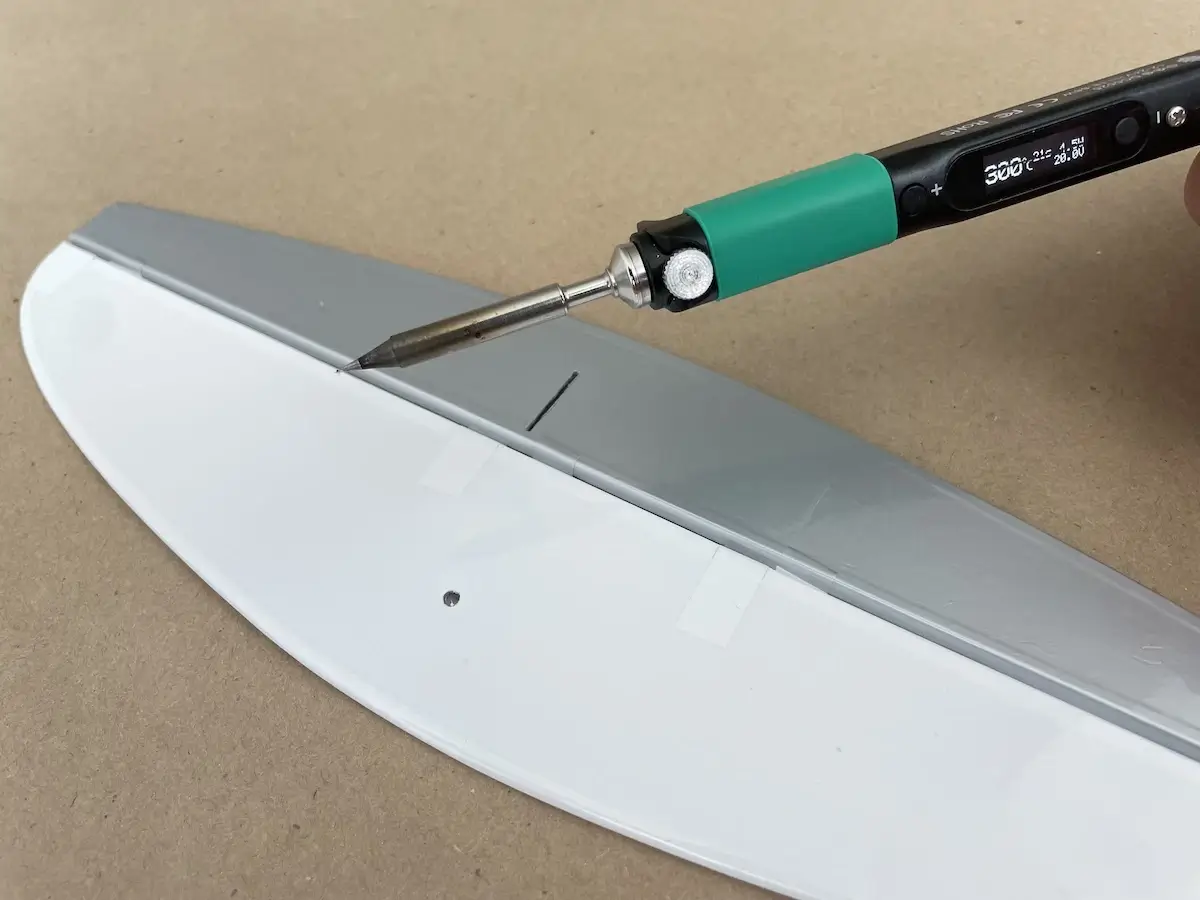
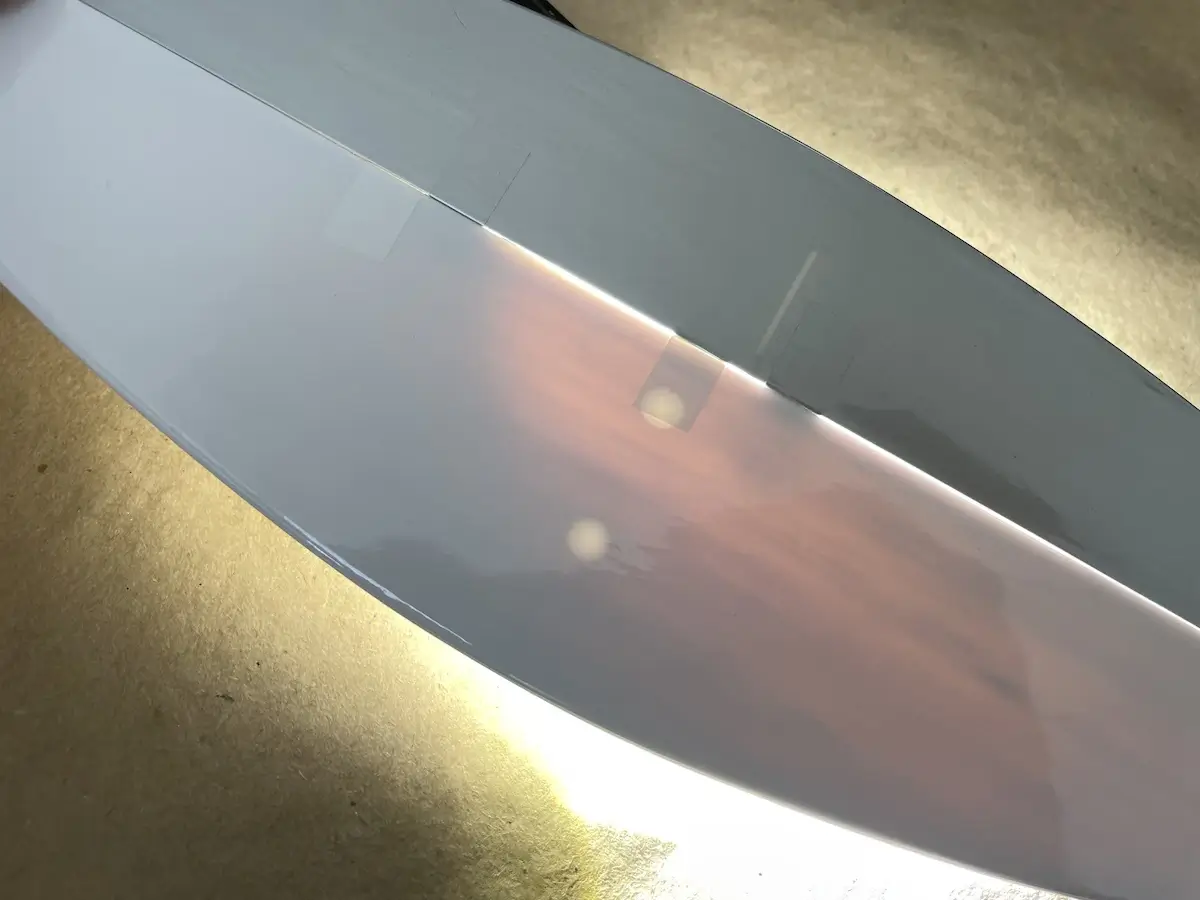
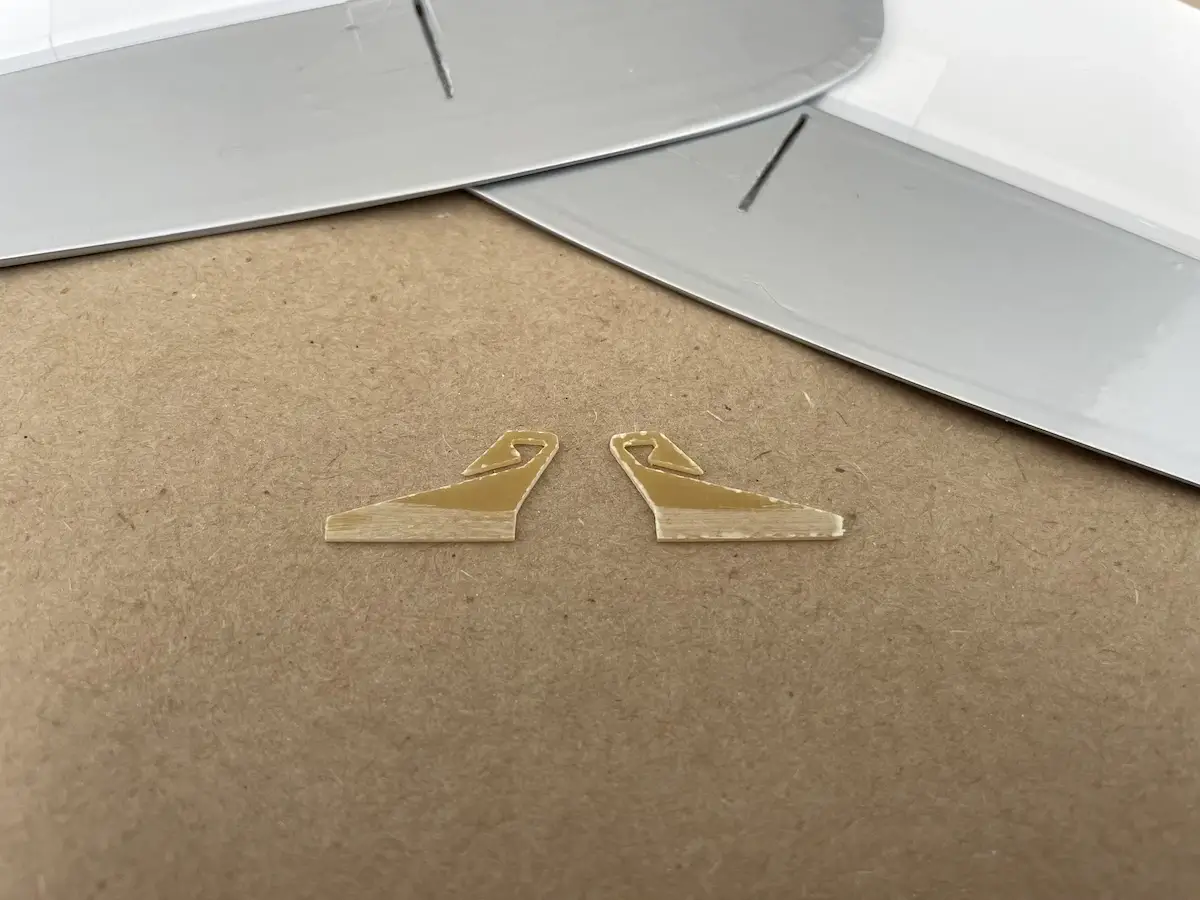
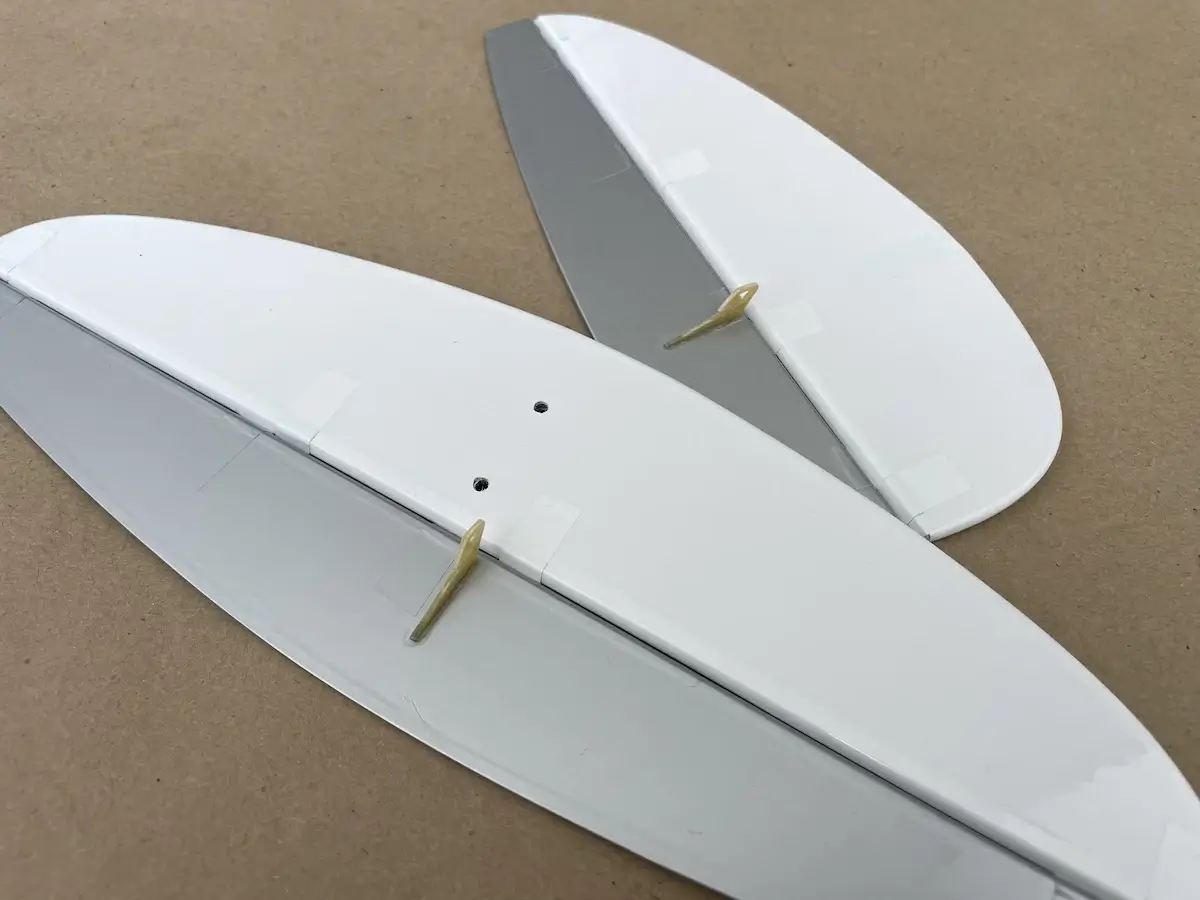
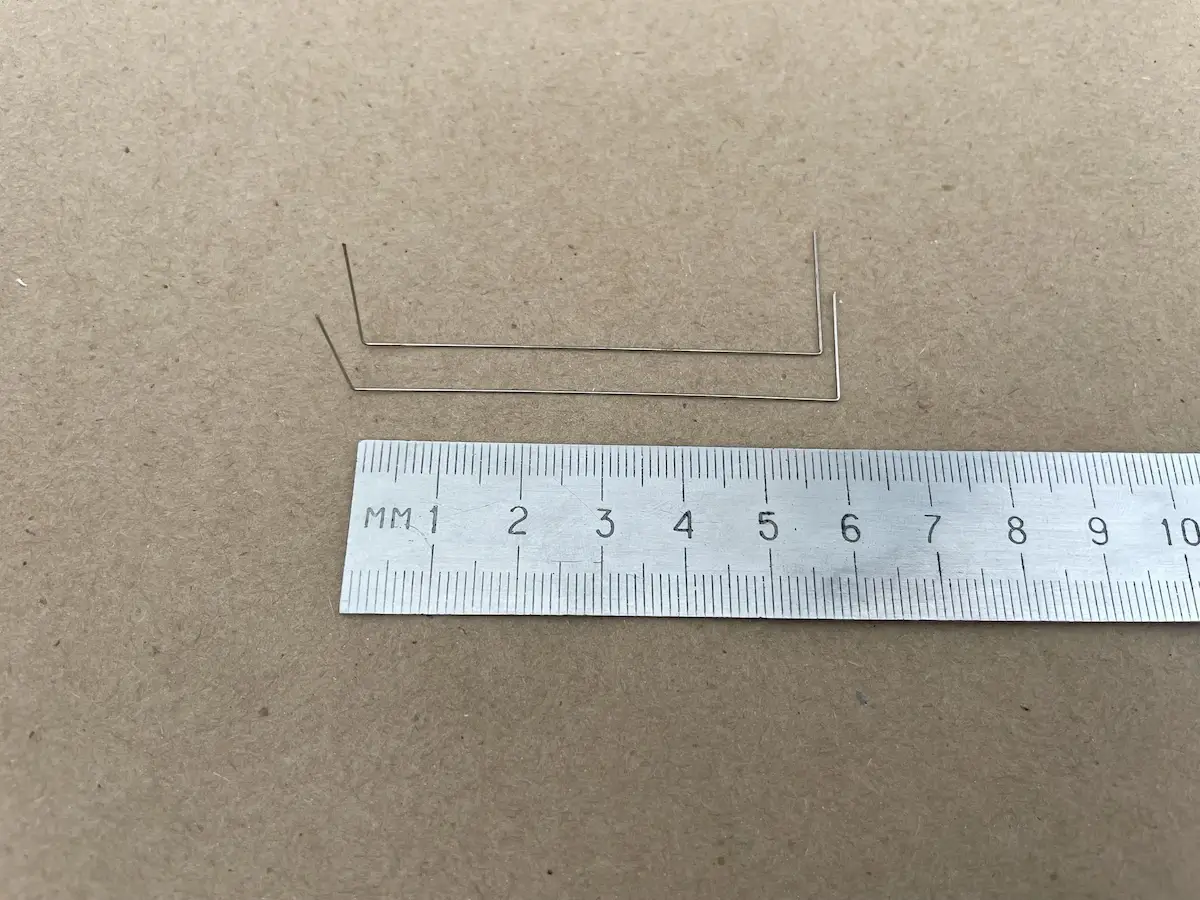
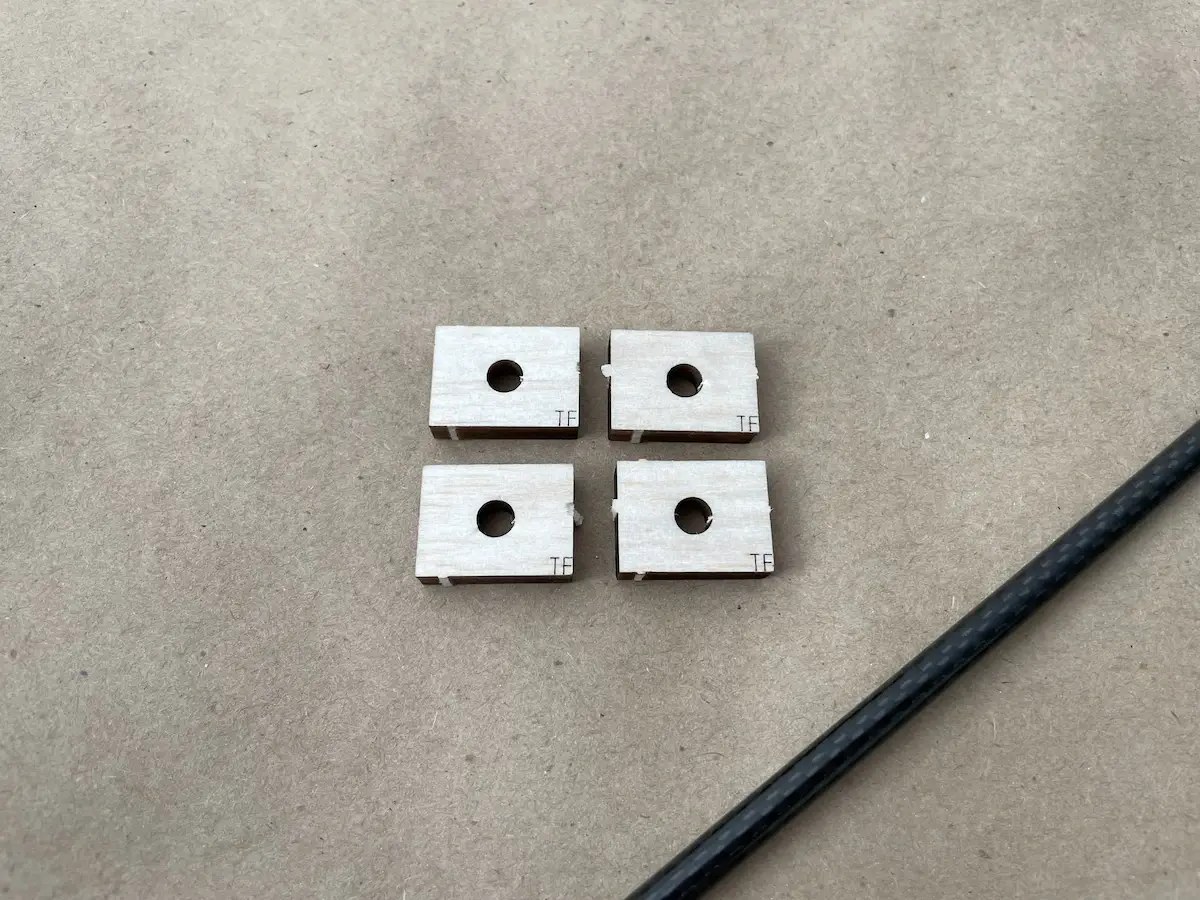
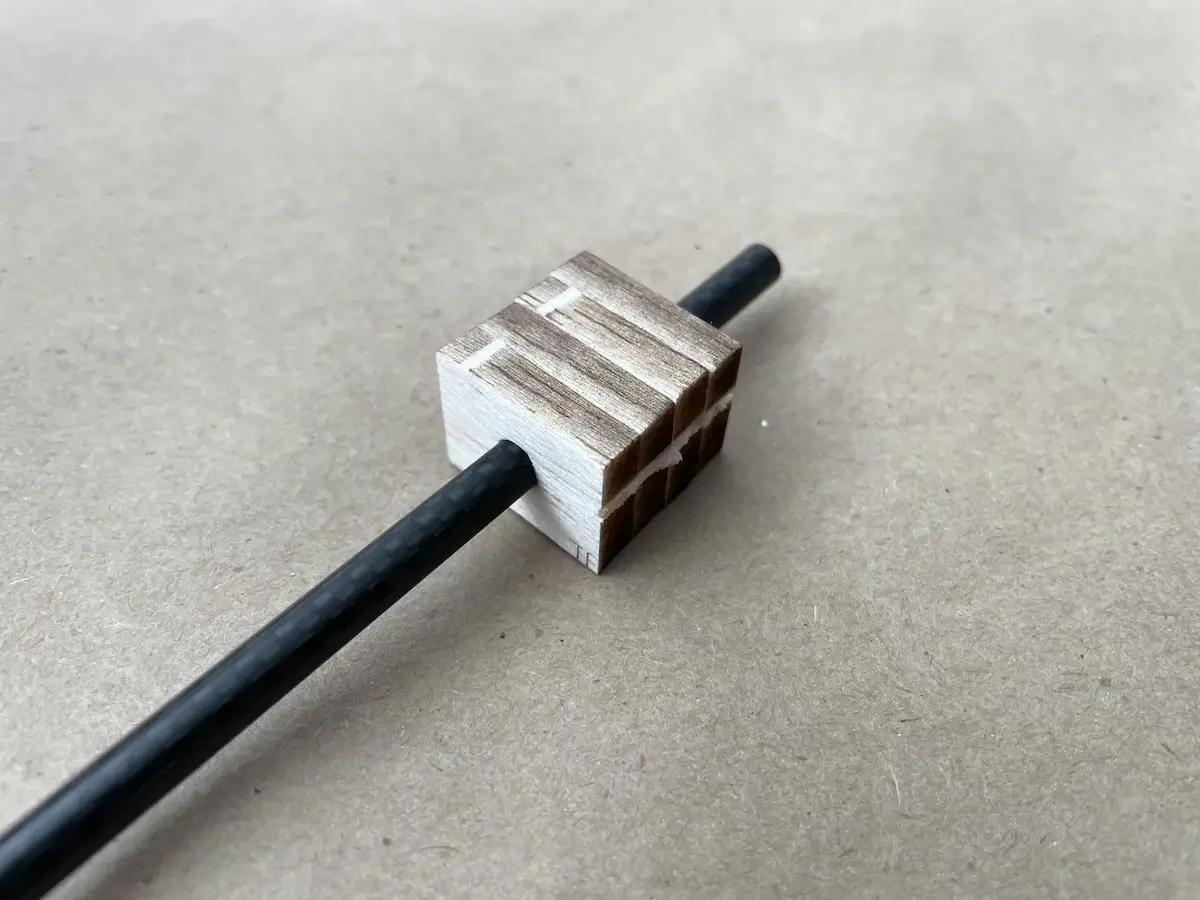
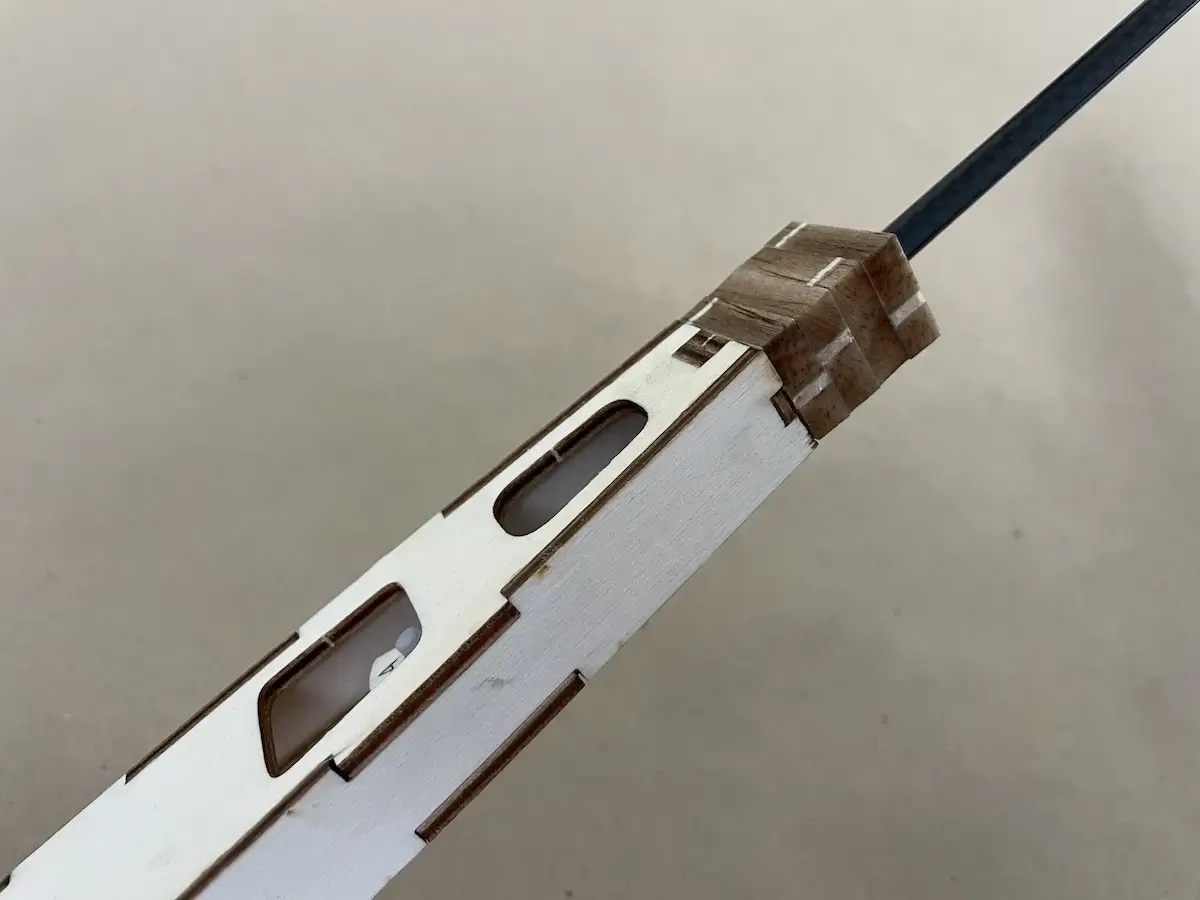
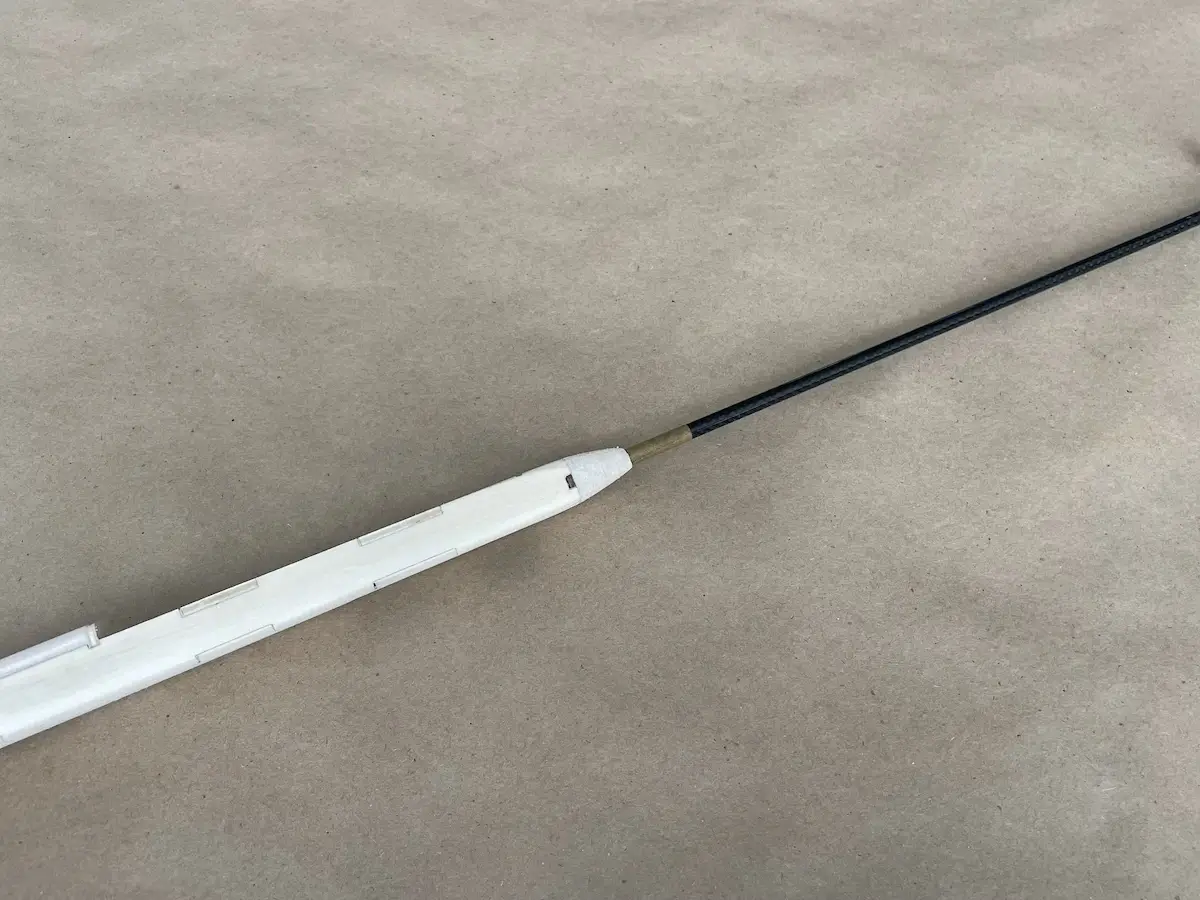
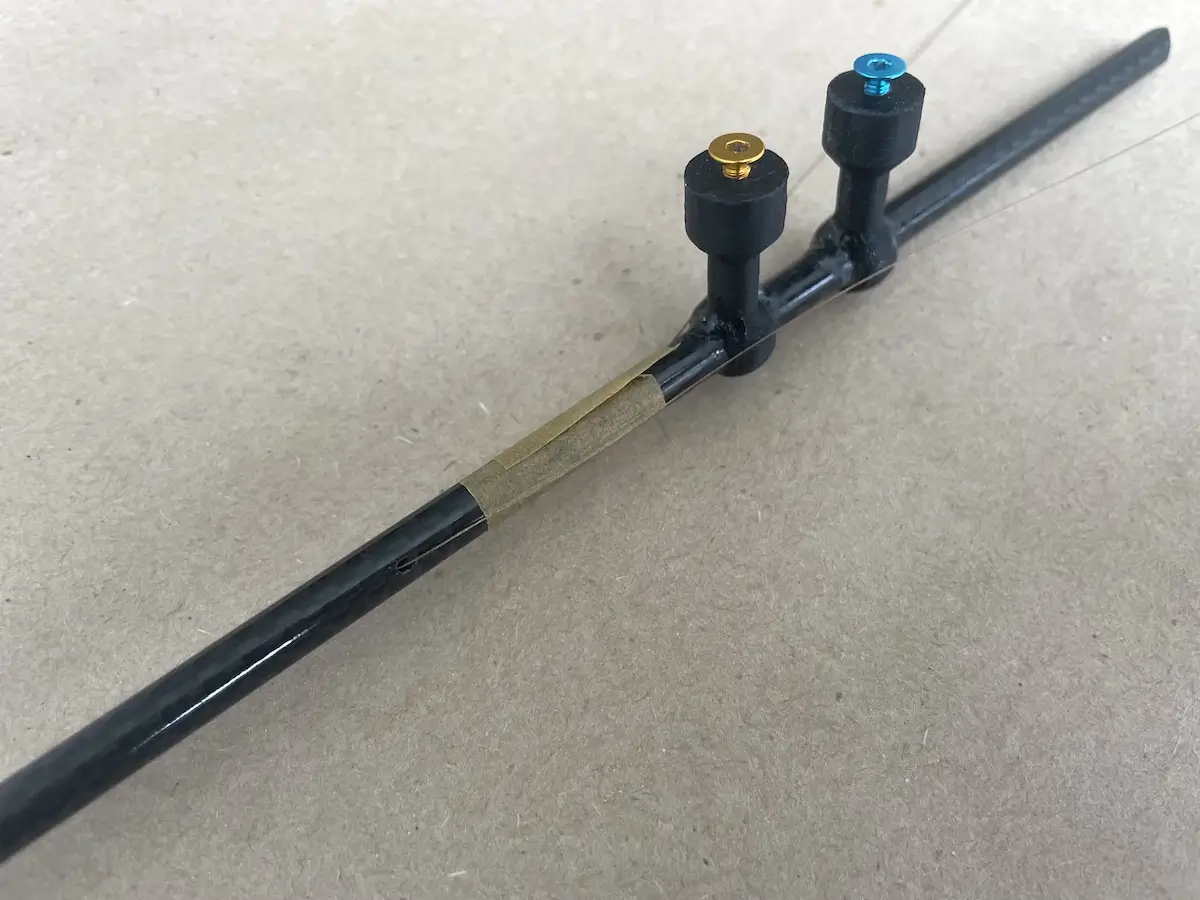
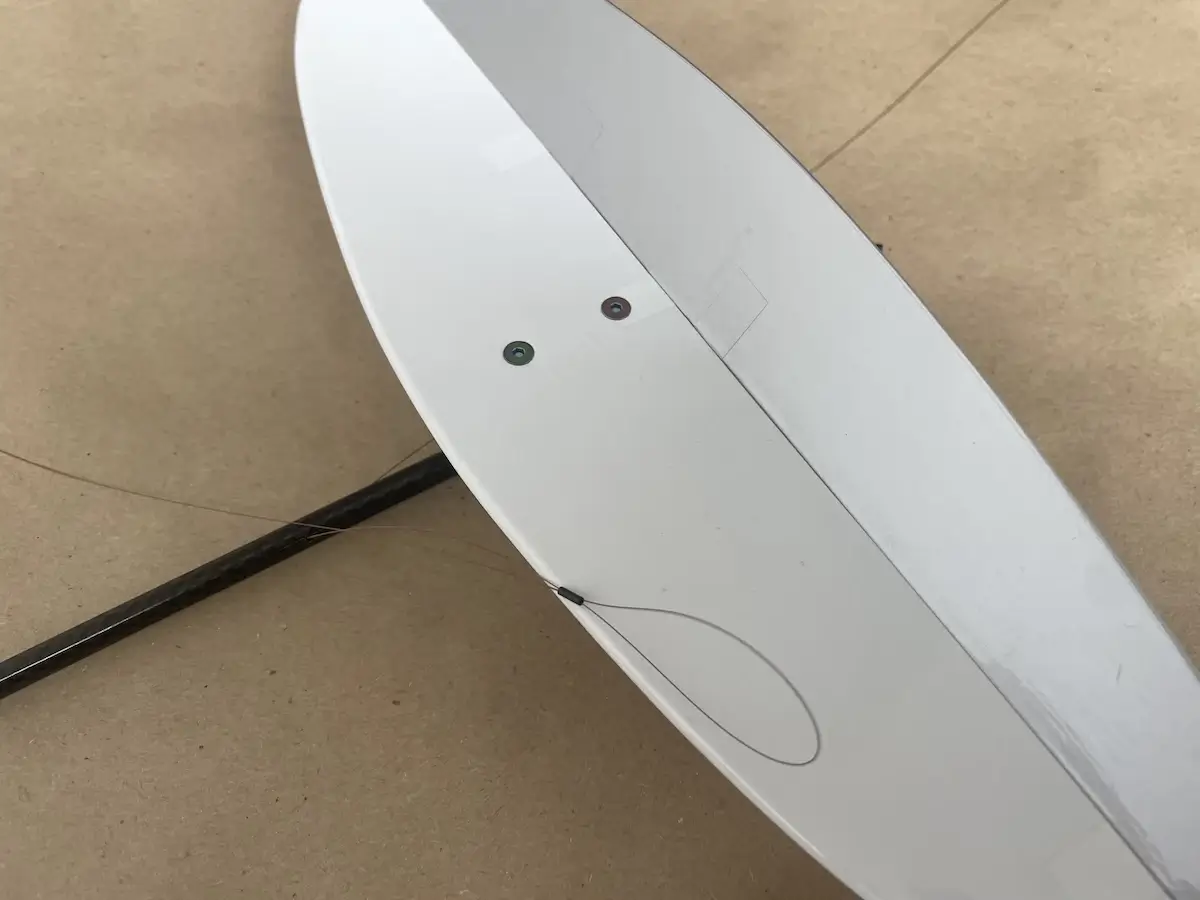
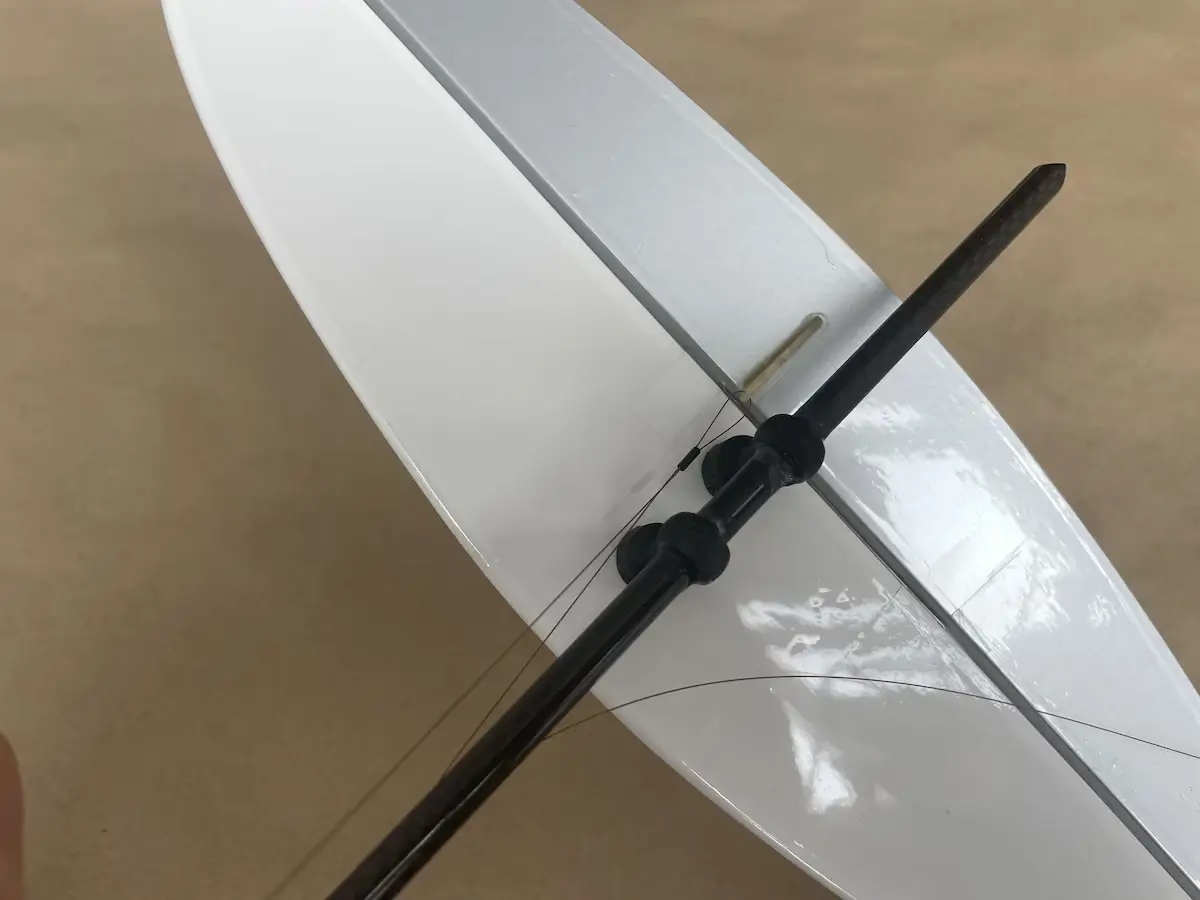
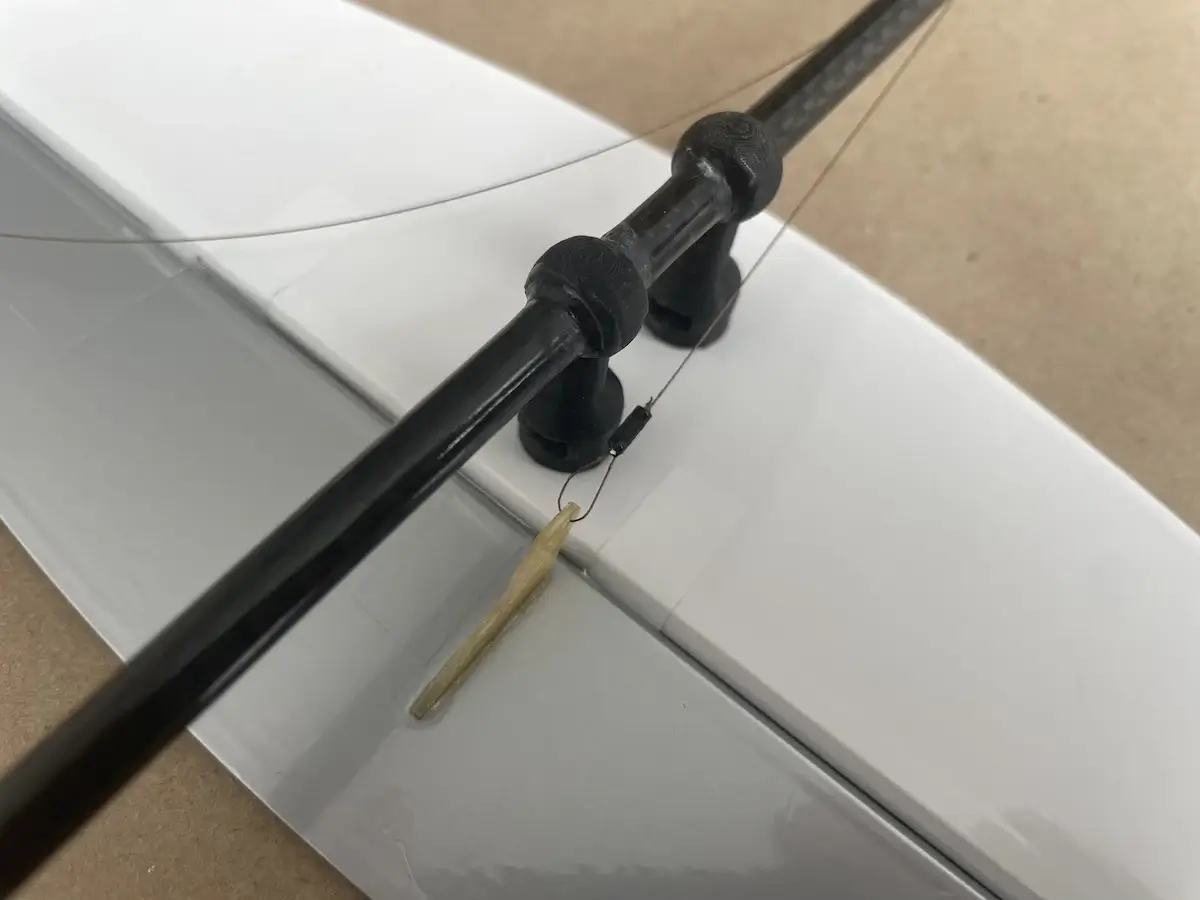
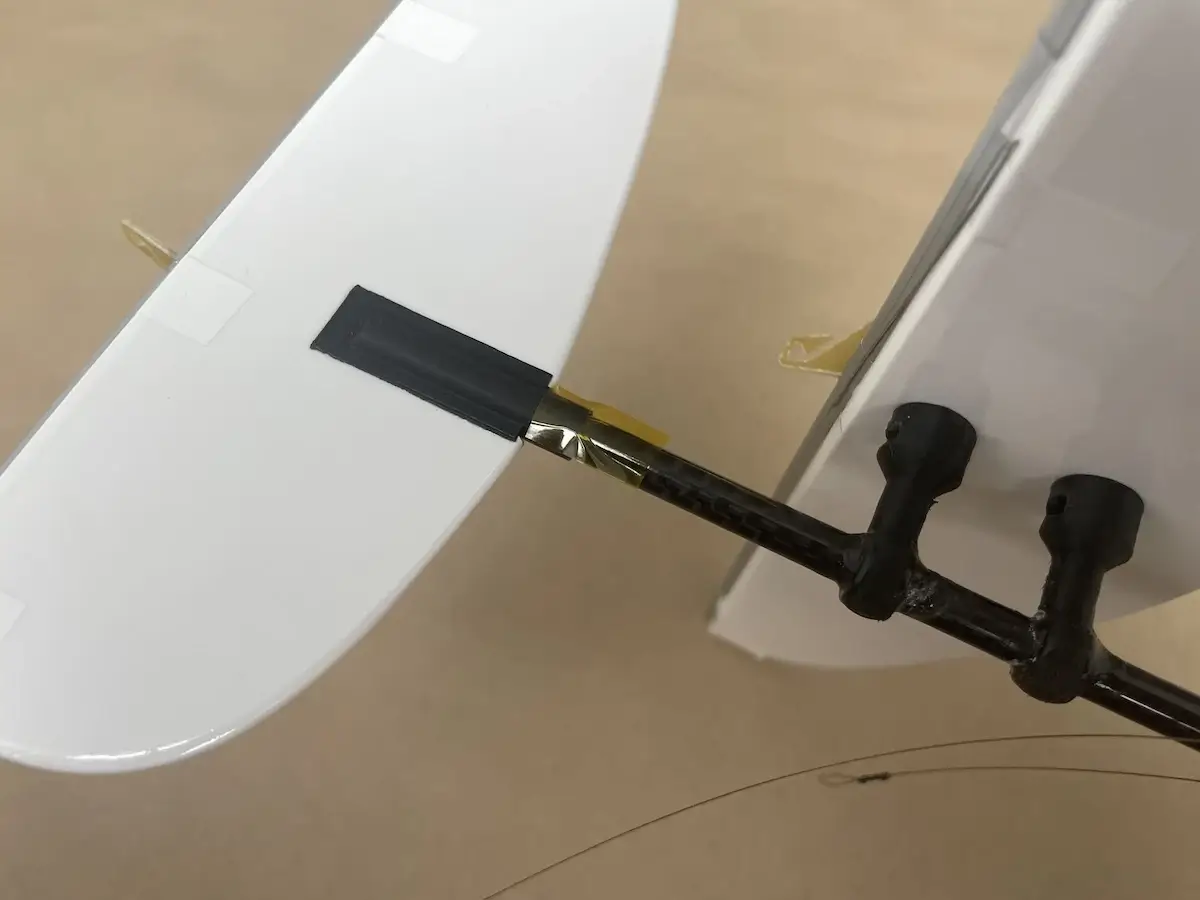
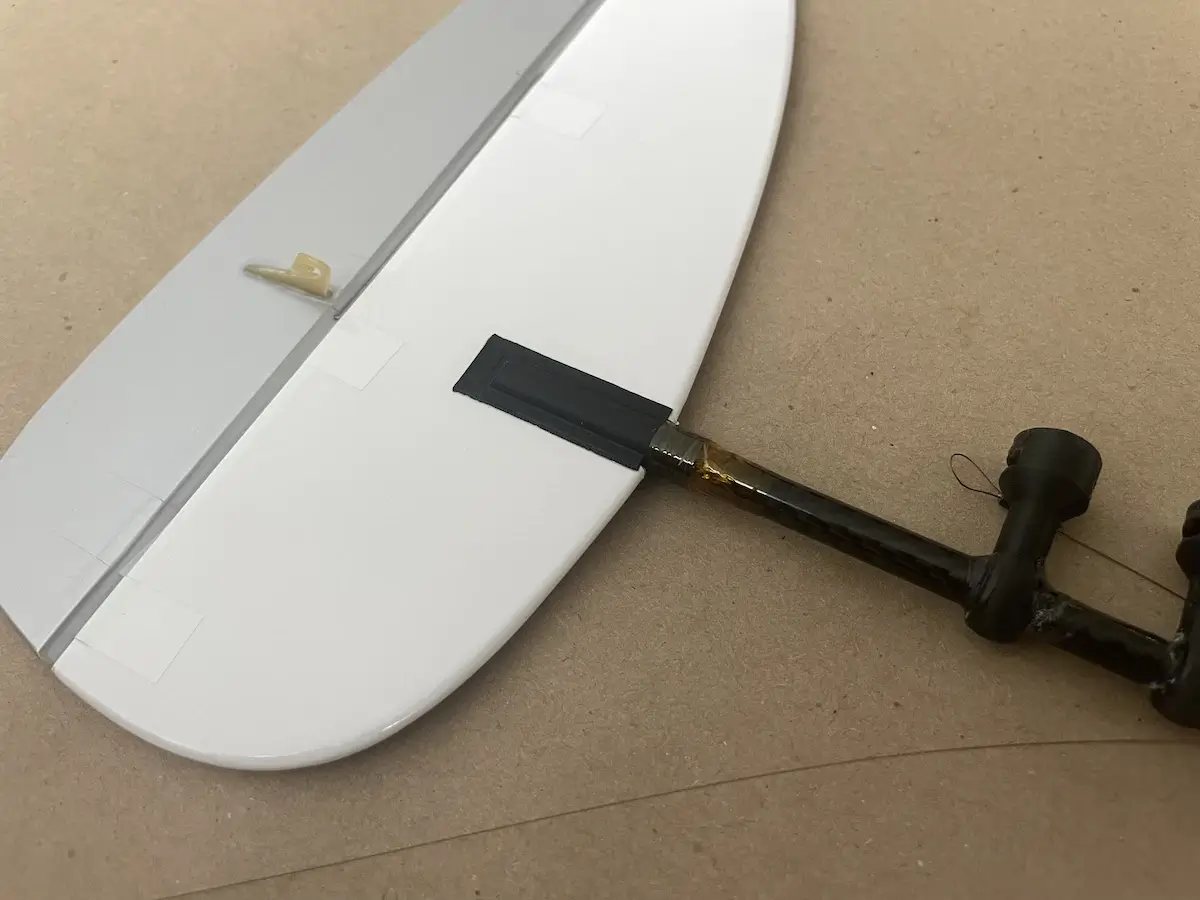
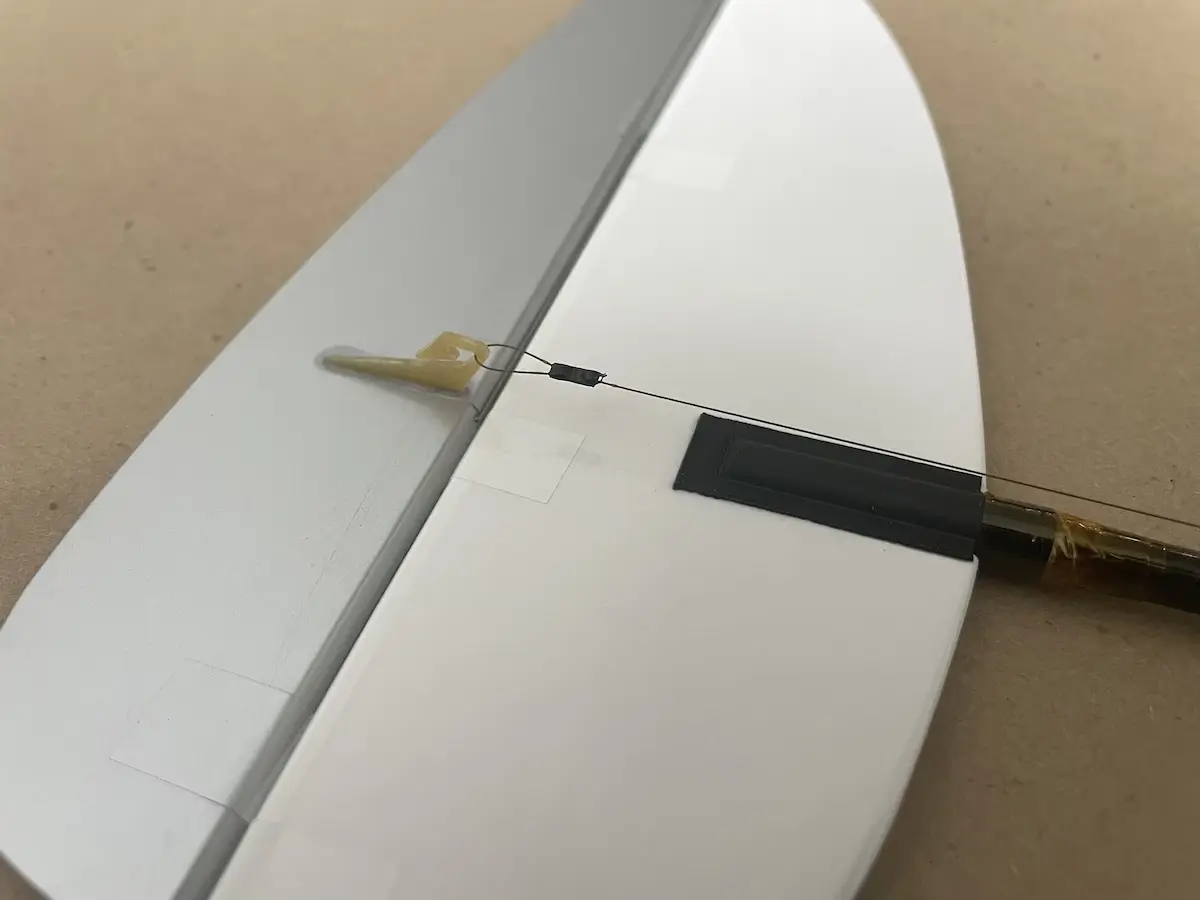
(Optional) While the control surfaces on the tails are uncut, apply a stipe of a masking tape and taper them for better glider performanceThis is the example of how it should look afterFind 500mm long Twill carbon 6mm tube and wrap one of the sides with a masking tape(Optional) Sand this edge of the tube 45° from each side, creating a 90° tip(Optional) Dry fit the vertical fin mount making sure that it fixes on the boom and does not spin, when pushed all the way inFind a pair of stab standoffs (updated to one-peice mount in the latest kits) & M3 nuts, clear the plastic parts from printing escess making sure they can slide on the 6mm tube with a moderate forceInsert M3 nuts into the corresponding slots in the standoffs and screw the stab mounting bolts in, making sure the nuts are positioned correctly. Fix the nuts with a drop of medium CA. Make sure that the treads are clear of any glue and the bolts can come offNext, wrap the “boom” ~140mm from the edge sanded to 90° beforeDrill ~1.5mm holes on both sides of the boom, selarating them by ~10mmOval your holes by altering the angles of a drill bit while making these holesPut both stab standoffs on the boomPosition the front standoff ~100mm from the sanded 90° edge of the boom. Dry-fit the fin mount on the fin, put it on the 90° sanded edge of the boom, slide all the way in so it locks from spinning and temporary fix the fin on the boom with a wrap of masking tapeMount your stab on the standoffs. Adjust the position of the rear standoff as needed to fit the mounting holes on the stabNow, adjust the position of the standoffs on the boom to find a perfect perpendicular position of the stab and a finMeasure the distance from the front edge of the boom, to the elevator hinge line to make sure the stab is perpendicular to the boom as wellNote the position of the elevator horn cutout. This is valid for the Right-Hand launchers. For Left-Handers, please flip the stab right to leftDouble check all the angles and fix the standoffs on the boom with CAMake a nice fillet around the boom from each sideIf you are using aftermarket flathead mounting bolts, feel free to screw them all the way in, so they push through the wood to become flush with the top surfaceThis is the maximum you should tighten theseRegardless of the type of bolts used, remove the stab and apply a few decent drops of thin CA into and around the mounting holesApply activator, and sand the grains that may appear with a fine sandpaper blockNow, you can cut the elevator and rudder offRound the edges and taper the hinge lines of each surface accordingly. Please, refer to the printed plan for your options. In this build we’ll use the Z-Stitch or Crossover hinchesWrap the tails with the covering film of your choice and hinge your flying surfaces. Make sure you have an extra hinge around the control horn and in 60mm distance from itOpen slots for for mounting bolts and control horns. A soldering iron with a thin dry soldering tip might help hereIf using opaque covering, light up a flashlight from the opposite side of your part to locate the holes with 100% accuracyPrepare your control horns and scrub the sides with a sandpaper for better adhesionInsert your control horns in place and fix with a medium CARemove the film from the fin mount slot. Make ~1mm of balsa wood free of the coveringCarefully install the fin mount into the slot, and apply the thin CA on the entire perimeter, from both sidesBend two pcs of 0.5mm music wire into a C-shape, with ~15-20mm legs. Insert the your torsions into the tails from hinge side into the surface. Make sure that one of the leg is as close to the control horn as possible and the other is also close to the hinge. This will prevent bending the tails under loadGlue the tail fillers in a single stack and push it onto the boomInsert your boom into the fuselage, all the way inMount the wing in placeInstall both tails and spin the boom to align the tails with the wingUse a drop of CA from the rear side of the fuse to fix the boom in place and prevent it from spinning out of desired positionSlide the rear filler to the fuselage and glue it in placeNow, shape and sand the fuselage to the desired shapeRemember to protect the boom behind the fuselag with a masking tape Once finished, stick a knife under the cover to pop it offPrepare two pcs of plastic sleave Install these into the firewall and apply a drop of CA to fix in placeAlso, use medium CA to fix the front part of the boom inside the fuselageMake a healthy fillet inside from both top and bottom part of the fuse
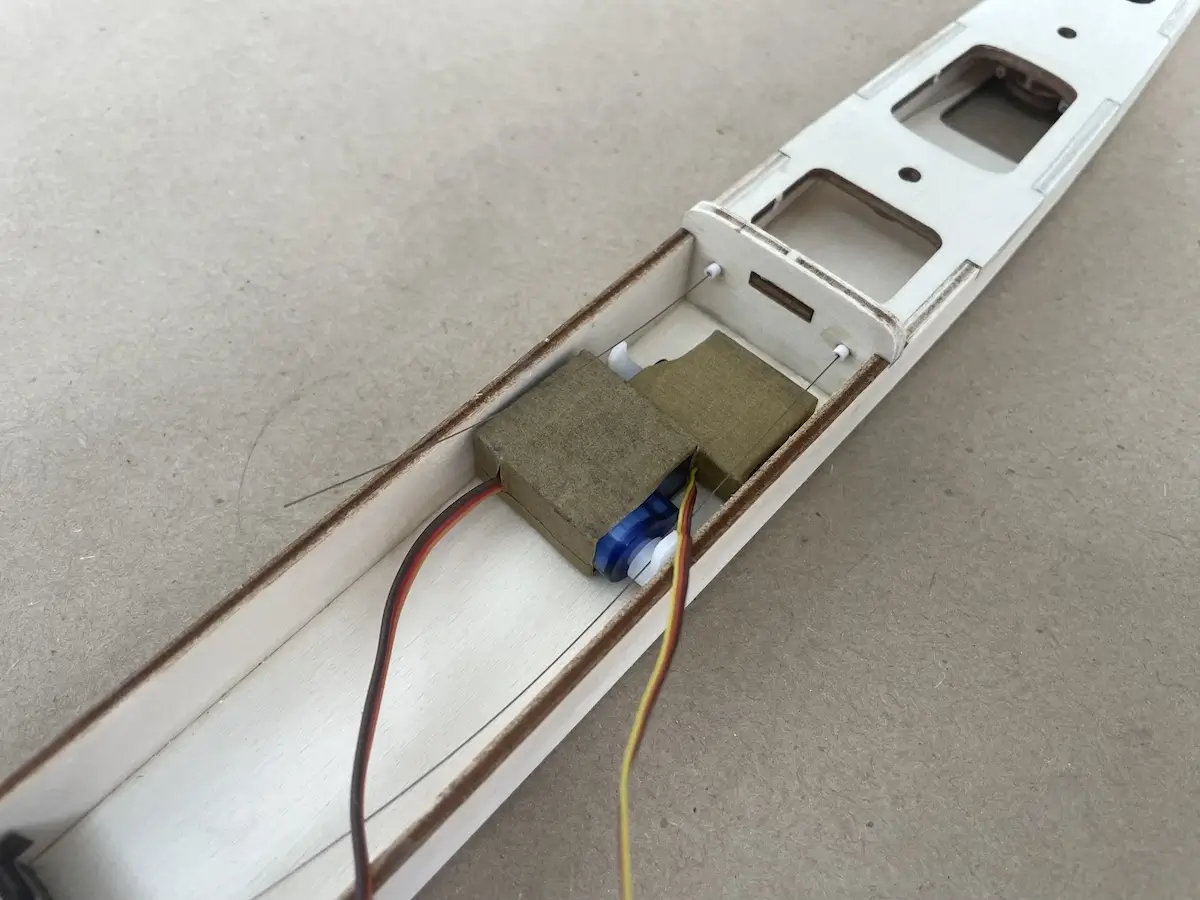
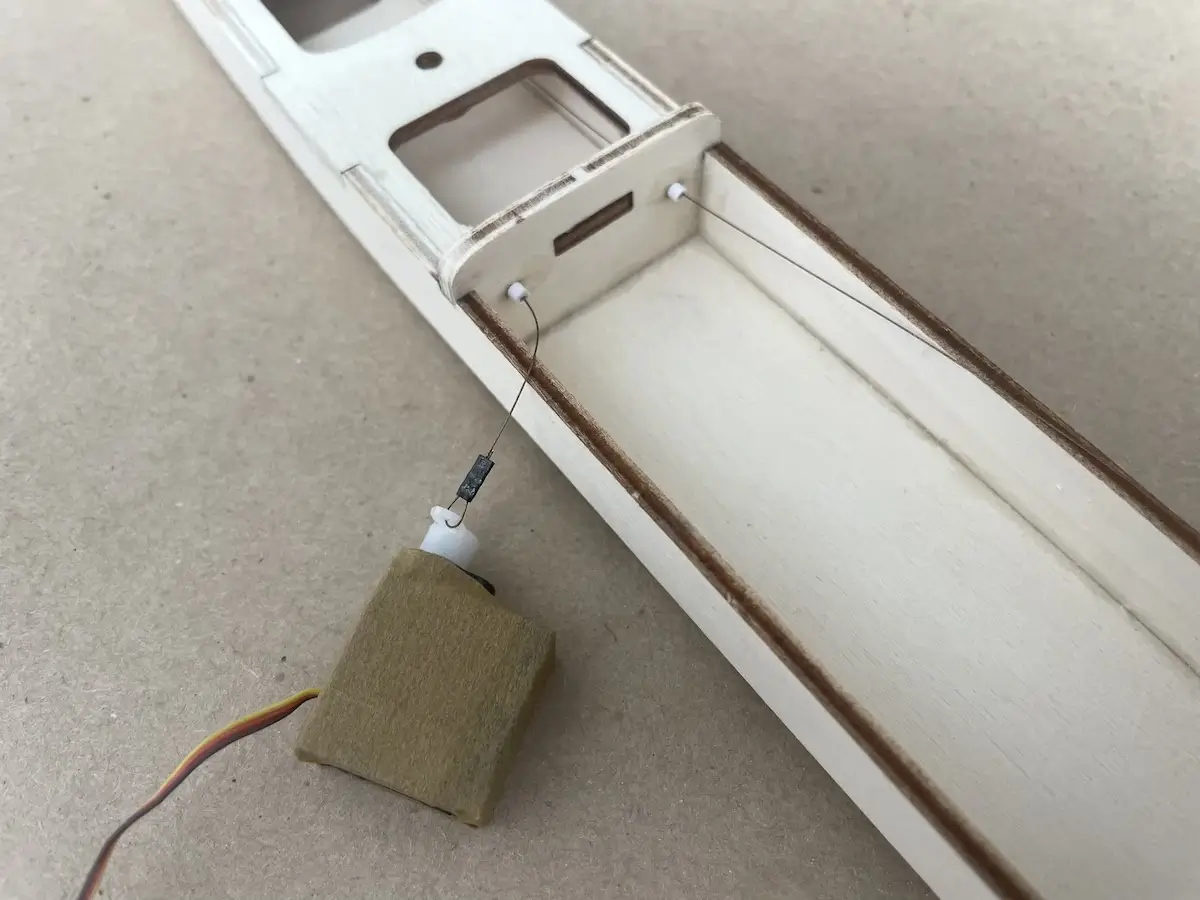
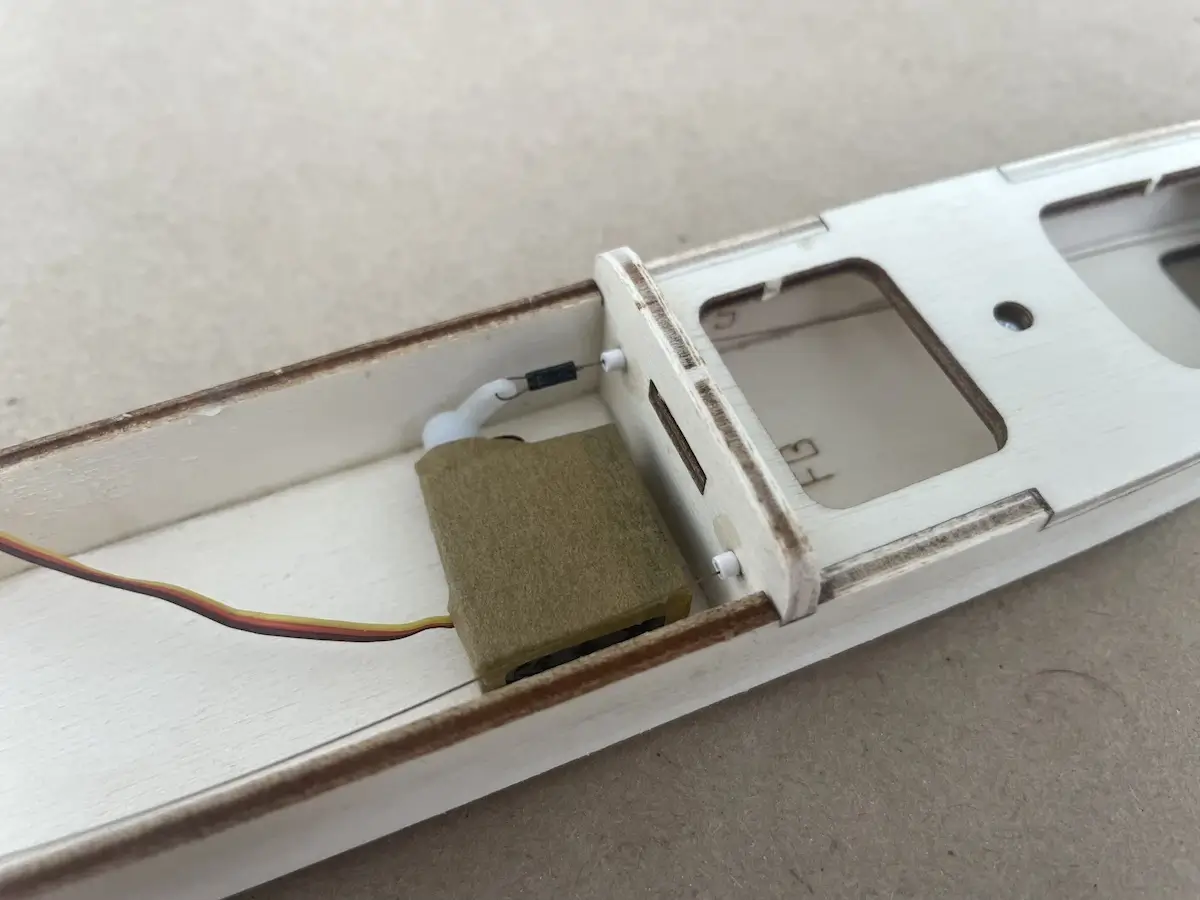
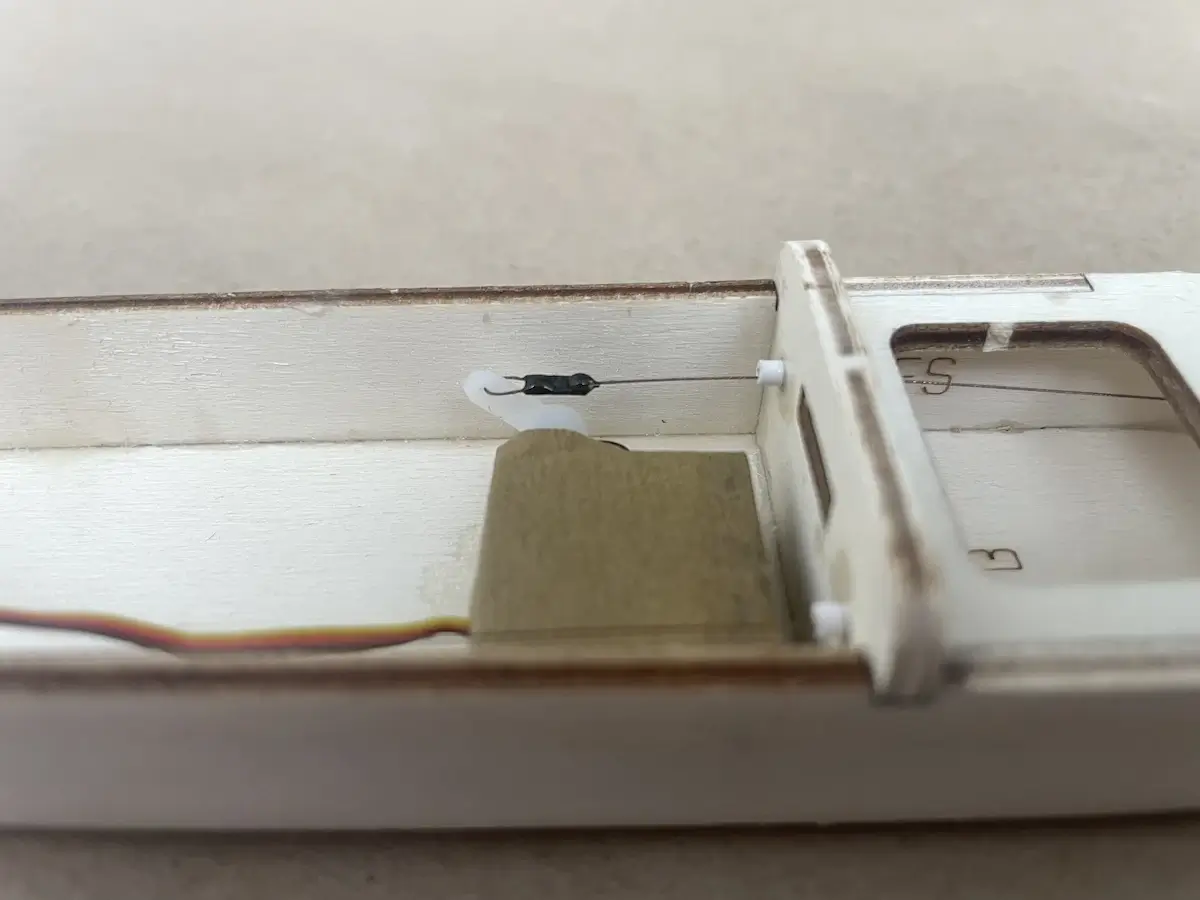
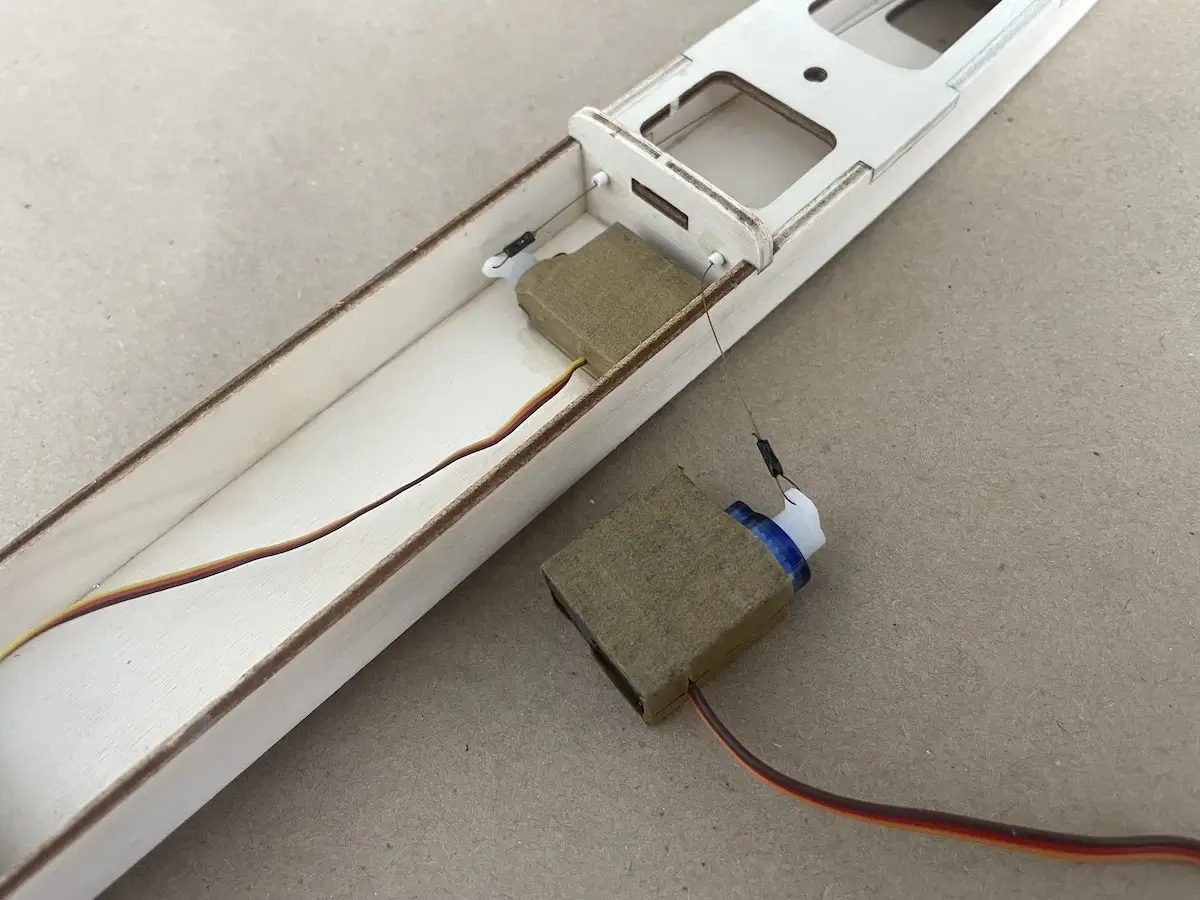
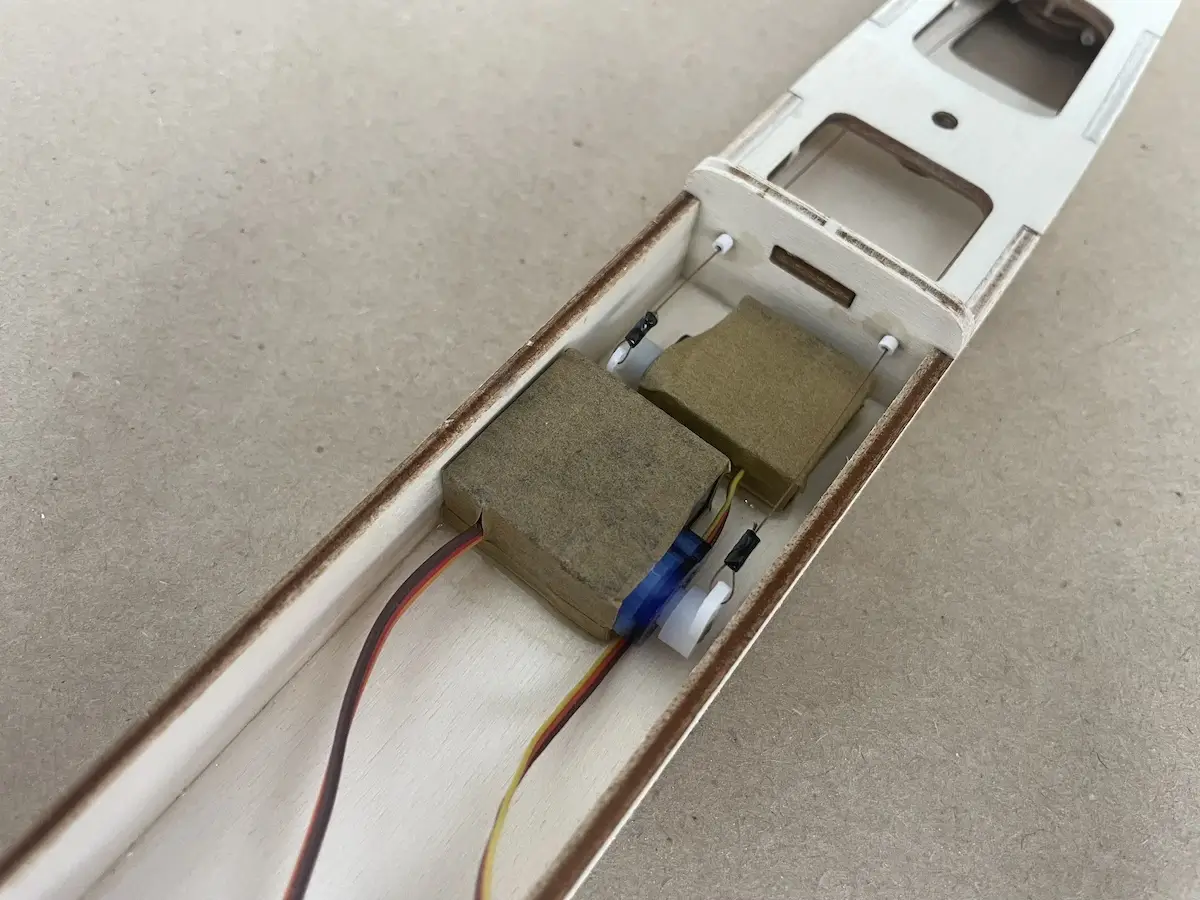
Part 4. Control Linkages & Servos
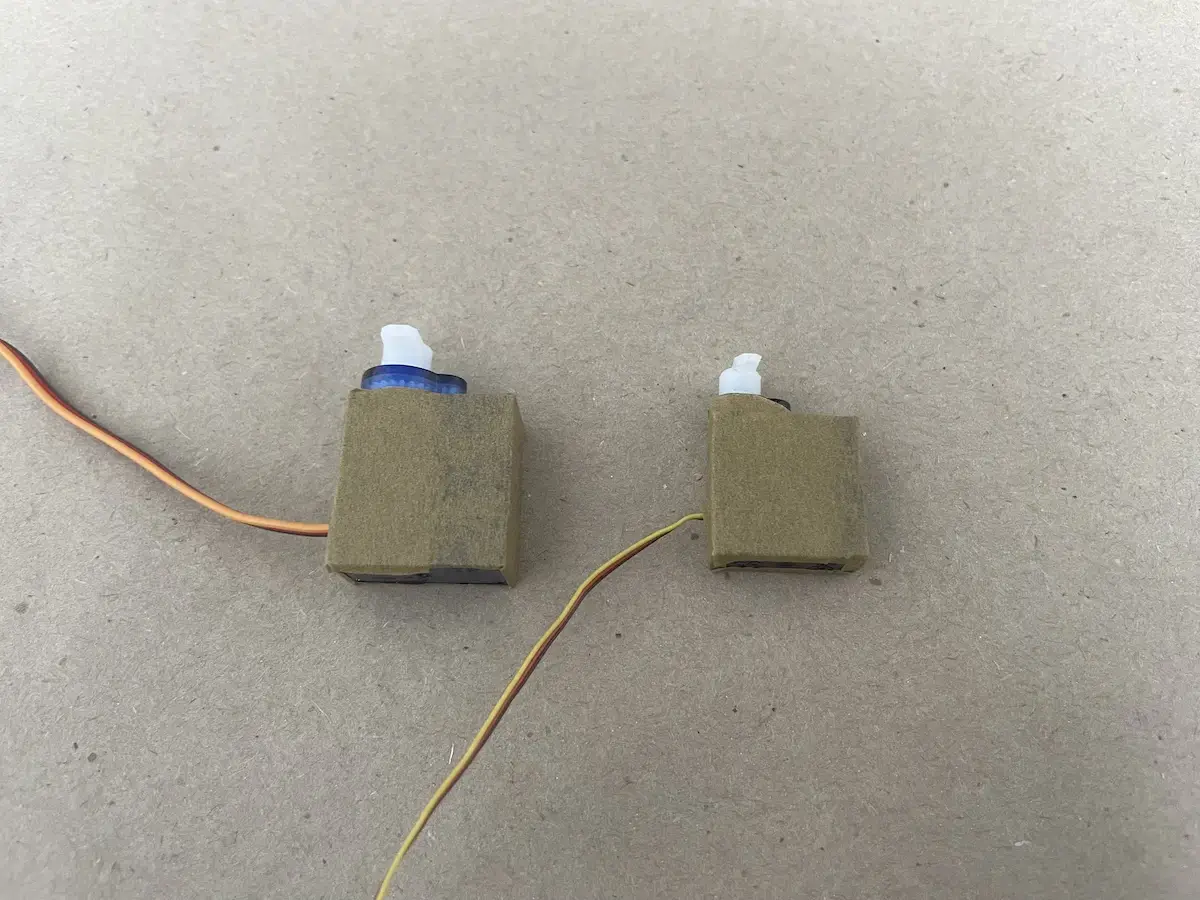
The Lull is designed to fit a lot of servo options in the pod, up to 9g analog ones.
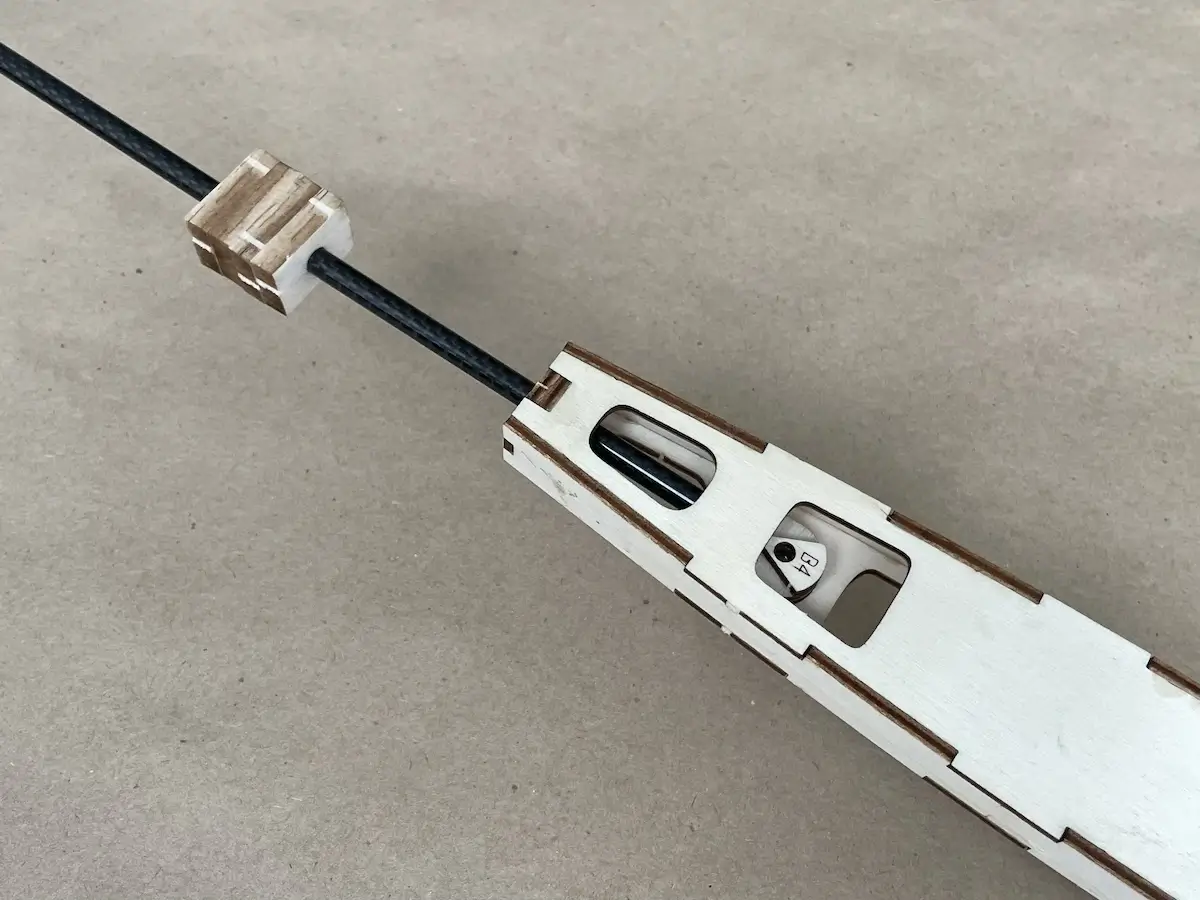
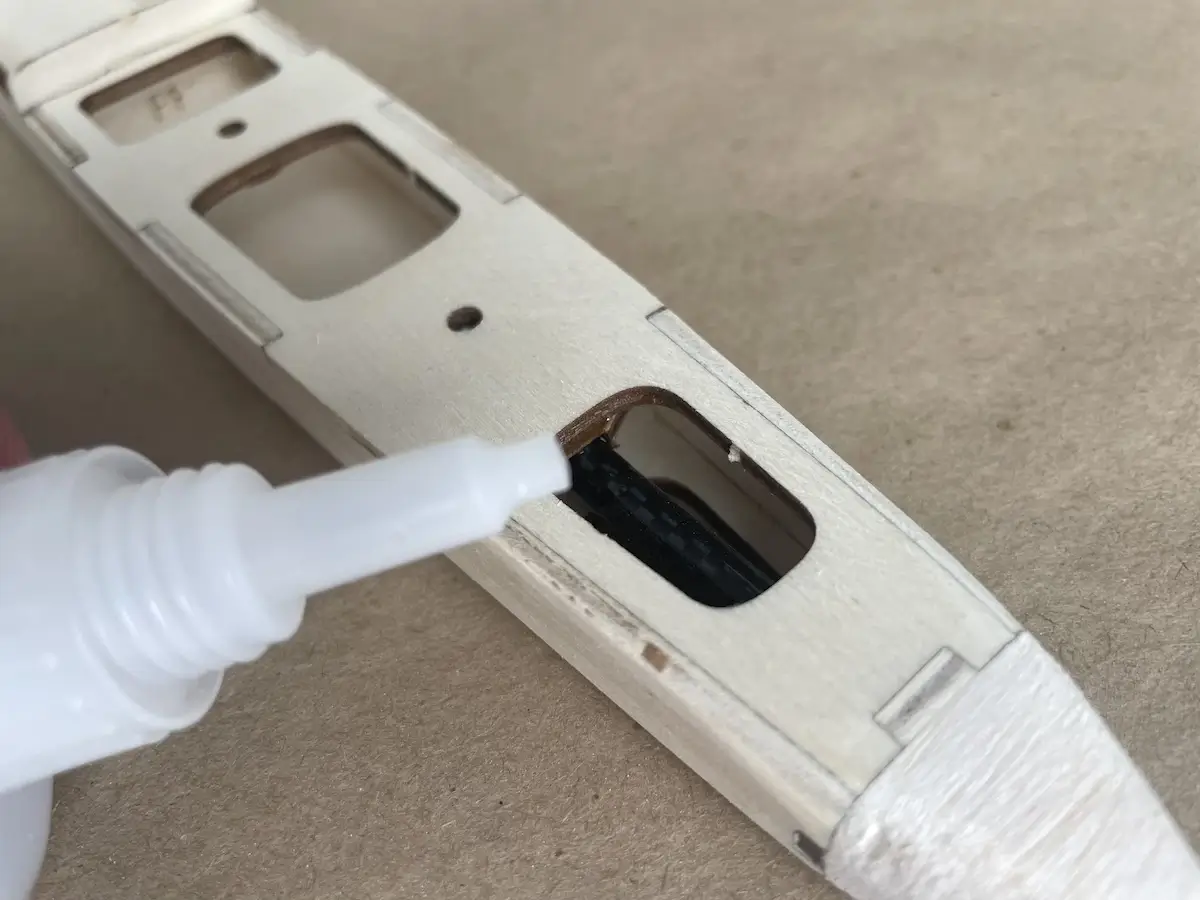
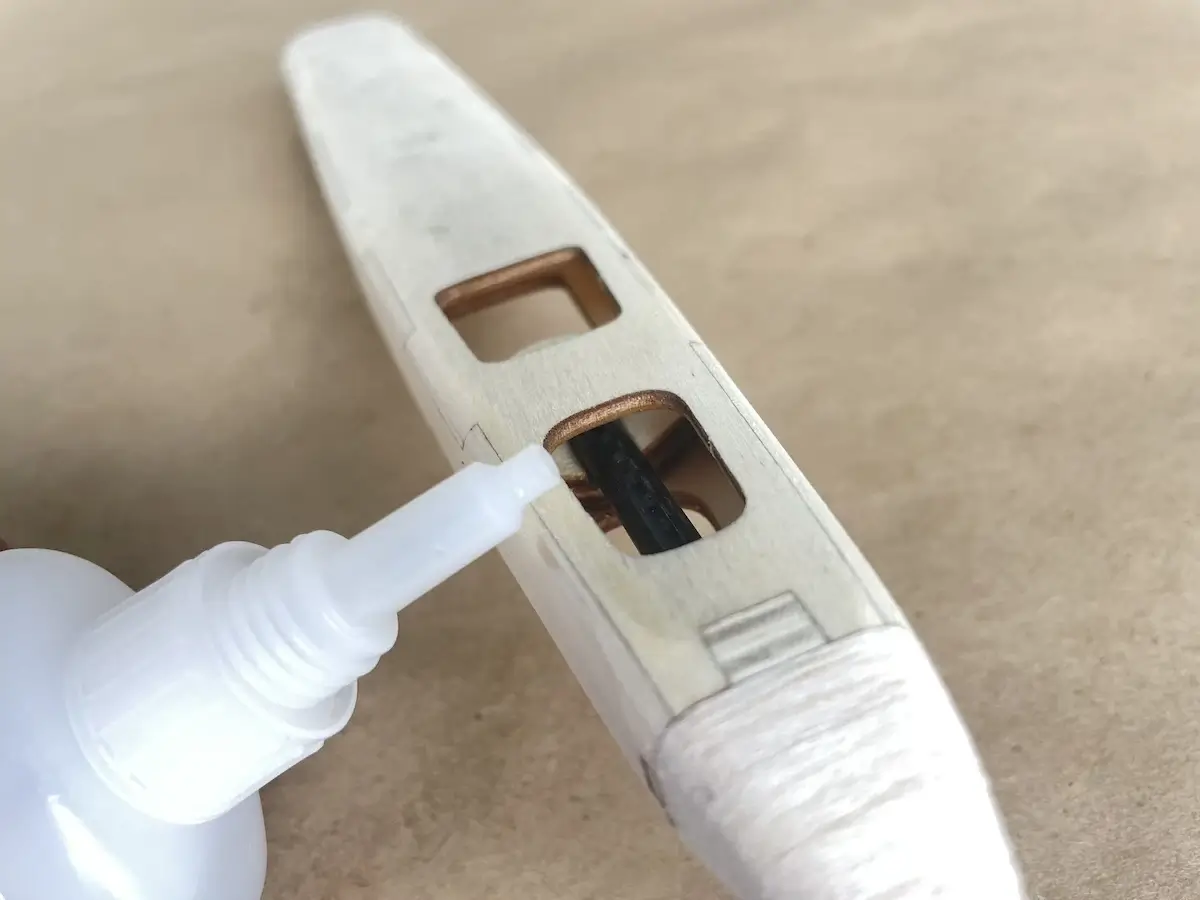
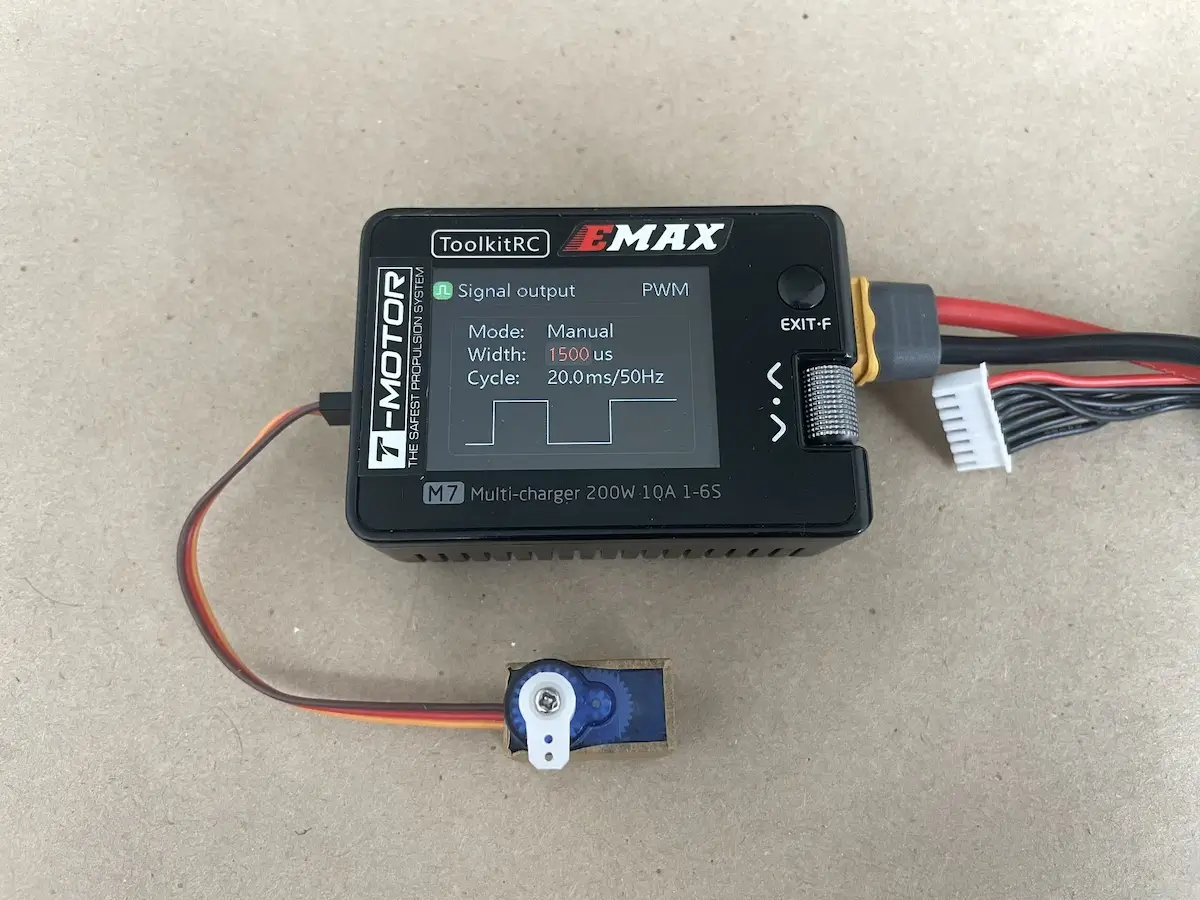
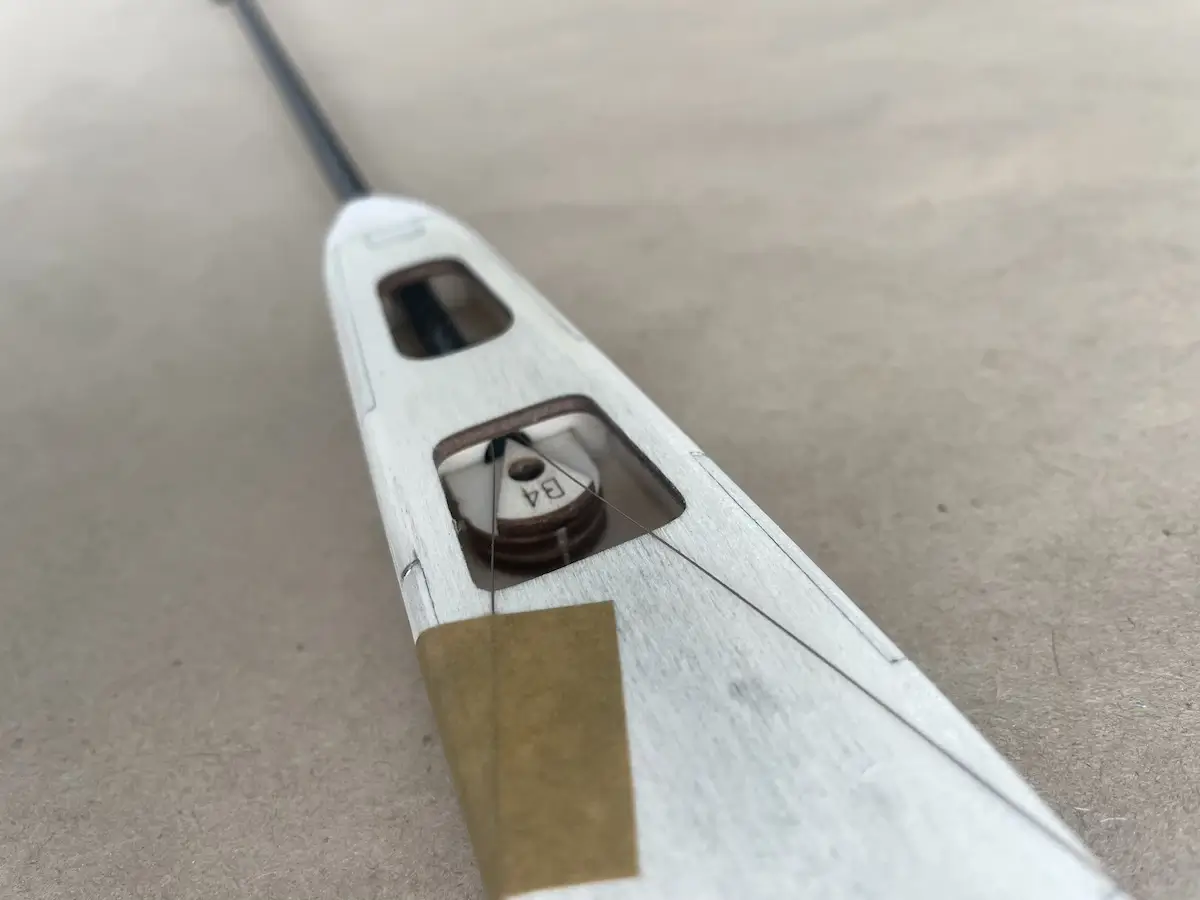
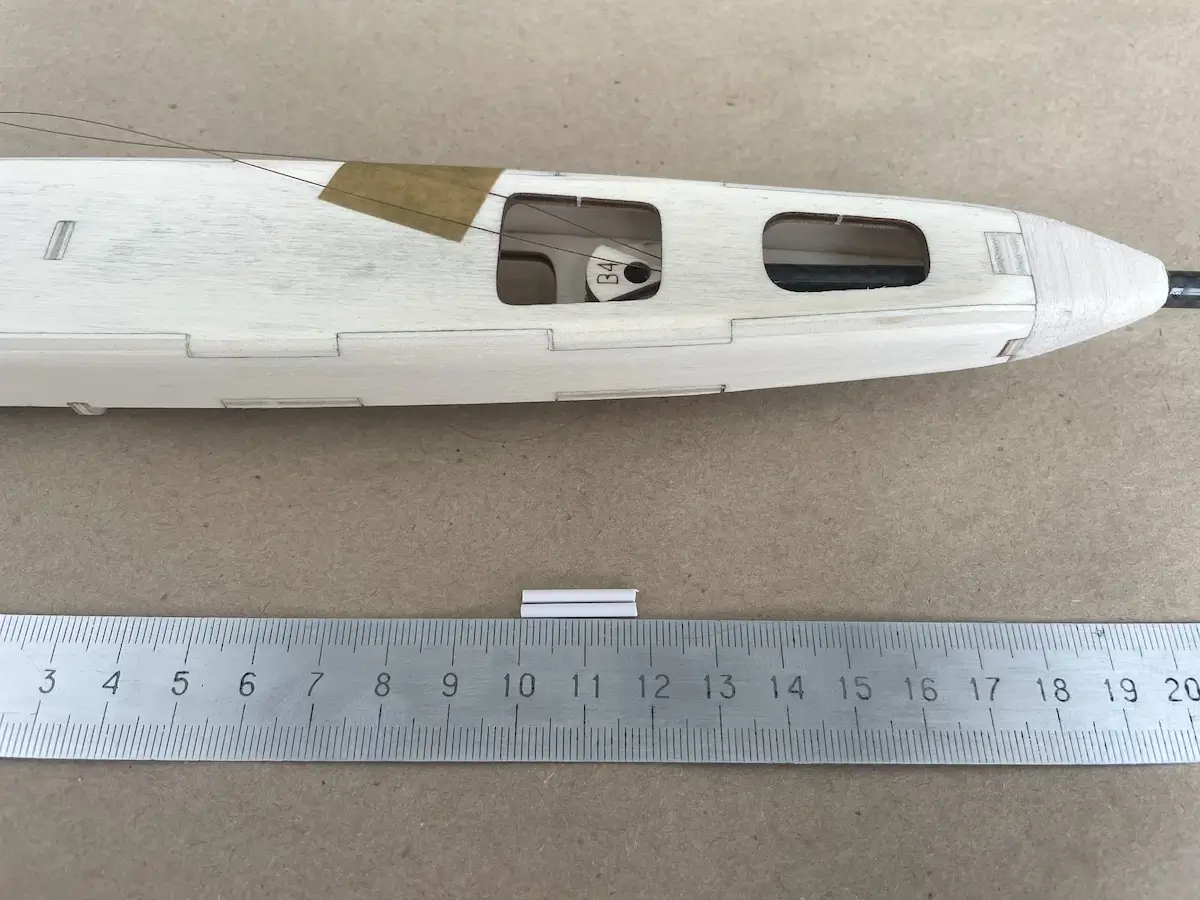
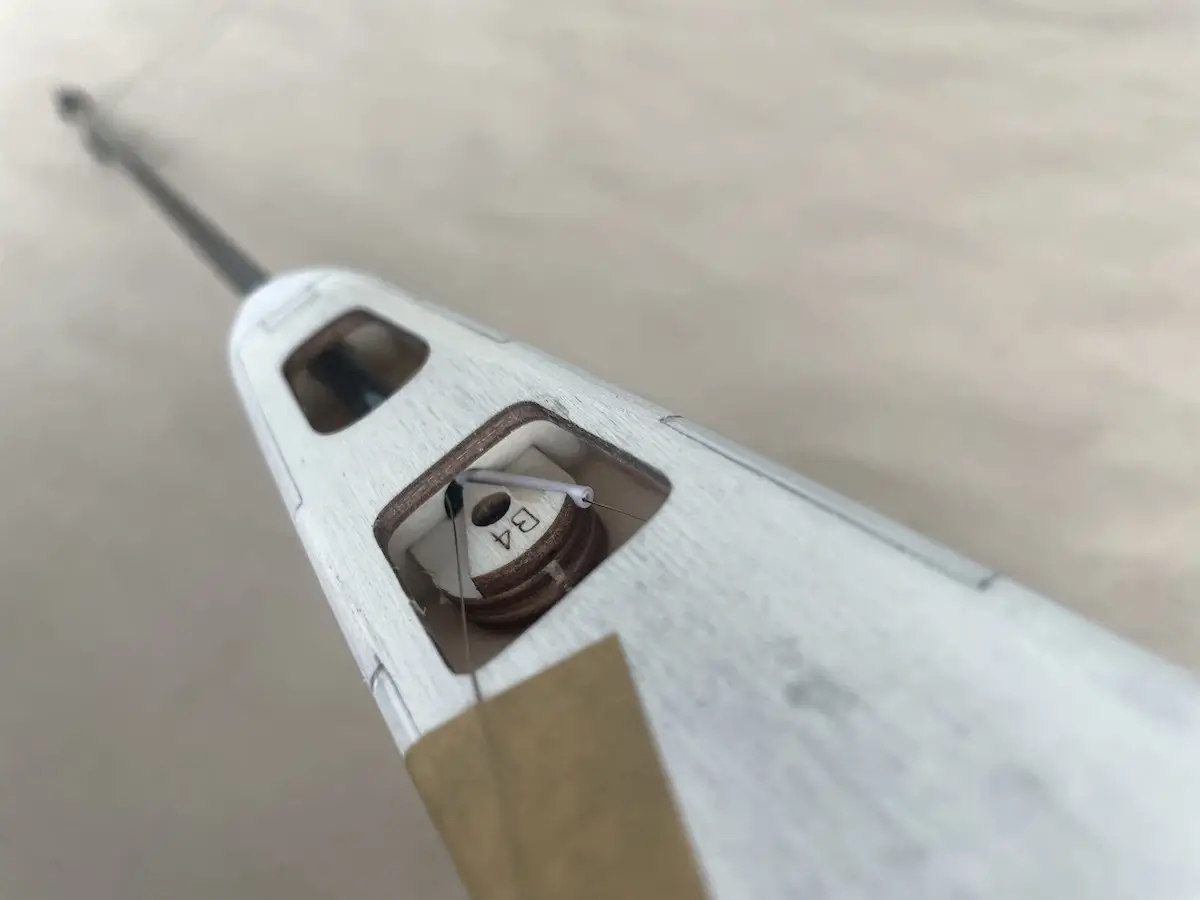
Center your servos, trim the control arms and install them at 90° to the side of the servo(Optional) Remove the tabs and wrap them in masking tape and/or thread for better adhesionGrab the cable from the kit and split them in two halvesPush one cable through the boom opening near the tails, and all the way through to the fuseFish out the first cable from the bottom side of the fuse and fix it temporarily with a masking tape. Repeat for the second cable making sure they do not cross or interfere with each other inside the boomFix both wires with a masking tape on the rearCut two pieces of the plastic sleevePut it on one of the wires and slide it all the way back to the boomLay the sleeve nearby the B4 part of the fuse, and push the sleave 0.5-1mm into the boom. Pull the “tail” of the wire to the top side of the boom to help you keep it in place. Finally apply fix it permanently with a thick CANext, push the front tail of the wire into the sleeve in the firewall and repeat the process for the other cableFind a good position for your servos Crimp the cable on one of the servosUsing servo tester of your radio, turn the control arm to the full “backward” position, and glue this servo in making sure that the cable crimp tube will not interfere with the firewallTurn the servo arm to the opposite side, and leave it this way before gluing the front servoCrimp the cable on the second servo nowFind a place where it won’t interfere with the rear control arm, and glue it permanently. Also apply a drop of CA on the crimp tube to secure the wire insideNow, use your radio or a servo tester to hold central positions of the servo armsInstall your tailplane in placeMake a loop through the crimping tube on the elevator wire – the one on the left for right-handed buildsHook the loop onto the elevator control hornPull the end of the wire towards the cable opening in the boom to set elevator in the neutral positionPull the crimp tube closer to the control horn and crimp, leaving ~10-12mm long loop. Apply CA to the both sides of the crimp tubeInstall the fin in place. (Optional) For removable tail, use two stripes of sticky tape along the boom, and then wrap the same tape around the boom and fin sleeve to fix in placeRepeat the same proces as with elevator to finish the rudder pull cablePack your radio gear into the podMake an O-ring for easy battery access following this tutorial
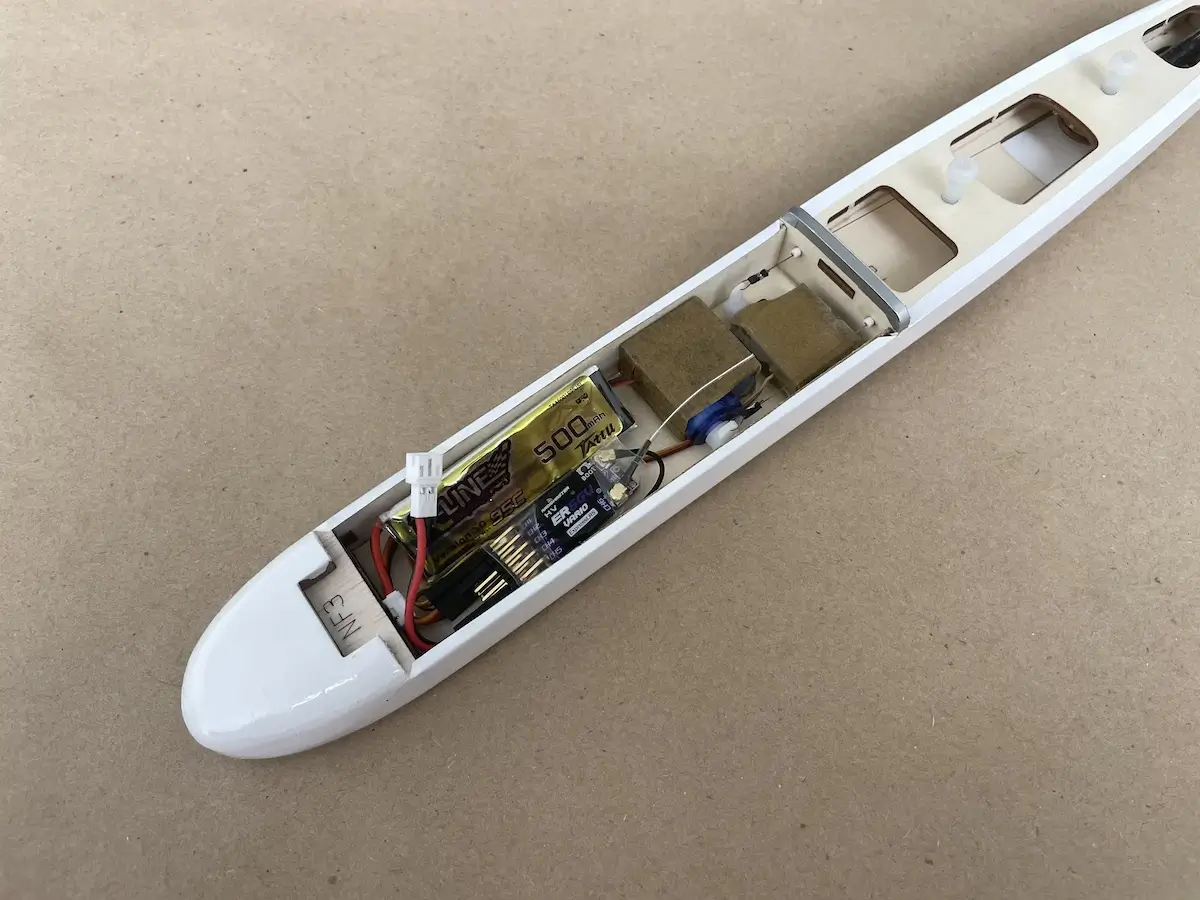
Part 5. CG Balance & Radio Setup
The last part of the assembly includes the installation of the RC receiver, a battery, and finding the correct CG point.
The last bit is critical as it will directly influence your in-flight model performance.
Feel free to use the following settings as your starting point and adjust later based on your preference.
Recommended Settings For Lull DLG
Lull 1.2m DLG Control Throws CG Settings
CG
84-87mm from wing leading edge (at the root rib)
Rudder Throws
+/- 12mm
Elevator Throws
6mm up / 12m down
Launch [Elevator]
1-1.5mm up
Launch [Rudder]
6mm right (for right hand launchers)
Zoom [Elevator]
0.5-1mm down
Zoom [Rudder]
Neutral
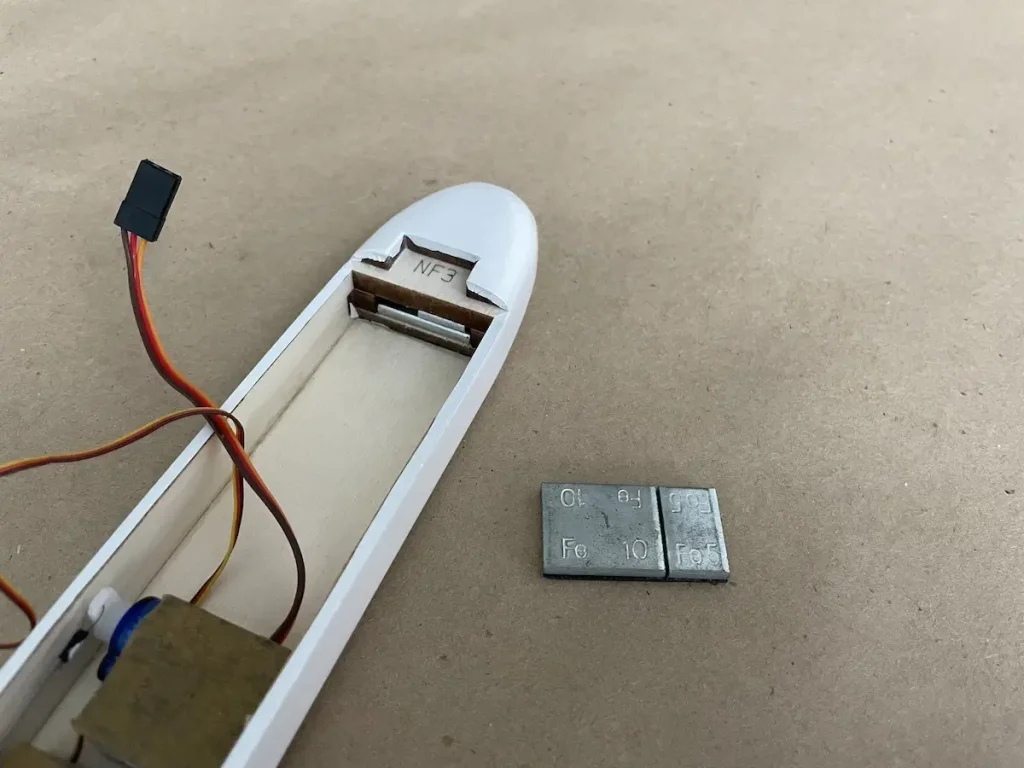
If your CG is too far behind the recommended position, you can use some car weights in the nose to move it forward.
Our build here required 15g of weight in the nose, which perfectly fit into the ballast enclave, and stuck one over another.
The radio setup for Lull is quite basic since you need only two channels here.
However, for OpenTx / EdgeTx users, we highly recommend SoarOTX templates, which offer user-friendly configuration, flight logs, scoring, flight graphing, and many more.
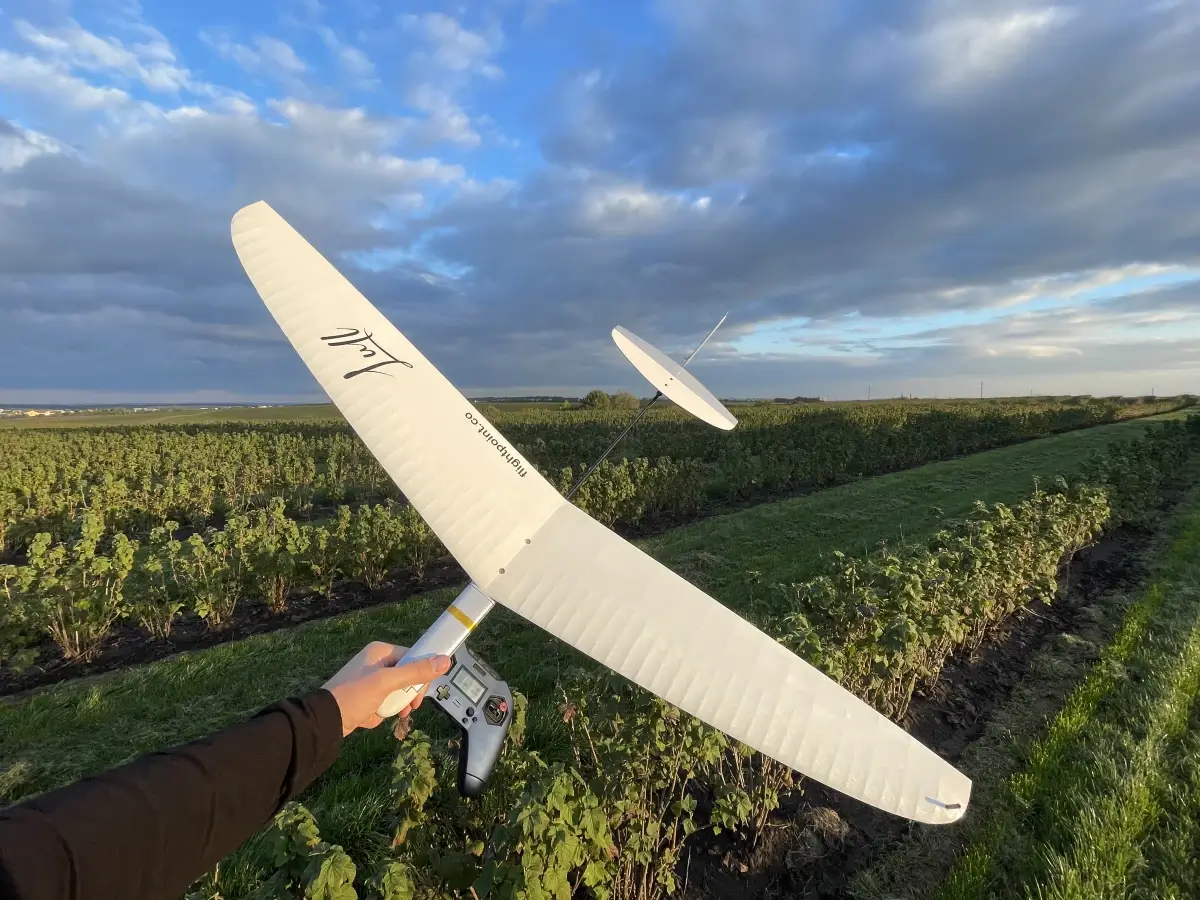
As soon as you are ready, head down to the field and please, share your experience with us in the comments below, on the RCGroups thread, or just by tagging us on Instagram.
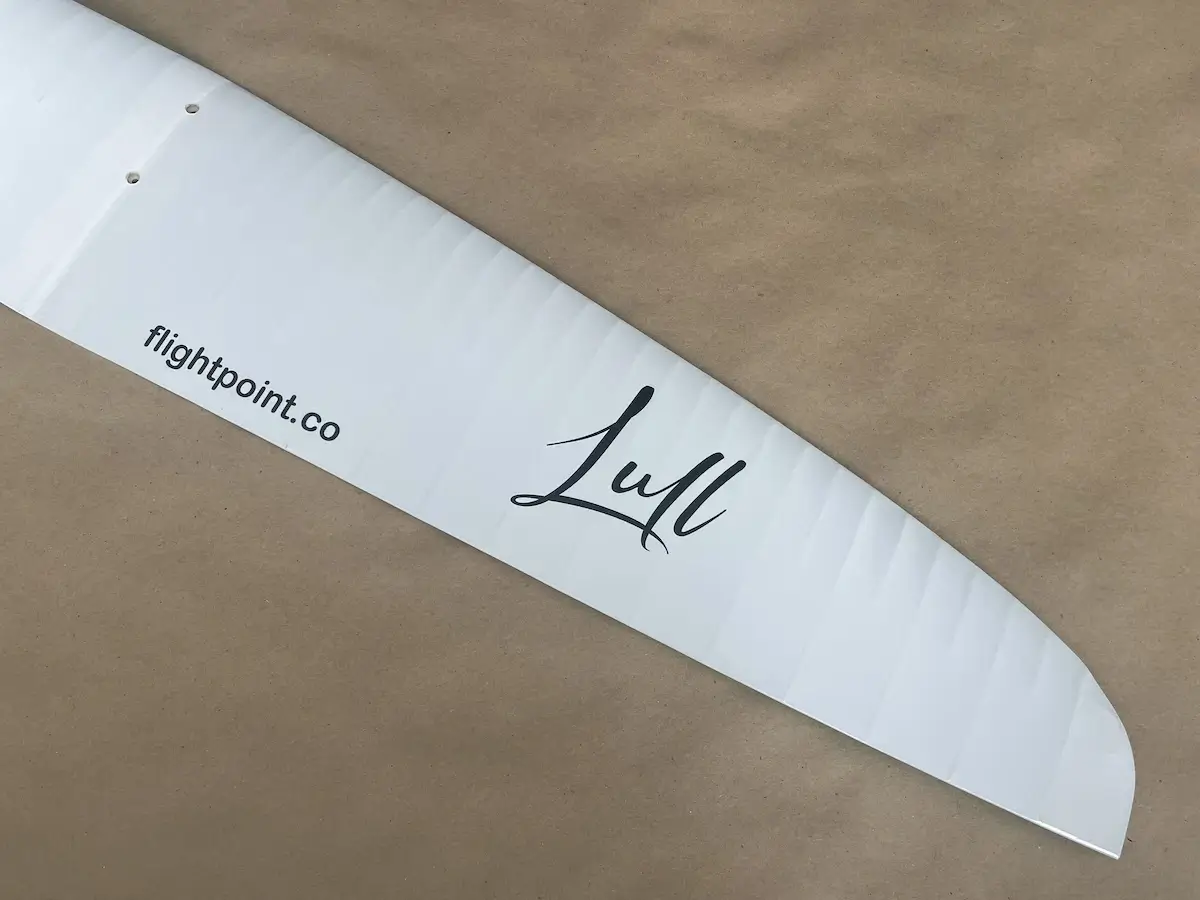
![[DIY] DLG Glider - The Lull Build Guide](https://flightpoint.co/wp-content/uploads/2024/09/diy_dlg_glider_lull_build_guide.webp)